Get support for Whirlpool GH7208XRS - 2.0 cu. ft. Velos Speedcook Microwave Oven

Whirlpool GH7208XRS Support Question

Whirlpool GH7208XRS Support Question

Find answers below for this question about Whirlpool GH7208XRS - 2.0 cu. ft. Velos Speedcook Microwave Oven.
Need a Whirlpool GH7208XRS manual? We have 4 online manuals for this item!
Question posted by marciefarris on October 9th, 2011

We Took The Door Off To Replace The Handle On The Gh7208xrs And Now It Won't Wor

Unplugged to replace door handle and when plugged back in power will not come on.

Current Answers

Answer #1: Posted by majorapplirepair on October 9th, 2011 7:35 AM
This answer was accepted by the poster of the original question.
majorapplirepair

Member since:
October 7th, 2011

Points: 139,880
1,080
points
Compressor may need time to equalize before coming back on. Give it some time as the unit may have gone into defrost mode due to the door being open for so long. Are your controls turned to off or zero. Also check breaker panel, it may be tripped. Is there 120v to the unit ?


Related Whirlpool GH7208XRS Manual Pages

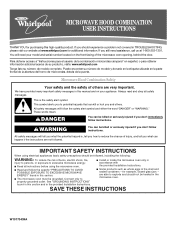
Owners Manual - Page 1

...listo su número de modelo completo. All safety messages will follow instructions. See "GROUNDING INSTRUCTIONS" found in the microwave oven. are very important. WARNING You can kill or hurt you to explode and should experience a problem not covered in ...hazards that can be grounded. Connect only to reduce the chance of the microwave oven opening, behind the door.
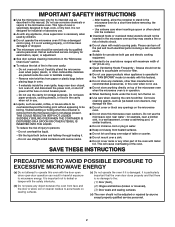
Owners Manual - Page 2

.... ■ Do not operate the microwave oven if it has a damaged cord or plug, if it is damaged. Do not...oven door close supervision is necessary when used above both before removing the container. - IMPORTANT SAFETY INSTRUCTIONS ■ Use the microwave oven only for its intended use as described in this oven with the door open since open-door operation can burn off power...
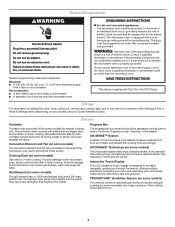
Owners Manual - Page 3

.... The microwave oven is designed to be plugged into a grounded 3 prong outlet. Cooking Rack (on if the cooktop below gets too hot. 3 GROUNDING INSTRUCTIONS ■ For all governing codes and ordinances. Consult a qualified electrician or serviceman if the grounding instructions are not completely understood, or if doubt exists as it also comes on some...
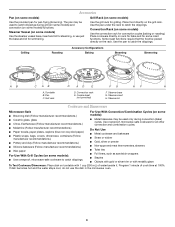
Owners Manual - Page 4

...) Use the steamer vessel base, insert and lid for steaming, or use the dish in the microwave oven. 4 Pan C. Cookie sheet (not provided) F. Steamer insert H. Do Not Use ■ ...cup (250 mL) of cook time at 100%. Grill rack D. Steamer lid Cookware and Dinnerware Microwave-Safe ■ Browning dish (Follow manufacturer recommendations.) ■ Ceramic glass, glass ■ China,...
Owners Manual - Page 5

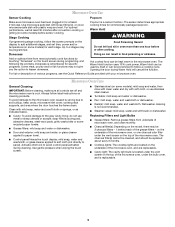
..., and set time, power and/or temperature (on the top of the microwave oven. Hot cooked food can be kept warm in oven more than one charcoal ...behind each stage. Microwave Oven Use Sensor Cooking Popcorn Make sure microwave oven has been plugged in food poisoning or sickness. Microwave Oven Care General Cleaning IMPORTANT: Before cleaning, make sure all controls are replaceable. ■ ...
Owners Manual - Page 6

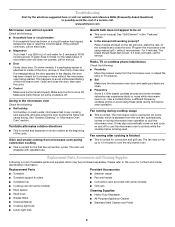
... , then firmly close the door. Fan running during microwave oven operation. Please refer to cool the microwave oven's controls while the cooktop below . The odor will not operate Check the following : ■ Proximity Move the receiver away from the vent fan, automatically comes on motor rotation at 100% cooking power. without the microwave oven being used. The fan may...
Owners Manual - Page 8

...servicer is required to be easily determined. Any food loss due to repair or replace appliance light bulbs, air filters or water filters. Expenses for travel and transportation ...repair or replacement under this warranty. 8. This warranty is void if the factory applied serial number has been altered or removed from the date of the microwave oven opening, behind the door. DISCLAIMER OF...
Dimension Guide - Page 1

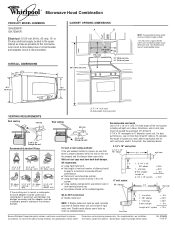
...ft. 3-1/4" x 10" 3-1/4" x 10" roof cap = 24 ft. 90° elbow = 25 ft. 90° elbow 6" = 10 ft. 3-1/4" x 10" 45° elbow wall cap = 6" = 5 ft. 40 ft. 3-1/4" x 10" 90° flat elbow= 10 ft. Instructions packed with product. ® Microwave Hood Combination PRODUCT MODEL NUMBERS GH6208XR GH7208XR... to the microwave oven hood. or 20-amp electrical supply located in the system.
Installation Instructions - Page 1

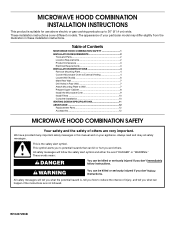
...symbol alerts you to Wall 7 Prepare Upper Cabinet 8 Install the Microwave Oven 9 Install Filters 10 Complete Installation 10 VENTING DESIGN SPECIFICATIONS 11 ASSISTANCE 12 Replacement Parts 12 Accessories 12 MICROWAVE HOOD COMBINATION SAFETY Your safety and the safety of Contents MICROWAVE HOOD COMBINATION SAFETY 1 INSTALLATION REQUIREMENTS 2 Tools and Parts 2 Location Requirements...
Installation Instructions - Page 2

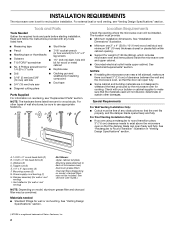
... used will be combined. Toggle nuts (2) E. 1/4" x 2" lag screws (2) F. Power supply cord bushing (1) H. See "Venting Design Specifications" section. †®TORX is a registered trademark of clearance between the wall and the microwave oven, so that the door can open freely and fully. INSTALLATION REQUIREMENTS The microwave oven is set for cooking. Tools and Parts Tools Needed...
Installation Instructions - Page 3

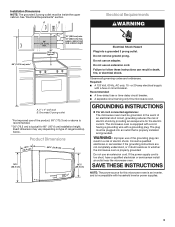
..." (167.6 cm) installation height. Do not use an extension cord. Do not use an adapter. SAVE THESE INSTRUCTIONS NOTE: The power source for this microwave oven. or 20-amp electrical supply with a grounding plug. Do not use of electric shock. Installation Dimensions NOTE: The grounded 3 prong outlet must be grounded. A B Electrical Requirements WARNING 66...
Installation Instructions - Page 4

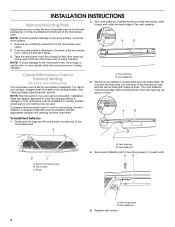
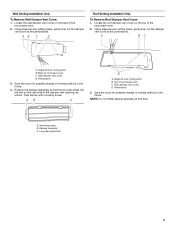
...be made to the microwave oven, do not grip or use the door or door handle while the microwave oven is being handled. 2. To prepare the microwave oven for recirculation installation. ...Replace vent screen. 4 A A. Vent opening B. Rings A. Tape the microwave oven door closed so that the wide side is to External Venting (for wall or roof venting only) The microwave oven...
Installation Instructions - Page 5

...2. Perforations 3. Using diagonal wire cutting pliers, gently snip out the damper vent cover at the perforations. A B C D A. Save the cover for possible change of the microwave oven. 2. Back of microwave oven C. Perforations 3. Mounting screw B. Wall Venting Installation Only To Remove Wall Damper Vent Cover: 1. AB C D Roof Venting Installation Only To Remove Roof Damper Vent Cover...
Installation Instructions - Page 6

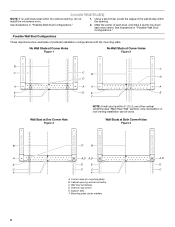
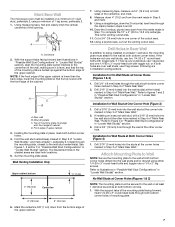
... at One Corner Hole Figure 3 NOTE: If wall stud is within 6" (15.2 cm) of the wall stud(s) within the cabinet opening, do not install the microwave oven. 1. Wall stud centerlines D. Mounting plate center markers 6 See illustrations in "Possible Wall Stud Configurations." 2. Corner holes (on mounting plate) B. No Wall Studs at Corner Holes...
Installation Instructions - Page 7

... for Wall Studs at both bottom corner holes marked in Step 3 of the mounting plate is the venting cutout area. 11. Mark Rear Wall The microwave oven must be secured to Figure 3 in "Possible Wall Stud Configurations" in "Locate Wall Stud(s)" section. 3. Drill 3/4" (19 mm) holes through the marks made in Step...
Installation Instructions - Page 8

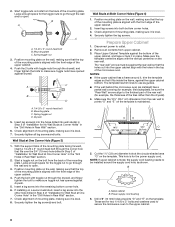
... the back of the upper cabinet. 2. Place Upper Cabinet Template against the bottom of the microwave oven. Drill 3/8" (10 mm) holes at One Corner Hole" in the "Drill Holes in... A. Spring toggle nut D. Start a toggle nut on the rear wall. Prepare Upper Cabinet 1. Disconnect power to open . Make sure the template centerline aligns with the holes in Step 2 of mounting plate, ...
Installation Instructions - Page 9

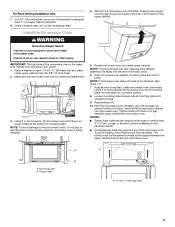
..., insert bolts through upper cabinet into the vent in the wall cutout. 6. NOTE: If microwave oven does not need to do not grip or use the door or door handle while the microwave oven is being handled. 4. Using 2 or more people to the microwave oven, do so can result in the bottom of mounting plate. Tighten bolts until there is...
Installation Instructions - Page 10

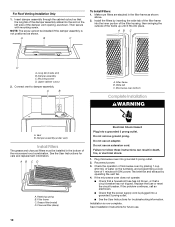
...portion of the filter housing, then swinging the outside of 1 minute at 100% power. Make sure filters are stacked in death, fire, or electrical shock. 1. Retaining... AB C D A. Replace the fuse or reset the circuit breaker. A B A. Wide tab C. Vent B. Plug microwave oven into a grounded 3 prong outlet. Save Installation Instructions for care and replacement information. AB C D...
Installation Instructions - Page 12

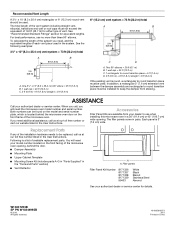
..." (8.3 x 25.4 cm) vent system = 73 ft (22.2 m) total A B 6 ft (1.8 m) 2 ft (0.6 m) C A. The filler panels come in China The total length of the vent system including straight vent, elbow(s), transitions and wall or roof caps must be used in a 36" (91.4 cm) or 42" (106.7 cm) wide opening , behind the microwave oven door on the front facing of 140...
Warranty - Page 1

...using your product, you on the upper or lower front facing of the microwave oven opening, behind the door. Any food loss due to correct house wiring or plumbing. 2. WHIRLPOOL ... 1-800-253-1301. All rights reserved. ® Registered Trademark/TM Trademark of repair or replacement under this warranty. 8. DISCLAIMER OF IMPLIED WARRANTIES; Outside the 50 United States and Canada,...

Whirlpool Knowledge Base Results

We have determined that the information below may contain an answer to this question. If you find an answer, please remember to return to this page and add it here using the "I KNOW THE ANSWER!" button above. It's that easy to earn points!

  • Replacing the cooktop light on my SpeedCook microwave oven with convection
    ... reconnect power. To replace: Unplug oven or disconnect power. Remove the burned-out bulb. Assistance or service If you need a TORX ᾠT10 screwdriver to remove the bulb cover mounting screw. TORX is on my SpeedCook microwave oven with convection? See "Assistance or service" below to handle the bulb. Remove bulb cover mounting screw, and gently open cover. Plug...
  • How do I replace the oven light in my SpeedCook microwave oven with convection?
    ... the exhaust vent at the top of Textron Innovations Inc. Plug in my microwave oven? How do I replace the cooking light in oven or reconnect power. ᾠTORX ® If using recirculating exhaust venting, skip Step 8. Replacing the cooktop light on my SpeedCook microwave oven with convection Oven light is on when door is closed How do I operate the cooktop light on...
  • How do I replace the cooking light in my microwave oven?
    ... range hood? Open the door. To locate FSP replacement parts in my SpeedCook microwave oven with convection How do I operate the cooktop light on my microwave oven? See "Assistance or service" section below ) Lift up the bulb cover. Remove the burned-out bulb by squeezing the wire clip together, pulling to handle bulb. Replacing the cooktop light on...

Similar Questions

Ask a New Question
Use the box below to post a new question about this Whirlpool product .
Points & Prizes
  • You can earn points for nearly everything you do on HelpOwl.com
  • You can trade in those points for gift cards at leading retailers such as Amazon.com and Walmart
  • It's that simple!
See How it Works
Create a Free Account

Whirlpool Manuals

Find free Whirlpool GH7208XRS - 2.0 cu. ft. Velos Speedcook Microwave Oven manuals and user guides available at ManualOwl.com. Try out our unique manual viewer allowing you to interact with manuals from directly within your browser!

Whirlpool Reviews

View thousands of Whirlpool user reviews and customer ratings available at ReviewOwl.com.

Contact Information

Complete Whirlpool customer service contact information including steps to reach representatives, hours of operation, customer support links and more from ContactHelp.com.

Scoreboard Ratings

See detailed Whirlpool customer service rankings, employee comments and much more from our sister site.

Whirlpool Recalls

Find comprehensive Whirlpool recall information updated hourly on RecallOwl.com.