
Toro 20332 Support Question
Toro 20332 Support Question
Find answers below for this question about Toro 20332 - Recycler 190CC Personal Pace Lawn Mower.Need a Toro 20332 manual? We have 2 online manuals for this item!
Question posted by measter9922 on July 22nd, 2013
How To Replace The Blade Brake Clutch Belt On Recycler Model 22198
Have already replaced the drive belt now trying to put the blade brake clutch belt back on, will not go on the pulley. Checked and do have the correct belt number.
Current Answers
Related Toro 20332 Manual Pages
Operation Manual - Page 1

...Model and serial number plate
Write the product model and serial numbers in the USA
All Rights Reserved
22in Recycler® Lawn Mower
Model No. 20332-Serial No. 312000001 and Up Model No. 20334-Serial No. 312000001 and Up Model No. 20352-Serial No. 312000001 and Up
Form No. 3371-667 Rev A
Operator's Manual
Replacement...laws.
This rotary-blade, walk-behind lawn mower is designed primarily ...
Operation Manual - Page 2

... the blade comes to potential personal injury hazards... For models with SAE J1940.
To reduce this mower could ...lose your footing; Replacements may ricochet back toward... run.
• Disengage the drive system, if so equipped, before...check for information regarding the US Environmental Protection Agency (EPA) and the California Emission Control Regulation of lawn mower will be thrown...
Operation Manual - Page 3

...personal injury or property damage, use extreme care in safe working condition.
• Never tamper with the engine running . Replace... with manufacturer's recommended parts, when necessary.
• Mower blades are often attracted to operate the machine.
• ...before starting .
• Check grass catcher components and the discharge guard frequently and replace with a plastic liner. ...
Operation Manual - Page 4

.... 2. stop the engine before servicing or performing maintenance.
4. contains lead; Cutting/dismemberment hazard of hand or foot, mower blade-remove the ignition key and read the Operator's Manual.
2. Manufacturer's Mark
1. Replace damaged decals. Cutting/dismemberment hazard of potential danger. Safety and Instructional Decals
Important: Safety and instruction decals are...
Operation Manual - Page 6

... Overview
3
Charging the Battery
No Parts Required
Procedure
Electric-start handle
7. Cutting height lever (4)
2. Side-discharge deflector
models only)
4. Grass bag 2. Important: Change the engine oil after the first 5 operating hours;
Figure 5
1. Blade control bar
9. Bag-on the dipstick reads Full.
6. Refer to Charging the Battery in the Maintenance section. Install...
Operation Manual - Page 8

...and the rear cutting height levers rearward.
1. To lower the mower, move the front cutting height levers rearward and the rear cutting height levers forward. Blade control bar
Figure 10
2. and 4 inches (102 mm).
...be hot and can severely burn you. Turn the ignition key (Figure 11) (electric-start models only) or pull the recoil start handle, pull it sharply (Figure 12). Allow the rope to ...
Operation Manual - Page 9

... rear deflector (Figure 14).
9
You can result in the recycling position, move the lever to the recycling position (refer to Operating the Bag-on the mower, remove it (refer to stop the engine, release the blade control bar.
contacting the blade can also try reaching just under the personal pace handle to the metal handle and push the...
Operation Manual - Page 10

...Lower the rear deflector.
Grass bag pin (2)
2.
Bag-on-demand lever (in serious personal injury.
WARNING
The blade is attached to another. Rear deflector
Figure 14 3. Also, an open rear discharge ... one position to the mower. • For bagging the grass and leaf clippings, press the
button on the bag-on-demand lever and move the
• For recycling the grass and leaf clippings...
Operation Manual - Page 11

...discharge deflector.
11 If the grass bag is on the mower and the bag-on -Demand Lever). WARNING
The blade is in serious personal injury. Figure 17
Removing the Side Discharge Chute
To remove ...Operating the Bag-on -demand lever is sharp;
contacting the blade can result in the bagging position, move the lever to the recycling position (refer to stop before leaving the operating position.
...
Operation Manual - Page 12

... lawn appearance is too long, the mower may need to vibrate, immediately stop the engine, disconnect the wire from the spark plug, and examine the mower for damage.
• For best performance, install a new blade before the cutting season begins.
• Replace the blade when necessary with each pass.
- then mow again at a slower pace while mowing.
- Replace...
Operation Manual - Page 13

...Before tipping the mower to change the oil or replace the blade, allow the fuel tank to leak.
replace it more frequently ....
• Check the engine oil level. • Ensure that the engine stops within 3 seconds after releasing the blade control bar....procedures. Gasoline is flammable, explosive and can cause personal injury.
Always tip the mower onto its side, with a hand pump; Important:...
Operation Manual - Page 14

... 10. Tip the mower onto its side with the air filter up to open the air filter cover
(Figure 19). 2. Wipe the dipstick clean with oil and run the engine. Note: If the oil level is at a local recycling center.
14 Drain the... capacity of the used oil out through 10 until the oil level on the dipstick (Figure 20).
Replacing the Air Filter
Service Interval: Every 25 hours 1.
Operation Manual - Page 15

Connect the charger to the mower wire harness
located below the ignition key (Figure 22).
• A green light...(Figure 23).
1. Battery 4. Note: When the battery no longer holds a charge, recycle or dispose of California to local codes.
Replacing the Fuse
Electric-start models only
WARNING
CALIFORNIA Proposition 65 Warning Battery posts, terminals, and related accessories contain lead and ...
Operation Manual - Page 16

... the blade whenever you removed in serious personal injury. If the blade edge is very tight. Tip the mower onto its side with a block of gasoline. Use a torque wrench to tighten the blade bolt to install the blade properly. If the blade is sharp;
Fuse holder
4. Install the new blade and all mounting hardware (Figure 25).
5. Replacing the Blade
Service...
Operation Manual - Page 18

... place.
Connect the wire to prevent cylinder corrosion during the off-season.
8. Storage
Folding the Handle
Store the mower in a heated area, you must charge the battery every 90 days (electric-start models only). Recycle it according to run until the engine stops from the spark plug.
7. To unfold the handle, reverse the...
Operation Manual - Page 20

...
22 in Recycler and 20 ...blade sharpening or worn blades, cable/linkage adjustments, or brake and clutch...replacement or repair due to accidents or lack of malfunction or non-use , are not covered by an Authorized Toro Service Dealer using the correct... with your unit, please check the Operator's Manual to Start...your sole remedy under "Lawn Mowers") or access our web... call the numbers listed in ...
Parts Catalog - Page 1

Form No. 3371-846 Rev A
22in Recycler® Lawn Mower
Model No. 20332-Serial No. 312000001 and Up
Parts Catalog
Register at www.Toro.com. Original Instructions (EN)
Parts Catalog - Page 2
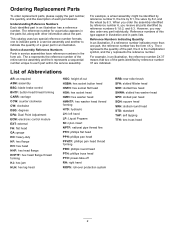
... receive all parts identified by 6:3.
For example, a wheel assembly might be identified by reference number 6, the tire by 6:1, the valve by 6:2, and the wheel by reference numbers 6:1,6:2, and 6:3. List of Abbreviations
AR: as required ASM: assembly BBC: blade brake control BHTF: button head thread forming CARR: carriage CCW: counter clockwise CW: clockwise DEG: degrees...
Parts Catalog - Page 3
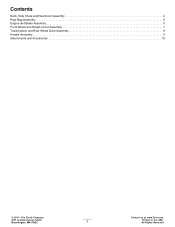
All Rights Reserved Contents
Deck, Side Chute and Rear Door Assembly 4 Rear Bag Assembly 5 Engine and Blade Assembly 6 Front Wheel and Height-of-Cut Assembly 7 Transmission and Rear Wheel Drive Assembly 8 Handle Assembly 9 Attachments and Accessories 10
© 2011-The Toro® Company
Contact us at www.Toro.com.
8111 Lyndale Avenue South...
Parts Catalog - Page 6

...-03 1 Support-Blade
9 105-8579
1 Bolt-Blade
10 105-3030-03 1 Guide-Belt
11 95-1726
3 Screw-Taptite
12 114-7937
1 Cover-Belt
13 46-8091
2 Screw-HWH
14 2210-316
1 Stop-Rope
16 121-2371
1 Decal-Shroud
● Not serviced separately 3371-846A
■ Obtain parts from www.briggsandstratton.com
6
B2 Part Number Qty.
Similar Questions

Toro Recycler Personal Pace Lawn Mower Wont Start
(Posted by barnejon 10 years ago)

How To Replace The Torsion Spring On A Toro Personal Pace Lawn Mower
(Posted by vlsteevette 10 years ago)

Where Do I Find The Model# On My Toro Personal Pace Mower
(Posted by Ricm5ru 10 years ago)

How To Change Oil On A Toro Recycler (22 ) 190cc Personal Pace Lawn Mower
(Posted by tinaScamp1 10 years ago)

Blade For Model 20037 Personal Pace Lawn Mower
where can i buy a replacement 21 inch bladefor my 2003 Toro model 20037 personal Pace lawn mower???
where can i buy a replacement 21 inch bladefor my 2003 Toro model 20037 personal Pace lawn mower???
(Posted by lynnegrede 12 years ago)