Get support for Pfaff Tiptronic 6152

Pfaff Tiptronic 6152 Support Question

Pfaff Tiptronic 6152 Support Question

Find answers below for this question about Pfaff Tiptronic 6152.
Need a Pfaff Tiptronic 6152 manual? We have 1 online manual for this item!
Question posted by Heidicasavant on June 10th, 2023

How To Change Stitches. On 6152

trying to change from zig zag to straight stitch. I don't remember how I engaged the zigza

Current Answers

Answer #1: Posted by SonuKumar on June 10th, 2023 10:34 AM
SonuKumar

Member since:
May 9th, 2021

Points: 16,648,140
100
points
To switch from zigzag stitch to straight stitch on a sewing machine, you'll need to disengage the zigzag function and select the straight stitch setting. Here's a general guide that should apply to most sewing machines:
  1. Locate the stitch selection dial or buttons: Look for the control panel on your sewing machine where you can choose different stitch patterns. The stitch selection dial is typically located on the front of the machine or on the side.
  2. Disengage the zigzag stitch: Turn the stitch selection dial or press the appropriate buttons to switch off the zigzag stitch. Some machines have a specific zigzag stitch setting that you'll need to turn off, while others may have a separate stitch selector for straight stitch and zigzag stitch.
  3. Select the straight stitch setting: Once the zigzag stitch is disengaged, choose the straight stitch setting. This is usually represented by a symbol that looks like a straight line. On some machines, you may need to turn the stitch selection dial to a number corresponding to the straight stitch.
  4. Adjust stitch length and width (if needed): If you want to adjust the length or width of the straight stitch, use the corresponding dials or buttons on your machine. The stitch length determines how long each stitch is, while the stitch width controls the side-to-side movement of the needle. For a straight stitch, set both the length and width to zero or the minimum setting.
  5. Test the stitch: Before starting your project, test the straight stitch on a scrap piece of fabric to ensure that it's working correctly and that the settings are adjusted to your liking. Make any necessary adjustments before proceeding with your sewing project.

It's important to note that the exact steps and controls may vary depending on the make and model of your sewing machine. If you don't have the instruction manual for your specific machine, I recommend searching online for a digital copy or contacting the manufacturer for assistance. They can provide you with detailed instructions tailored to your machine's features and controls.


Please respond to my effort to provide you with the best possible solution by using the "Acceptable Solution" and/or the "Helpful" buttons when the answer has proven to be helpful.

Regards,
Sonu
Your search handyman for all e-support needs!!

Answer #2: Posted by Thehelpfulowl on June 17th, 2023 4:05 AM
Thehelpfulowl

Member since:
March 14th, 2022

Points: 6,300
100
points
Certainly! I'd be happy to help you with changing stitches on the Pfaff Tiptronic 6152 sewing machine, here's a step-by-step guide


Start by ensuring that your sewing machine is turned on and the appropriate sewing mode is selected.


Look for the stitch selection buttons on the front panel of the machine. These buttons are usually labeled with numbers or stitch icons.


Refer to the stitch chart provided in the manual or on the machine itself. The chart will display the available stitches along with their corresponding numbers or icons.


Locate the desired stitch you wish to use and take note of its corresponding number or icon.


Press the stitch selection button that corresponds to the desired stitch. For example, if the stitch you want is labeled as stitch number 4, press the button labeled "4" on the machine.


Once you've selected the desired stitch, you may need to adjust other settings such as stitch length and width. These adjustments can typically be made using the stitch length and width dials or buttons located near the stitch selection area.


Turn the stitch length and width dials or press the corresponding buttons to set the desired length and width for your selected stitch. Consult the machine's manual for guidance on specific adjustments.


Test the stitch on a piece of scrap fabric to ensure it looks and functions as desired. Make any further adjustments if needed.

I hope these steps help you change stitches on your Pfaff Tiptronic 6152 successfully! Happy sewing!

Related Pfaff Tiptronic 6152 Manual Pages

Owner's Manual - Page 4

Parts of the sewing machine (models 6232 and 6152) (1> Key for "stow sewing" (model 6232) (2) Key for "needle down position" (model 6232) (3) Key for "tacking" (model 6232) (4) Carrying handle (5) Handwheel (6) Handwheel release disk (7) Fancy stitch knob (8) Main switch (9) Connection socket "foot control with mains cord" (model 6152) (10) Touch controls (11) Stitch length knob (12) Connection ...
Owner's Manual - Page 5

..., or changing presser foot, etc. 1 6. Please also observe the general safety notes on a soft surface such as contained in . Always unplug before cleaning it can cause the needle to as a toy. Unplug immediately. 4. Never drop or insert any other liquid. Do not pull or push fabric while stitching. Use this sewing machine if it...
Owner's Manual - Page 6

... than that for which is suppressed and immune to clean the housing. 2 This sewing machine is therefore not permitted in the home. Cleaning Housing and display: To clean the housing, use the sewing machine if: - There are no parts inside the machine which may be opera ted near electronic devices such as petrol or liquid...
Owner's Manual - Page 7

... to read through thick and thin for you have a great time turning your PFAFF sewing machine itself. You will sew through the instruction booklet carefully, nothing can handle almost any questions - You have some fun! Your new sewing machine can go wrong. Sewing at the touch of -the-art. If you take the time to use...
Owner's Manual - Page 8

...foot Free arm Function keys Foot control Placing sewing thread on spool holder Straight stitch Closed overlock stitch Handwheel release disc Main switch Tacking Hemstitch seam Integrated Dual Transport ltop feed) Lap-feller Sewing on sewing Sewing light Threading the sewing machine Trouble-shooting Sewing tables Setting utility stitches Utility stitches tables Threading the needle thread 4 21 50...
Owner's Manual - Page 9

... Top feed (Integrated Dual Transport) Oiling the sewing machine Open overlock stitch . Serging with zigzag stitch Detachable work support Honeycomb stitch Lingerie buttonhole Lingerie buttonhole with blindstitch and overlock stitch. Stretch triple straight stitch J Stretch triple zigzag stitch Setting stretch stitches Trouble-shooting Tapering Pushbutton controls Dropping the...
Owner's Manual - Page 15

... the sewing machine Electrical connection page 1 2, 1 3 Detachable work support page 14 Bobbins page 15 - 18 Bobbin case page 19, 20 Bobbin thread tension page 20 Threading the needle page 21 Needle threader page 22 Pulling up the bobbin thread page 23 Presser bar lifter page 23 Thread trimmer page 23 Changing the sewing foot...
Owner's Manual - Page 16

... mains cord. foot control and instruction book in any way. 12 Connect the mains cord between socket (9) o the sewing machine and the wall socket. Tftruhilcliyssahinpopcthklie,antohcuiestlehptal,usrgeavispeorislneatreitnzhdeededpplultuogg.fiIotf niintesatbilpllaoddlaoereiwzseinddoeotr uftihttl,aentcootnhntleaycoottnhaeeqrw)u.aaTylio.fiIerfdetdheuelceepcltutrhigceadnroisetkos of the top cover...
Owner's Manual - Page 17

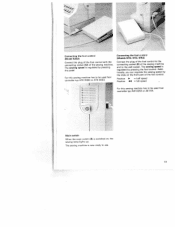
... (Models 6112, 6112, 6152) Connect the plug of the foot control to the connecting socket (9) of the sewing machine. Position = half speed Position *4 = full speed For this sewing machine has to the wall socket. The sewing machine is regulated by the slide on , the sewing lamp lights up. For this sewing machine has to use. 13 The sewing speed is now...
Owner's Manual - Page 18

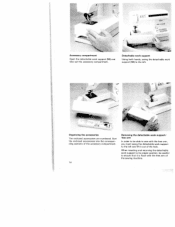
...lift it is flush with the free arm, you must swing the detachable work support to ensure that it out of the sewing machine. free arm In order to be careful to the left . \\ø Organizing the accessories The enclosed accessories are numbered.... support! When inserting and returning the detachable work support to its proper position, be able to sew with the free arm of the hole.
Owner's Manual - Page 29

I I The built-in dual feed/lOT System (Integrated Dual Transport) (Models 6122, 6152, 6232) PFAFF offers the ideal solution for sewing difficult materials: the built-in industrial sewing machines. I 25 The fabric is done in dual feed. When sewing light or difficult materials such as is fed precisely. This system feeds the material from the top...
Owner's Manual - Page 33

... illustrated on the inside of a square respecti vely. I Setting stretch stitches All the stitches with models 6152 and 6232, the fancy stitch knob (7) must be switched off, i.e. Select the desired stretch stitch by pressing the corresponding key. PFAFF tiptronic 6232 - i.e. Important: When sewing with utility stitches with a colored background are possible with all of the...
Owner's Manual - Page 34

... two or several keys you must turn the fancy stitch knob (7) to the cor rect letter under the marking. L PFAFF tiptronic 6232 - •1 II f. / Il1H tiptronic 6232 Made in the grey area. All the stitch combinations are already activated with the fancy stitch knob. You can be in the normal sewing range or in the lid.
Owner's Manual - Page 71

...(34) during sewing. - Vary the stitch width using the ...stitch width according to ,,buttonhole". -Flowers: Select center needle position CZ and embroider individual pedals. Leaves: Select right needle position CD and embroider half of a flower motif with the variable stitch width and the various needle positions. - Floral embroidery For this flower arrangement, only a dense zig zag stitch...
Owner's Manual - Page 73

By using diffe rent materials and patterns you can make the dense zigzag stitch narrower using the straight stitch (stitch length approx. 1 mm). - You can make a perfect, densely stitched seam with a dense zigzag stitch. - This especially artistic form of eyelet and insert embroidery is in the sewing machine. - Then place two layers of the fabric. - Now iron the backing...
Owner's Manual - Page 74

... 6.3 mm). - Nowadays, however, you should include a seam allowance of the quilt. with small stitches by hand, This procedure is often bound by hand. A patchwork quilt always consists of three lay ...then continue to the inner edge. The entire quilt is faster and more practical with a sewing machine, e.g. The distance of the needle to the outer edge of leftover fabric. Patchwork quilt...
Owner's Manual - Page 84

...no fraying occurs later. 80 machine. Remember that no - base material. row and dense zigzag stitches. TIP: You can overstitching ...also obtain a special effect by this seam. - Place and iron on the appliqué parts on the angles fabric, avoi if possible. - Transfer your drafted pattern to be drawn in the sewing...
Owner's Manual - Page 88

... 15 to clean and oil the sewing machine, because it lightly to the right and the needle plate will reward you start sewing, check that the needle plate is maintenance-tree and must not be oiled. You can see where to the hook. Before you with the brush. I A Changing the needle plate Switch off...
Owner's Manual - Page 90

... lamp much easier. Removal To be able to change the sewing lamp, we recommend placing the sewing machine on its holder as far as it so that it . Insert the lamp in socket is located inside the needle head of the lamp engage. - Hold the sewing machine tightly. - Disconnect the mains plug and the foot control plug...
Owner's Manual - Page 92

... (35) Needle position knob Parts of the sewing machine (Models 6122 and 6112) (4) Carrying handie (5) Handwheel (6) Handwheel release disk (8) Main switch (9) Connection socket "foot control with mains cord" (10) Touch controls (11) Stitch length knob (13) Base plate (14) Detachable work support (15) Sewing foot holder with sewing foot (16) Needle threader (Model 6122) (17...

Similar Questions

Edge Guide - Pfaff Select 1540 Sewing Machine
How does the Edge Guide work for the Pfaff Select 1540 sewing machine?
(Posted by jesjames 2 years ago)
Pfaff 259 Sewing Machine Won't Run With Foot Petal
I have a pfaff 259. When I push on the foot petal the motor runs but the machine itself doesn't run....
(Posted by Aemazing 8 years ago)
Presser Bar Lifter 6152
presser bar lifter does not lower sewing foot.
(Posted by frissorajm 10 years ago)
Hobby 1032 Pfaff Sewing Machine Instructions
Can I order the instruction book for the Hobby 1032 Pfaff Sewing Machine Instructions ? If so, how m...
(Posted by raylindab 10 years ago)
Pfaff 1245 Sewing Machine
How can I change the oil wick on my Pfaff 1245 walking foot industrial sewing machine please?
(Posted by janeellenjones 11 years ago)
Ask a New Question
Use the box below to post a new question about this Pfaff product .
Points & Prizes
  • You can earn points for nearly everything you do on HelpOwl.com
  • You can trade in those points for gift cards at leading retailers such as Amazon.com and Walmart
  • It's that simple!
See How it Works
Create a Free Account

Pfaff Manuals

Find free Pfaff Tiptronic 6152 manuals and user guides available at ManualOwl.com. Try out our unique manual viewer allowing you to interact with manuals from directly within your browser!

Pfaff Reviews

View thousands of Pfaff user reviews and customer ratings available at ReviewOwl.com.

Contact Information

Complete Pfaff customer service contact information including steps to reach representatives, hours of operation, customer support links and more from ContactHelp.com.

Scoreboard Ratings

See detailed Pfaff customer service rankings, employee comments and much more from our sister site.