
Pfaff 1221 - 1222 Support Question
Pfaff 1221 - 1222 Support Question
Find answers below for this question about Pfaff 1221 - 1222.Need a Pfaff 1221 - 1222 manual? We have 1 online manual for this item!
Question posted by Oldtonew on February 28th, 2015
I Am Unable To Engagage The Matchmaker Foot. I See No Slot For It To Fit Into.
do all ordinary sewing feet for the Pfaff 1222 come with that slot?
Current Answers
Answer #1: Posted by TechSupport101 on March 2nd, 2015 11:05 PM
TechSupport101

Member since:
May 24th, 2013 Points: 12,171,295

Member since:
May 24th, 2013 Points: 12,171,295
Hi. Do see the manual here www.helpowl.com/manuals/Pfaff/12211222/184589 for Matchmeker foot fittin
Related Pfaff 1221 - 1222 Manual Pages
Owner's Manual - Page 3
Instruction Book for the Push-Button Pfaff 1221 and 1222
Dear (new) Plaff Customer:
Welcome to the modern, efficient world at pages 62 and 63, where the roost essential parts of your machine are probably very
anxious to tell you about all the wonderful boicts you
can create with your Pfaff
We reommond that you study...
Owner's Manual - Page 4

... and thread the needle Push the master pluq into socket A in the machine base, and plug B into the wall socket Place the foot control under the table in a convenient posWon. This button al%o switches on the glarefres sewing tight To start sewing right away.
All you have to do now is push button C which...
Owner's Manual - Page 7
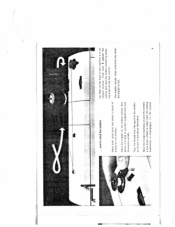
...at left). e. Check to make sure the sewing
I
Place the bobbin on the back of the machine is full,
... Raise both spool pins and... place a spool of them. I mechanism is held in its highest position. where it is disengaged, i.
Push lever E against the
bohhin and start the bobbin winder by press
ing down on one of
thread on the foot...
Owner's Manual - Page 13

... you have bocome well acquainted with your Pfaff.
• Touch on-off button 1 to turn machine on.
• Presser bar lifter 2 must be at Its lowest position in order to ensure that the sewing foot is , push button 4 on its top surface.
• For straight and zigzag sewing, the de corative and functional-stitch mechanism...
Owner's Manual - Page 15
... numbers. Note: The needle must never be in stitch range 8.
13 Then lot your machine sew a straight'stitch seam. Press the foot control pedal, and watch your Pfaff run .
Now try a zigzag stitch, Zigzag stitches are marked by making a sewing test.. Turn the outer ring of the stitch selector until the symbol of different lengths...
Owner's Manual - Page 18
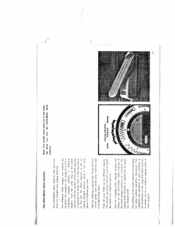
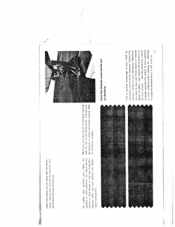
...slot ot the raised
sewing foot until it up out of fabric wUl match pertectly, no matter how iong the seam
may be. The Matchmaker sewing toot is also used tor sewing long seams and for sewing over thick cross seams
To engage the Matchmaker... a Matchmaker sewing toot. Your Pfaff is used for perfectly matching plaids, striped and patterned fabrics. This toot is the only home sewing machine in ...
Owner's Manual - Page 19
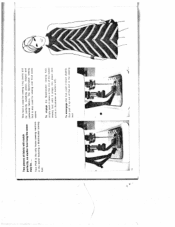
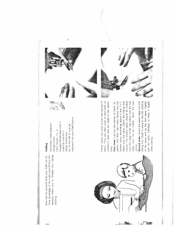
Other feet which operates "behind the scenes comes to that shown in the material.
17
Just relieve the pressure on the foot control , and the electronic control instantty reduces the speed of fabric. This is another advantage of your machine to stow stitchby-stitch sewing for stitching through the thickest spots in trio top illustration (below...
Owner's Manual - Page 20

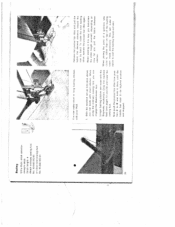
... special needles. Loosen screw B until the sewing foot can be removed, tilt rug it will go, making sure the flat side of your macnine contains several special sewing feet (hemmer foot,
buttonhole foot, etc ) which are used for changing. Changing the needle or sewing foot is discussed on page 61. Which sewing toot to the correct position for
venous...
Owner's Manual - Page 23
Stitch it taught
white sewing. The bottom fabric should be folded. Make sure the fahric enters the felting foot
evenly. but the top edqe mu't nut be ... stitch Stitch length: 15 Engage Matchmaker foot, if material rcquires it, Attach felling foot No 91.540 5.3l3-1 (can be ohtainect from your Pfaff can do Take advantage of the many possibilities this machine offers you in two opera
...
Owner's Manual - Page 28
... between stif hen
Wren homing the [arts or a garment sew niuse IU, r.rtior ther or ten of the hssiing scout...Pfaff
1 With the machine set as nOn oted atiove, you can make snort or 009 00 05tifl stitches with the Stoprnatic r'iechionisrn. [irup tic riichine feed )see pages 14 id 24) nct wor the. straight stitch Stitch length 4 Attach ordinary sewing toot No 93-040 910-91 or clear-view sewing foot...
Owner's Manual - Page 31

... other over its edge. Engage Matchmaker foot if material is loosely woven, more fabric yarns must be caught in the seam. If the fabric is cut on the bias
Attach ordinary sewing foot
No. 93-040 910-91. For this way, a neat edge finish is produced. In this reason, set the machine for a medium or tong...
Owner's Manual - Page 38

...Stitch length: 2 Attach clear-view sewing foot No. 93-040 920-91
2. Heavy threads are the same size As with cm ding. rig Fur best results, use a No 50 machine embroidery thread Make sue tie need...and the other below me tension dis lii ice sior under the top cover. Attach clear-view sewing foot NC) 93-040920-91. Slightly increme the needle tteE-ad tension
The heinstitching etfect is explaii...
Owner's Manual - Page 45

...machine and place the wool thread back and forth acioss the hole, packing thu
individual strands closely together Stitch it Then sew back md forth over the darned area lengtl wisu, using a thin darning thread.
Draw the wool thread through the needle hole of the darning toot and ii to the slot...in stitch range 6 or 7. Drop the machine feed Attach darning foot No 93-040 960-91
Knitted garments ...
Owner's Manual - Page 46

... hoop by hand at each dot, using your Ptafl dealer
Drop the machine fect. This is very rn portant to obtain beautiful eyelets. Remove the sewing foot, Lower the presser bar titter. Sew around °verv hole twice
Push the stud of the cover plate ....
Eyelet embroidery
For eyelet embroidery you need cover plate No 93-040 94645 which inserted in the teed slot (see adjoining drawing).
Owner's Manual - Page 52

... are prossed open after sewing are used for closing nseams of trousers Pressopen seams and nseams
TripIeshtch seam Stitch Inqth 4 Engage Matchmaker foot, as indicated above, then press the seam flCfl
The same mach ne setting s used for all elastic materials
Sew the two pieces of material together with the machine sot as nstru ted...
Owner's Manual - Page 54

...the hem
only once (Fig. 3). Regulate the needle position by machine, follow the instructions given on the sewing foot (ill, at right). Edge
51 Place the material under the blindstltch...is hemmed.
Blindstitching
Blind-stitch neam
ci 'i
Stitch length: 3-4
Attach hlinrtstilch foot
No. 93-040 917-91
Engage Matchmaker foot. If you want to haste by turnin knob
O in the stitch selector ...
Owner's Manual - Page 55

Inserting patches
Over edge-stitch seam Stitch length: 4
Attach ordinary sewing foot No. 93-040 910-91. The uvereuge-stitch seam is...Matchmaker foot if the material is ideally suited for sewing knit underwear and simultaneously finishing the edge of the tabric so that the needle alternately stitches into the fabric and Over its grain matches the rest 01 the fabnc.
Attach ordinary sewing...
Owner's Manual - Page 58

..., as with their edges in one on top of th" other with blind- Sew along the fabric edge so that the needle alternately stitches into the fabric and over... Ultra-l'vtatic stitch selector straight stitch Stitch length 4 Needle positron: left (see p. 37) Engage Matchmaker foot. Attach ordinary sewing foot No. 93-040 910-91
Reinforcing hems in elastic fabrics (jersey, Lastex, etc.) Blind-stitch...
Owner's Manual - Page 65

... of your
Pta 1221
1 Take-up lever 2 Thread retainer stud 3 Push button (K) 4 Top cover lid 5 Spool pins 6 indicator wheel (S) 7 Pattern length wheel (E) 8 Bobbrn winder 9 Ultra-Matic staldi selector 10 Needle position control (0) 11 Buttonhole control (T) 12 Master on-off switch (C) 13 Base (at portable machines) 14 Bed cover 15 Sewing foot 16 Matchmaker foot 17 Need...
Owner's Manual - Page 66

...
9 Ultra-Matic stitch selector
10 Needle position control (D) 11 Buttonhole control (T) 12 Master on-ott switch (C) 13 Free arm
14 Free arm cover
(enclosing the sewing hook) 15 SewIng foot 16 Matchmaker loot 17 Needle threader control 18 Upper tension 19 Reverse-teed control 20 Presser bar lifter
(on back of machine arm) 63
Similar Questions

Do You Have An On/off Switch For A Pfaff 1222 Please? Thanks, Hilton
(Posted by hiltongreen 2 years ago)

How To Use The Buttonhole Foot?
I've tried to do as I understand the manual explains. Buttonhole always stops short of what I want a...
I've tried to do as I understand the manual explains. Buttonhole always stops short of what I want a...
(Posted by mararenee 3 years ago)

Walking Foot For Pfaff Tiptronic 1019 Tipmatic
What type of walking foot will fit on the Pfaff Tiptronic 1019 Tipmatic sewing machine?
What type of walking foot will fit on the Pfaff Tiptronic 1019 Tipmatic sewing machine?
(Posted by hrhdmk 9 years ago)


Tipmatic 1147 Light Comes On Machine But When I Push The Foot Down To Sew Nothi
is there a fuse I need to change where is it
is there a fuse I need to change where is it
(Posted by susanbutler24 10 years ago)