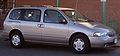
1999 Mercury Villager Support Question
1999 Mercury Villager Support Question
Find answers below for this question about 1999 Mercury Villager.Need a 1999 Mercury Villager manual? We have 4 online manuals for this item!
Question posted by richairyb on July 4th, 2014
Mercury Villager 1999 Where Is The Override Button
The person who posted this question about this Mercury automobile did not include a detailed explanation. Please use the "Request More Information" button to the right if more details would help you to answer this question.
Current Answers
Related Manual Pages
Owner's Manual - Page 1
... or by any information storage and retrieval system or translation in whole or part is not permitted without written authorization from Ford Motor Company. Copyright 1999 Ford Motor Company
1 Contents
Before driving Introduction Instrumentation Controls and features Seating and safety restraints Starting and driving Starting Driving Roadside emergencies Servicing Maintenance and...
Owner's Manual - Page 5

...
SIDE 1 - 2
REW FF
DISCS CD CD COMP
SHUFFLE
1
1
2
3
4
5
6
Climate control system (pg. 21)
2 3 4 MAX A/C
OFF
OFF REAR 1
2
3
4
A/C
CD Changer* (pg. 76)
5 Instrumentation
Gearshift (including overdrive button) (pg. 161) Rear wiper/washer (pg. 87) Rear defroster (pg. 39)
Hazard flasher (pg. 171)
DRI ON ER OV OFF/
VE
HAZAR
D
Auxiliary power point...
Owner's Manual - Page 29

...)
OFF
A/C MAX
HI
TEMP AUTOMATIC
OFF REAR 1 A/C
2
3
4 LO
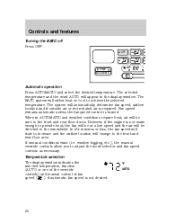
The EATC system will only operate when the engine is running.
29 You can override automatic operation with any of the override controls or the fan speed control.
The EATC will maintain a selected temperature and automatically control airflow. Turning the EATC on
OFF
A/C MAX...
Owner's Manual - Page 30
... the engine is not desired.
˚F
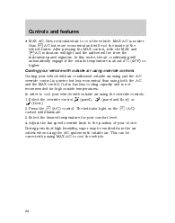
AUTO
30 window fogging, etc.), the manual override controls allow you to the windshield. The EATC system will automatically determine fan speed, airflow... Temperature selection The display window indicates the selected temperature, function (AUTO or one of the override controls) and manual control of fan speed ( ) if automatic fan speed is not warm ...
Owner's Manual - Page 32

... conditioning will show manual fan operation. The display will only function if the outside or recirculated air during air conditioning operation The air conditioning can override fan speed at any time. It will also operate only when required when AUTOMATIC has been selected. You can operate in all modes except OFF...
Owner's Manual - Page 34
... conditioning will cool the inside of high humidity, vapor may be from the air outlets when using the A/C system with outside air using just the A/C override control is quieter but more economical and will automatically engage if the outside temperatures. This can be corrected by using both the MAX and A/C A/C indicators...
Owner's Manual - Page 45
...
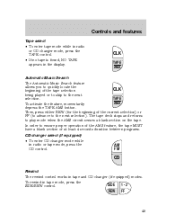
Rewind The rewind control works in tape mode, press the SIDE 1 - 2 SIDE/REW control. TAPE AMS To activate the feature, momentarily depress the TAPE AMS button.
Controls and features
Tape select • To enter tape mode while in radio or CD changer mode, press the TAPE control. • If no tape...
Owner's Manual - Page 56

... in slow rewind. Pressing the control for less than three seconds results in the radio or CD changer mode, press the TAPE control. Press the button during rewind or fast forward to stop the rewind or fast forward function and begin play. • To begin CD play will begin tape play...
Owner's Manual - Page 69

... stopped last. Pressing the control for more than three seconds results in slow forward action. Rewind The rewind control works in fast rewind. Press the button during rewind or fast forward to toggle between single CD and CD changer play.
Owner's Manual - Page 93
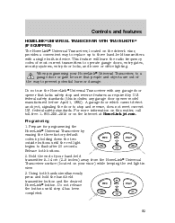
...and reverse, does not meet current U.S. federal safety standards. Do not release the buttons until the red light begins to flash after 20 seconds. Prepare for programming the ... 3. Release both hands simultaneously press and hold the hand-held transmitter button and the desired REC DEL PLAY HomeLink button. Controls and features
HOMELINK UNIVERSAL TRANSCEIVER WITH TRAVELNOTE (IF EQUIPPED) The ...
Owner's Manual - Page 94
... and re-press the hand-held transmitters. Canadian Programming During programming, your hand-held transmitter may not be long enough to program the remaining two buttons. Controls and features
4. To program your hand-held transmitters: • continue to a fast flash.
The red light will illuminate, indicating the signal is being transmitted...
Owner's Manual - Page 95
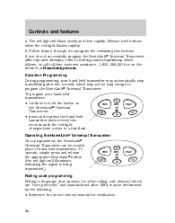
... after 2 seconds. The HomeLink Universal Transceiver has now been trained to erase the three programmed buttons: REC DEL PLAY 1. Erasing HomeLink buttons Individual buttons cannot be erased, however, to the receiver. Release both buttons. Press and release the programmed HomeLink button. After completing the "Programming" functions, follow these steps to be programmed if this has...
Owner's Manual - Page 96

... TravelNote records and stores messages for up to flash rapidly, release both buttons. To record a message: 1. Press and release the REC button a second time to 5 inches) away from the HomeLink surface. 3.... All you don't have to flash slowly (after 20 seconds), position the hand-held transmitter button. 4. When you get an idea or remember something important while you're driving, you have...
Owner's Manual - Page 97

...PLAY 2. The indicator light will flash amber and an "error" tone will sound if the PLAY button is pressed but no message is currently in consecutive order starting with the most recent. 3. The ...will skip to , TravelNote will sound. Press and release the DEL button while listening to play a message: 1. If the DEL button is being listened to the beginning of your option package.
97 During...
Owner's Manual - Page 98

... and features
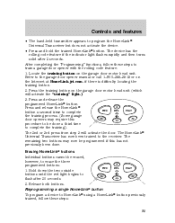
Storage bin (if equipped) The storage compartment may be converted to accommodate a variety of aftermarket garage door openers: • Remove the GARAGE control button from the storage compartment. • Place Velcro on aftermarket transmitter opposite of actuator control. • Install the transmitter into storage compartment, control down.
98 Push...
Owner's Manual - Page 99
...When the control is in the storage compartment. • Close cover and press the GARAGE control button to activate the lamps.
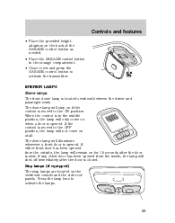
99 INTERIOR LAMPS
Dome lamps The front dome lamp is shut. Controls and...; Place the provided height adaptors on the back of the GARAGE control button as needed. • Place the GARAGE control button in the middle position, the lamp will only come on when a door...
Owner's Manual - Page 113
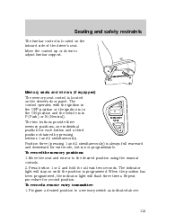
... full rearward and downward for at least two seconds. Repeat procedure for each button and a third position obtained by pressing buttons 1 and 2 simultaneously. Memory seats and mirrors (if equipped) The memory ...the ignition is in P (Park) or N (Neutral). To record the memory positions: 1.
Press button 1 or 2 and hold for exit mode, but is located on the driver's door panel. Seating ...
Owner's Manual - Page 114
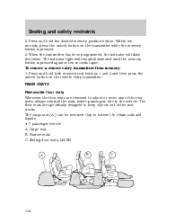
... in the vehicle. The floor mats are removed to retain soils and liquids. • 7 passenger vehicle A. Press and hold the desired memory position button. Within ten seconds, press the unlock button on the remote entry transmitter. Narrow mats C. When the transmitter has been programmed, the indicator will remain illuminated until the memory...
Owner's Manual - Page 126

... installed in the shoulder belt. Automatic locking mode In this chapter.
126 The automatic locking mode is automatically pre-locked. To unfasten, push the release button and remove the tongue from the buckle. Seating and safety restraints
2.
When to remove any slack in a passenger front or outboard rear seating position (if...
Owner's Manual - Page 128

... belt so the belt rests across the middle of the shoulder belt, slide the height adjuster up. To lower the shoulder belt height, push the button and slide the height adjuster down on the height adjuster to adjust the safety belt properly could reduce the effectiveness of the safety belt and...


