
1996 Mercury Villager Support Question
1996 Mercury Villager Support Question
Find answers below for this question about 1996 Mercury Villager.Need a 1996 Mercury Villager manual? We have 1 online manual for this item!
Question posted by qwertymJWD2 on August 19th, 2013
Where Is The Knock Sensor Located In 1996 Mercury Villager
The person who posted this question about this Mercury automobile did not include a detailed explanation. Please use the "Request More Information" button to the right if more details would help you to answer this question.
Current Answers
Related Manual Pages
Owner's Manual - Page 2
... subject.
WARNINGS Warnings provide information which will follow. INFORMATION ABOUT THIS GUIDE The information found in rules for more information. Indicates vehicle information related to locate the appropriate section which may change the contents without notice and without incurring obligation.
2 This is necessary to give the moving parts a chance to Seating...
Owner's Manual - Page 15
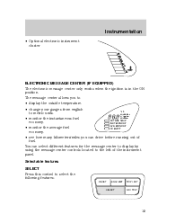
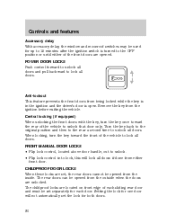
... the left of fuel. The message center allows you can select different features for the message center to display by using the message center controls located to select the following features:
RESET ENG / MET TRIP / RST SELECT OD / TRIP
15 MILES/GAL L/100 km MILES km • monitor the instantaneous fuel...
Owner's Manual - Page 24
...
OFF REAR A/C 1 2 3 4
A/C
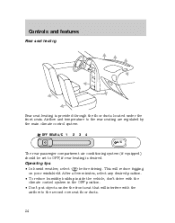
The rear passenger compartment air conditioning system (if equipped) should be set to OFF, if rear heating is provided through the floor ducts located under the front seat that will reduce fogging on your windshield. After a few minutes, select any desired position. • To reduce humidity buildup inside the...
Owner's Manual - Page 30
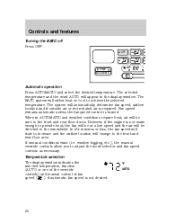
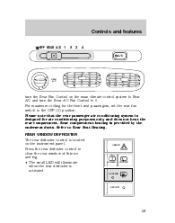
...8260;2 minutes or less, the fan speed will start to increase and the airflow location will either heat or cool to achieve the selected temperature. OFF
TEMP AUTOMATIC
OFF REAR... rear floor ducts. However, if the engine is required. The system will automatically determine fan speed, airflow location and if outside air or recirculated air is not warm enough to provide heat, the fan will be at...
Owner's Manual - Page 35
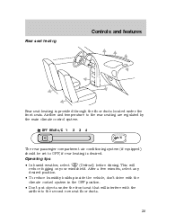
.... Controls and features
Rear seat heating
Rear seat heating is desired. Airflow and temperature to OFF, if rear heating is provided through the floor ducts located under the front seat that will reduce fogging on your windshield.
Owner's Manual - Page 39
... REAR A/C 1 2 3 4
A/C
0 1 4 3 2
REAR A/C
turn the Rear Fan Control on the instrument panel.
Press the rear defroster control to 0. REAR WINDOW DEFROSTER The rear defroster control is located on the main climate control system to Rear A/C and turn the Rear A/C Fan Control to clear the rear window of thin ice and fog. •...
Owner's Manual - Page 42
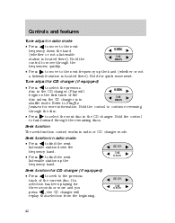
... find the next listenable station down the band (whether or not a listenable TUNE station is located there). Seek function in radio mode • Press to find the next listenable station up the band... (whether or not a listenable station is located there). If a selection has been playing for CD changer (if equipped) • Press to ...
Owner's Manual - Page 45
... selection being played or to skip to the next selection).
CLK
TAPE AMS
Automatic Music Search The Automatic Music Search feature allows you to quickly locate the CLK beginning of the current selection) or FF (to advance to the next selection. The tape deck stops and returns to ensure proper operation...
Owner's Manual - Page 52
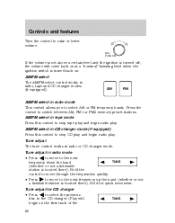
... in radio mode • Press to move to the next TUNE frequency down the band (whether or not a listenable station is located there).
Hold the control to select AM or FM frequency bands. Press the control to raise or lower volume. Controls and features
... quickly. to move to the next frequency up the band (whether or not • Press a listenable station is located there).
Owner's Manual - Page 64
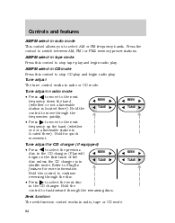
...you to the next • Press frequency up the band (whether or not a listenable station is located there). Hold the control to move to select AM or FM frequency bands. Refer to switch between ...begin radio play and begin on the first track of the TUNE disc unless the CD changer is located there). Hold the control to stop CD play . Press the control to Shuffle feature for more ...
Owner's Manual - Page 76
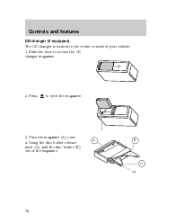
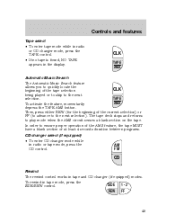
Press
to access the CD changer magazine.
2. Using the disc holder release knob (C), pull the disc holder (B) out of your vehicle. 1. A
B
C
76
Slide the door to eject the magazine.
3. Turn the magazine (A) over. 4. Controls and features
CD changer (if equipped) The CD changer is located in the center console of the magazine.
Owner's Manual - Page 80

...audio system warranty information. Weak signals are two auxiliary power points: • One is located on the instrument panel. There are sometimes captured by stronger signals when you pass a ... the "Warranty Guide" for electrical accessories. AUXILIARY POWER POINT The power point is located in stereo. Audio system warranties and service Refer to single channel reception if it will...
Owner's Manual - Page 88
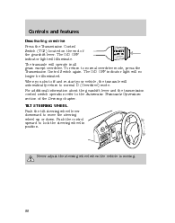
... longer be illuminated. Never adjust the steering wheel when the vehicle is moving.
88 Controls and features
Deactivating overdrive Press the Transmission Control Switch (TCS) located on the end of the Driving chapter.
Owner's Manual - Page 90
...turn the key once toward the front of the front doors are unlocked. The childproof locks are located on front edge of the vehicle to unlock that door only. Remove the key from being ...all doors and pull backward to unlock all doors.
FRONT MANUAL DOOR LOCKS • Flip lock control, located above door handle, out to unlock. • Flip lock control in the ignition and the driver's...
Owner's Manual - Page 93
...Controls and features
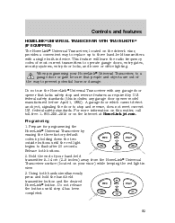
HOMELINK UNIVERSAL TRANSCEIVER WITH TRAVELNOTE (IF EQUIPPED) The HomeLink Universal Transceiver, located on the driver's visor, provides a convenient way to replace up to three hand-held... transmitter 5-14 cm (2-5 inches) away from the HomeLink Universal Transceiver surface (located on the Internet at HomeLink.jci.com. Programming 1. Using both buttons. 2. This ...
Owner's Manual - Page 94
...
4. Follow steps 2 through 4 to hold the button on the Internet at HomeLink.jci.com. If you do not successfully program the HomeLink Universal Transceiver after 1996, may be determined by the following: • Reference the device owner's manual for verification
94 To REC operate, simply press and release the appropriate HomeLink...
Owner's Manual - Page 95
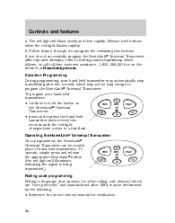
... 2nd or 3rd press from step 3 will activate the "training" light.) 3. Release both buttons. Locate the training button on the garage door motor head unit (which will activate the door. Press and ... 1-800-355-3515 or on the Internet at HomeLink.jci.com. if there is difficulty locating the training button. 2. Refer to flash after 2 seconds. Press and release the programmed HomeLink...
Owner's Manual - Page 146

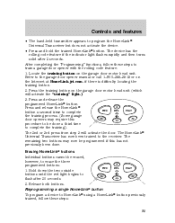
...bolt, cut through the U-shaped tether location outlines on the floor behind the third..., REMOVE THE PARCEL SHELF and tether child safety seat to the anchorage locations on the floor behind the 3rd row seat.
146 Tighten the anchor ... tether anchorage hardware The tether has to be attached to the tether anchor located on the carpet of the luggage area. Tether anchorage hardware kits (part number...
Owner's Manual - Page 174
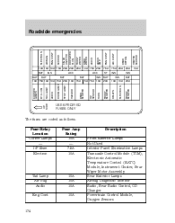
...Rear Exterior Lamps Airbag Diagnostic Monitor Radio, Rear Radio Control, CD Changer Powertrain Control Module, Oxygen Sensors
Tail Lamp Air Bag Audio Eng Cont
UP SIDE
10A 10A 10A 10A
174
RELAYS
AUDIO
TURN
HEATED...
REAR WIPER
AUDIO
AUDIO AMP Fuse/Relay Location Corner Lamps - I /P ILLUM CORNER LAMPS REAR BLOWER O2 SENSOR
HAZARD
USE SPECIFIED FUSES ONLY
The fuses are coded as follows.
Owner's Manual - Page 175
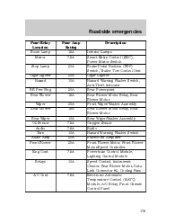
Roadside emergencies
Fuse/Relay Location Room Lamp Mirror Stop Lamp Cigar Lighter Hazard RR Pwr Plug Rear Blower Wiper Rear Blower Rear Wiper O2 Sensor Audio Turn Audio Amp Front ...Wiper/Washer Assembly Rear Blower Motor Relay, Rear Blower Motor Rear Wiper/Washer Assembly Oxygen Sensor Radio Hazard Warning Flasher Switch Subwoofer Amplifier Front Blower Motor, Front Blower Motor/Speed Controller ...
Similar Questions

How To Install A Knock Sensor 1999 Mercury Villager
(Posted by ublack2 9 years ago)

Where Is Knock Sensor Located On My 1999 Mercury Villager
(Posted by Gunnjche 10 years ago)

Free Online Where Is The 02 Sensors On 1996 Mercury Villager
(Posted by audfd 10 years ago)

