Maytag MVWC700VW Support Question
Maytag MVWC700VW Support Question
Find answers below for this question about Maytag MVWC700VW - Centennial Washer.Need a Maytag MVWC700VW manual? We have 2 online manuals for this item!
Question posted by jimafm on October 12th, 2011
How Do I Remove The Back Of A Maytag Centennial Mvwc300vwi To Replace The Drain
Four foot drain hose not long enough. Need to install a six foot.
Current Answers
Related Maytag MVWC700VW Manual Pages
User Instructions - Page 1
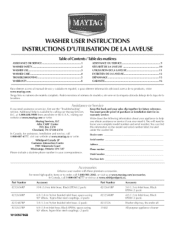
... number and serial number. In Canada, call 1-800-901-2042, or visit us at www.maytag.com or write:
Maytag Services, LLC Attn: CAIR _':C_enter P.O. WASHER USER INSTRUCTIONS INSTRUCTIONS D'UTILISATION DE LA LAVEUSE
Table of purchase or installation date for inwarranty service. You can find this book and your appliance to order; adicional acerca...
User Instructions - Page 2
... moving. [] Do not install or store the washer where it will release
any... remove the door or lid. [] Do not reach into the washer if...replace any accumulated hydrogen gas.
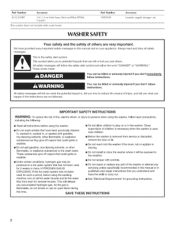
IMPORTANT SAFETY INSTRUCTIONS
WARNING: To reduce the risk of children is necessary when the washer...on all safety messages. Part Number 1903WH
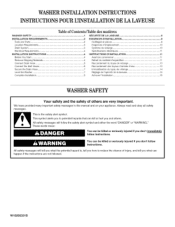
WASHER SAFETY
Accessory Laundry supply storage cart
Your safety and the ...
User Instructions - Page 3
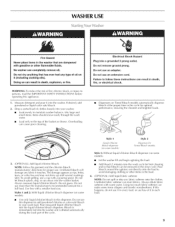
... chlorine or color-safe bleach to persons, read the IMPORTANT SAFETY INSTRUCTIONS before operating this dispenser. No washer can cause poor cleaning.
Use less with a pouring spout. Using too much fabric softener can be removed in the rinse cycle. WARNING: To reduce the risk of fire, electric shock, or injury to your...
User Instructions - Page 4
...).
8. Repeat this option provides a second rinse. Remove any spills such as washer safe. Remove dispenser by adding rinse Options to maintain a minimum temperature of the cycle. To avoid damage to the washer or clothing, do not dissolve well. it . A list of this user instructions. Replace water inlet hoses after the washer has started filling by regulating incoming...
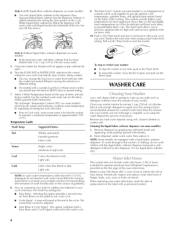
User Instructions - Page 5
....maytag.ca
Noisy
Is the load balanced and the washer level? The washer must be properly installed and the nuts tightened. Leaking
• Check the following:
Are the fill hoses tight? Center the tub before spin, or is loose, or moves in only one direction. Reset the rear leveling legs (if needed). Basket crooked
Was the washer...
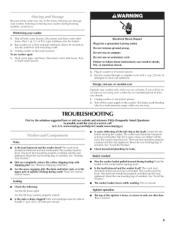
User Instructions - Page 6
..., or has a circuit breaker tripped? The washer pauses for proper installation of the drain hose more information. Wash smaller loads. Washer will not agitate or spin with the lid ...need to hold it taped to the standpipe? Washer won 't drain or spin
• Is the drain hose clogged, or the end of drain hose.
• Is the lid open .
• Is there excessive sudsing? Do not remove...
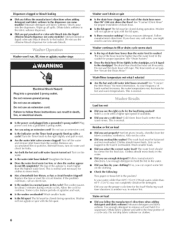
User Instructions - Page 7
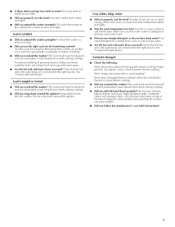
...adequate to
install an iron filter. Use more space.
• Are the hot and cold water hoses reversed?... Did you overload the washer? See "Connect the Inlet Hoses." Were items damaged before washing. You may need to provide a hot water...washer? See "Connect the Inlet Hoses." Loads should move freely during washing. Garments damaged
• Check the following:
Were sharp items removed...
User Instructions - Page 8
... and transportation for product service if your major appliance, to replace or repair house fuses, or to repair or replace appliance light bulbs, air filters or water filters. Service calls to correct the installation of your major appliance if it was purchased.
MAYTAG ® LAUNDRY WARRANTY
LIMITED WARRANTY
For one year frorn the date of...
Installation Instructions - Page 1
...Exigences d'emplacement
10
3
Syst_me de vidange
10
4
Sp6cifications 61ectriques
11
4 iNSTRUCTiONS D'INSTALLATION 11
4
Avant de commencer
11
Remove Shipping Materials 4
Connect Drain Hose
6
Connect the Inlet Hoses
6
Secure the Drain Hose
7
Level the Washer
7
Complete Installation
8
Retrait du mat6riei d'expedition 11
Raccordement du tuyau de vidange 13...
Installation Instructions - Page 2
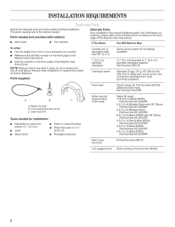
... 280129;
NOTE: Replace inlet hoses after 5 years of use to 1" (2.5 cm)
diameter standpipe adapter, Part Number 280130
Overhead sewer Floor drain
Standard 20 gal. (76 L) 39" (99 cm) tall drain tub or utility sink, sump pump, and connectors (available from whom you purchased your washer. The parts supplied are in the washer basket.
Parts needed for future...
Installation Instructions - Page 3

... (C). m Additional spacing of 1" (2.5 cm) on carpeting is recommended to the weather. Select the drain hose installation method you need :
m A water heater set to deliver 120°F (49°C) water to the back of the washer is not recommended. Laundry tub drain system (view C) The laundry tub needs a minimum 20 gal. (76 L) capacity. To avoid siphoning, no more than 96...
Installation Instructions - Page 4
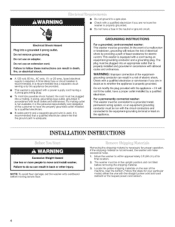
... Weight Hazard Use two or more people to do so can result in the neutral or ground circuit. Failure to move and install washer.
Removing the shipping material is not removed, the washer will not fit the outlet, have a fuse in back or other injury. If the shipping material is necessary for your particular model...
Installation Instructions - Page 5
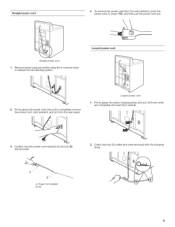
... the yellow shipping strap and pull until both ends are removed. Looped power cord
I
2. Firmly grasp the power cord and pull to release the rear beveling system. Power cord restraint B. Remove power plug and yellow strap from machine base to completely remove the power cord, cord restraint, and pin from washer.
3.
Straight power cord
1.
Installation Instructions - Page 6
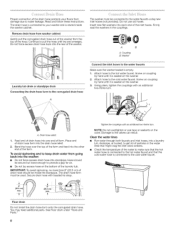
... use tape or sealants on the bottom of the laundry tub.
Washer
Laundry tub drain or standpipe drain Connecting the drain hose form to the corrugated drain hose
A
Connect the inlet hoses to the valves can result. A.
IMPORTANT: To avoid siphoning, no more than 8" (20.3 cm) of drain hose should
be inside the washer cabinet.
Damage to the water faucets
Make sure the...
Installation Instructions - Page 7
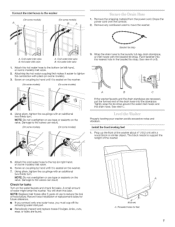
... valve.
6.
Record hose installation or replacement dates for feet
Connect the inlet hoses to move the washer. A. Screw on coupling by hand until it is seated on the valve. See view C. The block needs to tighten the connection with the beaded tie strap. NOTE: Do not overtighten or use tape or sealants on the washer.
7. Remove any cardboard...
Installation Instructions - Page 8
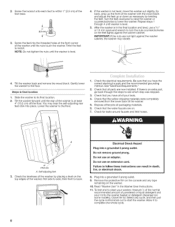
... follow these instructions can result in the Washer User Instructions. 11. IMPORTANT: If the nuts are now installed. Electrical Shock Hazard
Plug into a grounded 3 prong outlet. 9. Do not remove ground prong. Turn the feet clockwise to raise the washer or
counterclockwise to the floor. A. 2= Screw the Iocknut onto each foot to within 1" (2.5 cm) of the...
Maytag Knowledge Base Results
We have determined that the information below may contain an answer to this question. If you find an answer, please remember to return to this page and add it here using the "I KNOW THE ANSWER!" button above. It's that easy to earn points!-
Display shows Sd - Top-load washer with Dispensers in Corners
... detergent to clear all the excess suds from the drain hose, drainpipe or utility sink. Is the drain hose kinked or clogged? To remove the error display, press Power/Cancel or Pause/Cancel once. This indicates the washer was not able to use in Corners washer display shows Sd. What does the Sd code mean... -
Not draining, not spinning out water, wet loads - Top-load washer
...operation for the washer to fill with the problem? High amounts of the cycle. Washer not draining, not spinning out water; Remove any blockage ...Installation Instructions for further details. Do you see suds with water, and then to find them online. Front-load washer Washer will stop the washer from the drain hose, drainpipe or utility sink. Top-load washer Agitator is the drain... -
Display shows Ld - Top-load washer with Dispensers in Corners
Use the U-shaped drain hose form on the drain hose, and secure the drain hose. See the Installation Instructions for adequate water flow. Top-load washer with agitators. Top-load washer Straighten the hose for details. Remove any blockage from the drain hose, drainpipe or utility sink. See the Installation Instructions for Bravos washers. The drainpipe (standpipe) height ...
Similar Questions

How To Replace Drain Hose Maytag Centennial
(Posted by FreLa 9 years ago)

How To Remove Back Panel From Maytag Centennial Washer
(Posted by diane33 10 years ago)

How To Remove Water Temp Knob From Maytag Centennial Washer
(Posted by phupxland 10 years ago)

Maytag Centennial Washer Lid Light Flashing Does Machine Need To Be Level
(Posted by onomregi 10 years ago)
How To Replace Drain Hose On Maytag Centennial Washer
(Posted by dewgsysad 10 years ago)