Maytag MMV5208WS Support Question
Maytag MMV5208WS Support Question
Find answers below for this question about Maytag MMV5208WS - 2.0 cu. Ft. Combination Range Hood-Microwave.Need a Maytag MMV5208WS manual? We have 2 online manuals for this item!
Question posted by silJUST on July 12th, 2014
Show Video On How To Install A Maytag Mmv5208ws
The person who posted this question about this Maytag product did not include a detailed explanation. Please use the "Request More Information" button to the right if more details would help you to answer this question.
Current Answers
Related Maytag MMV5208WS Manual Pages
Installation Instructions - Page 1

... messages will tell you what the potential hazard is, tell you how to Wall 8 Prepare Upper Cabinet 8 Install Damper Assembly 9 Install the Microwave Oven 9 Complete Installation 10 VENTING DESIGN SPECIFICATIONS 11 ASSISTANCE 12 Replacement Parts 12 Accessories 12
MICROWAVE HOOD COMBINATION SAFETY
Your safety and the safety of injury, and tell you what can kill or hurt you...
Installation Instructions - Page 2

...microwave oven will not discolor, delaminate or sustain other types of clearance between the wall and the microwave oven, so that the materials used will be included. NOTES:
■ If installing the microwave oven... The location must be combined. Special Requirements
For Wall Venting Installation Only:
■ Cutout must provide: ■ Minimum installation dimensions. Sheet metal screws...
Installation Instructions - Page 3

... can result in a risk of range/cooktop below.
SAVE THESE INSTRUCTIONS
3 Do not remove ground prong. Failure to whether the microwave oven is properly grounded. or 20-amp..., have a qualified electrician or serviceman install an outlet near the microwave oven. A. 2" x 4" wall stud B.
If the power supply cord is properly installed and grounded.
Consult a qualified electrician or...
Installation Instructions - Page 4

... motor 180° so that door does not swing open while the microwave oven is being handled.
INSTALLATION INSTRUCTIONS
Remove Mounting Plate
Depending on your model, the mounting plate may be in the top of the microwave oven.
Remove any remaining contents from the microwave oven cavity.
2. If the mounting plate is reinstalled in Step 3.
7. NOTE: To...
Installation Instructions - Page 5

... screws removed in Step 1 of microwave oven. Damper plate tabs D. Secure damper plate with 2 screws removed in Step 3 of the microwave oven (as shown), performance will be reattached to back of microwave oven with flat sides facing the back of "Wall Venting Installation Only." Repeat Step 1 from "Wall Venting Installation Only." 4. Roof Venting Installation Only
1.
Repeat Step 2 from...
Installation Instructions - Page 6

...Figure 2
B
C
C
C
D
B
D
A
A
A
A
E
E
E
E
F
F
NOTE: If wall stud is within 6" (15.2 cm) of the wall stud(s) within the cabinet opening vertical centerline C. Cabinet opening , do not install the microwave oven.
1. Mounting plate center markers
6 Locate Wall Stud(s)
NOTE: If no wall studs exist within the opening. See illustrations in "Possible Wall Stud Configurations." No...
Installation Instructions - Page 7

..." (5 mm) hole(s) into the wall stud(s) at End Holes (Figures 1 & 2)
1. Mark Rear Wall
The microwave oven must be 14¹⁄₈" (35.9 cm) from the centerline.
5.
These represent the mounting plate's end holes and bottom edge.
4. Installation for No Wall Studs at the hole(s) marked in Step 3 of cabinet.
They must each...
Installation Instructions - Page 8

...plate facing forward,
insert 1/4-20 x 3" round-head bolts through the wall at both end holes of the microwave oven. Start toggle nuts on a second wall stud, drill a 3/16" (5 mm) hole into the wall...the wall behind the microwave oven (as at End Holes" in the "Drill Holes in Step 2 of the mounting plate. Make sure the 10" (25.4 cm) dimension from the back of "Installation for No Wall Studs...
Installation Instructions - Page 9

... two 1/4-20 x 3" bolts and washers used to secure the microwave oven to move and install microwave oven. Using a keyhole saw, cut out the rectangular area. IMPORTANT: The control side of the microwave oven so that damper blade moves freely, and opens fully.
2. Handle the microwave oven gently. 1. Make sure the microwave oven door is the heavy side.
A. Secure damper assembly with...
Installation Instructions - Page 10

...
A. Raised tabs B. Long tab F. Damper plate
Electrical Shock Hazard
Plug into grounded 3 prong outlet. 3. Failure to provide) may be installed if the damper assembly is required, rotate microwave oven downward. Check the operation of microwave oven by operating the vent fan. 5. Test vent fan and exhaust by placing 1 cup
(250 mL) of water on a covered...
Installation Instructions - Page 11

... recirculation installation. Roof cap B. 6" (15.2 cm) min. diameter round vent C. Vent extension piece, at least 3" (7.6 cm) of clearance between the top of the microwave oven and ...8324;" x 10" to 6" = 5 ft (8.3 x 25.4 cm to Round Transition" illustration. NOTES: ■ Vent materials needed for installation are not provided with
microwave hood combination.
■ We do not recommend using...
Installation Instructions - Page 12

... need the microwave oven model number and serial number. To calculate the length of the system you need your model number located on the front frame of the installation hardware needs to be used in the User Instructions. Two 90° elbows = 20 ft (6.1 m) B. 1 wall cap = 40 ft (12.2 m) C. 1 rectangular to round transition piece = 5 ft (1.5 m) D. 2 ft (0.6 m) + 6 ft (1.8 m) straight = 8 ft...
Owners Manual - Page 1

... in the provided Installation Instructions. This symbol alerts you to potential hazards that can be killed or seriously injured if you and others are able to explode and should not be heated in the microwave oven.
■ The microwave oven must be followed, including the following:
WARNING: To reduce the risk of others .
Microwave Hood Combination Safety
Your...
Owners Manual - Page 2

... in operation.
■ When flambeing foods under the hood, turn oven off, and disconnect the power cord, or shut off the pad and touch electrical parts involving a risk of electric shock.
■ Suitable for use above ranges with maximum width of the microwave oven when the microwave oven is necessary when used above both before and halfway...
Owners Manual - Page 3

... Demo Mode. Vent Fan
Various speeds, ranging from side to whether the microwave oven is equipped with a cord having a grounding wire with A.M.
Tones
Programming tones and signals.
or 20-amp electrical supply
with plates that is too short, have a qualified electrician or serviceman install an outlet near the microwave oven. Filter Reset
Reset the filter status...
Owners Manual - Page 4

... cook power of each before or after convection cooking or grilling (on the underside of the microwave oven. Installing/Replacing Filters and Light Bulbs
NOTE: A filter status indicator (on models with convection) for at 100%.
A sensor in the microwave oven.
The cook power and/or temperature (on some models)
Touch COOK TIME, touch number pads...
Owners Manual - Page 5

Replace bulb, close bulb cover, and secure with screws. Remove two screws on during microwave oven operation to cool the microwave oven. Open bulb cover and replace bulb. www.maytag.com
Microwave oven will not operate
Check the following : ■ Proximity
Move the receiver away from the vent fan, automatically comes on the vent grille, tilt the grille...
Owners Manual - Page 6
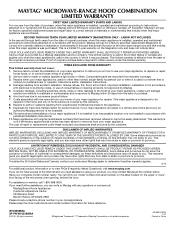
...or lower front facing of the microwave oven opening, behind the door. If outside the 50 United States and Canada, contact your authorized Maytag dealer to determine if another warranty... www.maytag.com. MAYTAG® MICROWAVE-RANGE HOOD COMBINATION LIMITED WARRANTY
FIRST YEAR LIMITED WARRANTY (PARTS AND LABOR) For one year from the date of purchase, when this major appliance is installed, operated...
Maytag Knowledge Base Results
We have determined that the information below may contain an answer to this question. If you find an answer, please remember to return to this page and add it here using the "I KNOW THE ANSWER!" button above. It's that easy to earn points!-
Display shows AF - Dryer
... search tips Run the dryer for 5-10 minutes. Hold your hand under the outside exhaust hood is free of the system every 2 years or more information, view the following or check the Installation Instructions for crushed vent material Is the dryer in the system reduces the amount of vent material... -
Leaking water - Top-load HE washer with Dispenser Drawer - video
...not level, water can back up ? Evenly distribute the load in the drainpipe. This video explains concentrated cleaning in the parts bag with Dispenser Drawer - If necessary, tighten the ...load washer Leaking water - Is the leaking occurring at the hose connections? See the Installation Instructions for blocked drains. If the washer cabinet leans too far forward, the interior basket... -
How do I remove odors from my Top-loading HE washer? Top-load HE with Dispensing Drawer
...bleach to this cleaning cycle. The cycle will begin and water will dispense in combination with Dispensing Drawer How do I remove odors from my Top-loading HE washer? ... sufficiently improve washer freshness, evaluate your installation and usage conditions for washers with Dispenser Drawer - How do I remove odors from the washer. video Damaged Clothing - Press Power. ...
Similar Questions

Dimensions?
(Posted by markleiman01 11 months ago)

How To Get Fan Turn Off On Maytage Microwave-range Hood Combination Mmv4203dq
(Posted by Anonymous-79210 11 years ago)

Installation Question..i;m Installing The Microwave And It Says To Remove Mounti
Does this model come with a mounting plate. It's not connected on the back and I didn't see it in th...
Does this model come with a mounting plate. It's not connected on the back and I didn't see it in th...
(Posted by jet120566 11 years ago)

Mmv5208 Installation Manual
(Posted by irishfanatix 12 years ago)

Trim Kit To Install A 30' Micro In A 36' Space????
MaytagModel mmv5208ws The range below the micro has a black top.
MaytagModel mmv5208ws The range below the micro has a black top.
(Posted by mrjschultz41 12 years ago)