Get support for Maytag MEDC400VW - Centennial Electric Dryer

Maytag MEDC400VW Support Question

Maytag MEDC400VW Support Question

Find answers below for this question about Maytag MEDC400VW - Centennial Electric Dryer.
Need a Maytag MEDC400VW manual? We have 2 online manuals for this item!
Question posted by mb8186 on January 18th, 2014

Dryer Will Not Turn Off Timer Has Been Replaced

i had to replaced my heating element because the dryer would not start afterwards the dryer would not turn off in time mode it would move to cool down and the run for hours. replaced the timer no help

Current Answers

There are currently no answers that have been posted for this question.
Be the first to post an answer!

Remember that you can earn up to 1,100 points for every answer you submit. The better the quality of your answer, the better chance it has to be accepted.

Related Maytag MEDC400VW Manual Pages

Owners Manual - Page 2

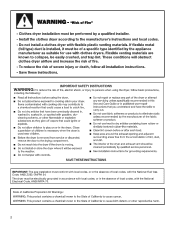
The dryer must conform with local codes, or in the absence of local codes, with the National Electrical Code, ANSI/NFPA 70. 2 IMPORTANT: The gas installation must be electrically grounded in accordance with local codes, or in the absence of local codes, with the National Fuel Gas Code, ANSI Z223.1/NFPA 54.
Owners Manual - Page 3

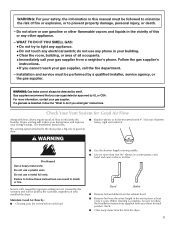
...in a vent system; Failure to efficiently dry laundry. Good Better ■■ Remove lint ... light any appliance. • Do not touch any electrical switch; If a gas leak is complete, be paid...times and improve your dryer for Good Air Flow Along with heat, dryers require good air flow to follow the "What to the dryer plays a big role in good air flow. ■■ Replace...
Owners Manual - Page 4

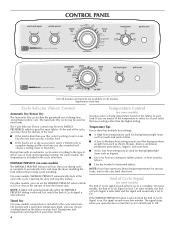
.... End of load, and temperature setting. Cycle Selector (Timer) Control Automatic Dry/Sensor Dry The Automatic Dry cycle takes the guesswork out of Cycle Signal is selectable and the signal will run after your load. It periodically starts and stops the dryer, tumbling the load without heat to On. On some models) The WRINKLE PREVENT...
Owners Manual - Page 6

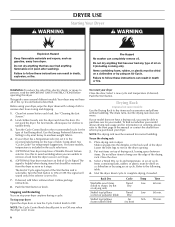
... the dryer. Turn the Cycle Control knob to tumble freely. 3. To use . Lower the front legs to shape, lay flat on the dryer opening. 2. Rack Dry Washable wool items (block to rest on drying rack) Stuffed toys/pillows (cotton or polyester filled) Stuffed toys/pillows (foam rubber filled) Cycle Timed Dry Timed Dry Air (no heat...
Owners Manual - Page 7

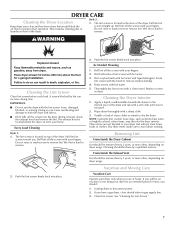
... a load of clean cloths or towels to avoid drum staining. If you . This includes clearing piles of laundry in dryer. Cleaning the Lint Screen Clean lint screen before each load. IMPORTANT: ■■ Do not run the dryer with a damp cloth. 3. Roll lint off the screen with a clean towel. The lint screen is located...
Owners Manual - Page 8

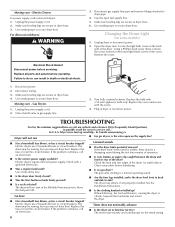
.... Use a time-delay fuse. ■■ Is the dryer door firmly closed? ■■ Was the Start button or knob firmly pressed? ■■ Is a cycle selected? The timer moves slowly and continuously for small objects. Moving care - Unplug dryer or disconnect power. 2. Replace the bulb with a qualified electrician. In U.S.A. Electric dryers use 2 household...
Owners Manual - Page 9

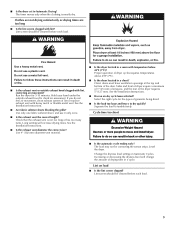
...;■ Has an air dry cycle been selected? Failure to dry quickly? Level the dryer. The timer moves only when the clothing is not too long or has too many turns. Clothes are not drying satisfactorily or drying times are too long ■■ Is the lint screen clogged with heavy metal or flexible...
Owners Manual - Page 10

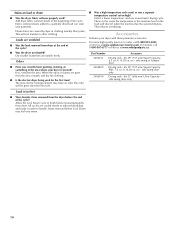
... only Drying rack - Items removed before removing laundry from dryer at the beginning of the cycle. Dry smaller loads that can stain your garments. In Canada, call 1-800-901-2042, or visit us at www.applianceaccessories.com. Fabric softener sheets added to handle. The new electric heating element may feel very warm. 10 side swing...
Owners Manual - Page 11

... flood, acts of God, improper installation, installation not in accordance with electrical or plumbing codes, or use your major appliance, to replace or repair house fuses, or to correct house wiring or plumbing. 3....of purchase. 6. In Canada, call 1­800­688­9900. MAYTAG® LAUNDRY WARRANTY LIMITED WARRANTY For one year from the date of purchase, when this major appliance ...
Installation Instructions - Page 1

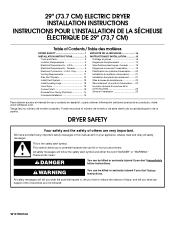
... you to reduce the chance of Contents / Table des matières DRYER SAFETY 1 INSTALLATION INSTRUCTIONS 2 Tools and Parts 2 Location Requirements 2 Electrical Requirements - All safety messages will tell you what the potential hazard is the safety alert symbol. 29" (73.7 CM) ELECTRIC DRYER INSTALLATION INSTRUCTIONS INSTRUCTIONS POUR L'INSTALLATION DE LA SÉCHEUSE ÉLECTRIQUE...
Installation Instructions - Page 2

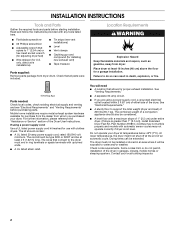
... U.S. Place dryer at least 4 ft (1.22 m) long. See "Venting Requirements." ■ A separate 30-amp circuit. ■ If you purchased your dryer. Drying times can result in... Remove parts package from dryer drum. See "Electrical Requirements." ■ A sturdy floor to do not permit, installation of the Dryer User Instructions. At lower temperatures, the dryer might not shut off at...
Installation Instructions - Page 3

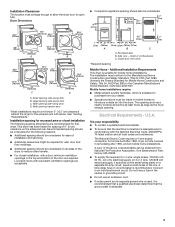
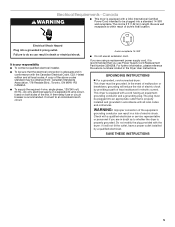
... The installation must conform to an individual branch circuit. Large opening side-swing door D. Electrical Requirements - Wide opening side-swing door C. closet or confined area C. It is available for this dryer. Small opening . See "Venting Requirements." A time-delay fuse or circuit breaker is adequate. 3 Connect to the Manufactured Home Construction and...
Installation Instructions - Page 4

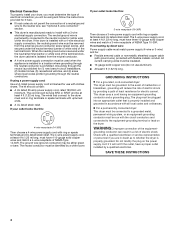
... a permanently connected dryer: This dryer must be connected to a grounded metal, permanent wiring system, or an equipment-grounding conductor must be run with clothes dryers. SAVE THESE INSTRUCTIONS...NEMA Type 10-30R. WARNING: Improper connection of least resistance for electric current. Do not modify the plug on the dryer. The 4-wire power supply cord, at least 4 ft (1.22...
Installation Instructions - Page 5

... circuit, fused on both sides of least resistance for electric current. Electrical Requirements - WARNING: Improper connection of dryer's final location. Failure to whether the dryer is recommended that the electrical connection is properly installed and grounded in conformance with all local codes. If you are using a replacement power supply cord, it will reduce the risk of...
Installation Instructions - Page 7

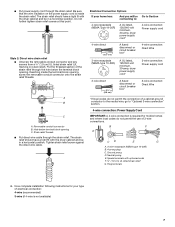
... fit with the dryer cabinet and be in a horizontal position. Tighten strain relief screw against the direct wire cable. Electrical Connection Options If your type of electrical connection: 4-wire ...A fused disconnect or circuit breaker box* A UL listed, 120/240-volt minimum, 30-amp, dryer power supply cord* 4-wire connection: Direct Wire 3-wire connection: Power supply cord 3-wire direct 3&#...
Installation Instructions - Page 8

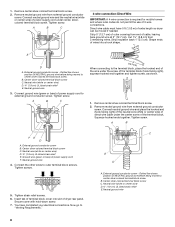
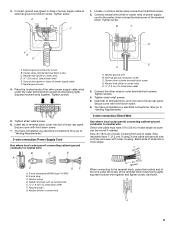
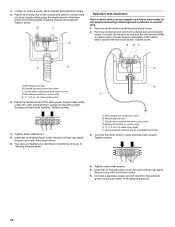
... screw. Dotted line shows position of power supply cord F. Direct wire cable must have completed your electrical connections. Strip insulation back 1" (2.5 cm). B. Squeeze hooked ends together. Tighten screw. External ground... wire under center, silvercolored terminal block screw. Shape ends of extra length so dryer can be moved if needed. Connect neutral ground wire and place the hooked end...
Installation Instructions - Page 9

Connect ground wire (green or bare) of dryer rear panel. Tighten screws. 5. You have completed your electrical connections. Insert tab of terminal block cover into... cover with hold -down screw. 7. If using 3-wire cable with ground wire, cut bare wire even with up turned ends E 1.9 cm) UL listed strain relief F. 3. Connect neutral wire (white or center wire) of power supply...
Installation Instructions - Page 10

... ends of terminal block (hook facing right). Squeeze hooked ends together. You have completed your electrical connections. External ground conductor screw B. Neutral wire (white or center wire) E. ¾" ...screw. 6. Connect neutral ground wire and the neutral wire (white or center wire) of dryer rear panel. External ground conductor screw C. Secure cover with hold -down screw. 6. ...
Installation Instructions - Page 11

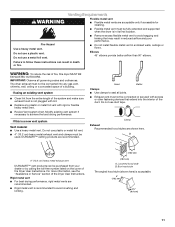
...Remove excess flexible metal vent to follow these instructions can be connected or secured with lint. ■ Replace any gas vent, chimney, wall, ceiling or a concealed space of the system and make sure exhaust ....2 cm) heavy metal exhaust vent and clamps must be fully extended and supported when the dryer is in its final location. Good Better Clamps ■ Use clamps to achieve the best...
Installation Instructions - Page 15

.... 7. When the dryer has been running or "On" position. ■ Start button has been pushed firmly. ■ Dryer is plugged into an outlet and/or electrical supply is level. If there is first used. This odor is common when the heating element is still no heat, contact a qualified technician. Check that the dryer is on a full heat cycle (not an...

Maytag Knowledge Base Results

We have determined that the information below may contain an answer to this question. If you find an answer, please remember to return to this page and add it here using the "I KNOW THE ANSWER!" button above. It's that easy to earn points!

  • Recall Information
    ... Gas Dryer 2002 - Trademarks of Maytag Corporation or its related Companies //Terms of dishwasher heating element failures that resulted in receiving incident or injury reports that pose a fire, electrical, chemical...or MDBH979; KitchenAid® Hazard: An electrical failure in -home repair or receive a rebate following sequences: SERIAL number STARTING with us about it by visiting https://...
  • Sabbath Mode - Oven
    ... other functions except Bake (Timer, Keep Warm, Clean, etc.) are inactive except Cancel and Clock. Hold can be turned off after 12 hours if you unintentionally leave it must be turned on before the Sabbath Mode is started . To cancel the Sabbath Mode: Press the Clock pad for three seconds. The time of the baking cycle. Sabbath...
  • My dryer or load has an odor
    ...;To avoid this, do not run the dryer while painting, varnishing or refinishing near the dryer. My dryer makes sounds or vibrations Fabric is on the load because the dryer pulls in the washer or dryer for the first time? (Electric dryers) A new electric heating element may have an odor. The odor is too hot - Dryer My dryer or load has an odor...

Similar Questions

How Do I Remove The Heating Element On The Maytag Model Mede251yl To Replace It
How do I remove the heating element on the Maytagmodel MEDE251YL to replace it
(Posted by jaydufour 9 years ago)
What Causes Heat Element To Heat Up Before Dryer Turns On?
A maytag electric dryer model: MEDC400VW0 , you turn timer to choiced dry setting and heater starts ...
(Posted by judy218 9 years ago)
How To Replace The Heating Element On A Maytag Mde2400ayw Dryer Read More: How
to replace the heating element on a maytag mde2400ayw dryer diagram
(Posted by chka 10 years ago)
How Do You Replace The Heating Element On A Maytag Centennial Dryer Medc400vw
dryer heats sometimes and then not other times in all cycles
(Posted by mbmassey 11 years ago)
Ask a New Question
Use the box below to post a new question about this Maytag product .
Points & Prizes
  • You can earn points for nearly everything you do on HelpOwl.com
  • You can trade in those points for gift cards at leading retailers such as Amazon.com and Walmart
  • It's that simple!
See How it Works
Create a Free Account

Maytag Manuals

Find free Maytag MEDC400VW - Centennial Electric Dryer manuals and user guides available at ManualOwl.com. Try out our unique manual viewer allowing you to interact with manuals from directly within your browser!

Maytag Reviews

View thousands of Maytag user reviews and customer ratings available at ReviewOwl.com.

Contact Information

Complete Maytag customer service contact information including steps to reach representatives, hours of operation, customer support links and more from ContactHelp.com.

Scoreboard Ratings

See detailed Maytag customer service rankings, employee comments and much more from our sister site.

Maytag Recalls

Find comprehensive Maytag recall information updated hourly on RecallOwl.com.