Maytag MDE2400AYW Support Question
Maytag MDE2400AYW Support Question
Find answers below for this question about Maytag MDE2400AYW - 3.7 cu. Ft. Electric Dryer.Need a Maytag MDE2400AYW manual? We have 2 online manuals for this item!
Question posted by Rudvo on November 17th, 2015
Dryer Will Not Turn On, Lights Are Blinking
The person who posted this question about this Maytag product did not include a detailed explanation. Please use the "Request More Information" button to the right if more details would help you to answer this question.
Current Answers
Answer #1: Posted by TechSupport101 on November 17th, 2015 9:40 AM
TechSupport101

Member since:
May 24th, 2013 Points: 12,171,305

Member since:
May 24th, 2013 Points: 12,171,305
Hi. Possible causes (assuming you are certain the door closes properly).
- Bad console control board
- Heating thermistor
Do see the troubleshooting guide on page 11 of the Owners Manual here https://www.helpowl.com/manuals/Maytag/MDE2400AYW/21586
Related Maytag MDE2400AYW Manual Pages
Owners Manual - Page 1
... the Lint Filter Load the Dryer Properly Start/Pause Turn the Dryer Off Estimated Time Display Cycle Status Lights
Using the Controls 5-7
Select Cycle Select Dryness Level Select Temperature Select Options Press Start/Pause
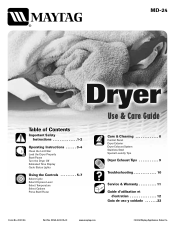
Use & Care Guide
Care & Cleaning 8
Control Panel Dryer Exterior Dryer Exhaust System Stainless Steel Special Laundry Tips
Dryer Exhaust Tips 9
Troubleshooting 10
Service...
Owners Manual - Page 2
...in severe personal injury or death. Keep sales receipt and/or canceled check as your clothes dryer, can create a fire hazard. All washed and unwashed fabrics that have questions, call ...and keep this appliance. Eastern Time) Internet: http://www.maytag.com
U.S.A. Always contact your dryer items that contain vegetable oil or cooking oil can ignite spontaneously. Do not place into your...
Owners Manual - Page 3

...the right to the drying compartment.
5. There are many highly flammable items used in your dryer; Items containing foam rubber (may contribute to carry out.
9. Before the appliance is removed... from lint accumulation, dust and dirt.
12. The interior of fire, explosion, electric shock, or personal injury when using the appliance.
2. Note
• Because of these flammable...
Owners Manual - Page 4
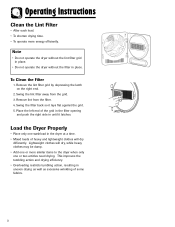
...grid by depressing the latch on the right end.
2. Remove lint from the grid. 3. Load the Dryer Properly
• Place only one or two articles need drying. Swing the lint filter away from the ... 4. Place the left end of the grid in the filter opening
and push the right side in the dryer at a time. • Mixed loads of some fabrics.
3 This improves the tumbling action and drying efficiency...
Owners Manual - Page 5
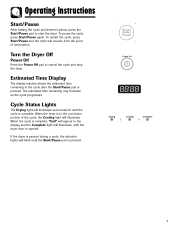
Turn the Dryer Off
Power Off
Press the Power Off pad to start the dryer. When the dryer is in the cool down portion of interruption. Operating Instructions
Start/Pause
After setting the cycle and desired options, press the Start/Pause pad to cancel the cycle and stop the dryer.
Cycle Status Lights
The Drying light will blink until...
Owners Manual - Page 6
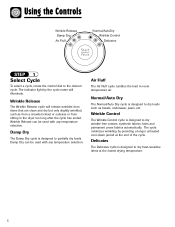
... to partially dry loads. Air Fluff
The Air Fluff cycle tumbles the load in the dryer too long after the cycle has ended.
Wrinkle Release
The Wrinkle Release cycle will illuminate....automatically. Wrinkle Control
The Wrinkle Control cycle is designed to the desired cycle. The indicator light by providing a longer unheated cool-down period at the lowest drying temperature.
5 The cycle...
Owners Manual - Page 7

...pad repeatedly to scroll through the settings. Use the chart below as a guide:
DRYER TEMPS
LOAD TYPE
Regular
For sturdy cottons or those labeled Tumble Dry. Press the pad repeatedly...the settings.
An indicator light will illuminate next to the desired temperature. Low
For heat sensitive items labeled
Tumble Dry Low or Tumble Dry
Warm.
6 An indicator light will illuminate next to ...
Owners Manual - Page 8

... Prevent pads for 3 seconds. If the door is displayed. The Child Lock indicator light will go out. The Child Lock indicator light will illuminate.
To lock the controls, press and hold the Chime and Wrinkle Prevent pads for the dryer to operate. STEP 5
Press Start/Pause
Press this pad to the cycle, press...
Owners Manual - Page 9
...
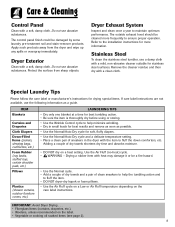
Clean with a clean cloth. Protect the surface from the dryer and wipe up any spills or overspray immediately. The outside exhaust hood should be damaged by some laundry pre-treatment soil and stain-remover products. The control panel finish could be cleaned more information. Remove the cleaner residue and then dry with...
Owners Manual - Page 10

...Use longer than necessary duct runs with a poor exhaust system.
Never use and care guide.
Dryer Exhaust Tips
WARNING
Plastic or nonmetal flexible duct presents a potential fire hazard. Don't
Let ...slow drying.
Do
Use 4" diameter rigid metal duct.
Do
Clean all joints, including at the dryer. Do
Read the installation instructions and the use lint-trapping screws. Do
Keep duct runs as ...
Owners Manual - Page 11
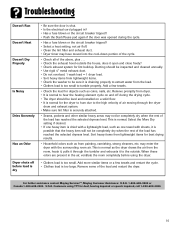
...Sort heavy items from the room, heats it, pulls it is shut. • Is the electrical cord plugged in the air, ventilate the room completely before load is dry
• Be ... is normal. Troubleshooting
Doesn't Run Doesn't Heat Doesn't Dry Properly
Is Noisy
Dries Unevenly
Has an Odor Dryer shuts off during the cycle.
• Has a fuse blown or the circuit breaker tripped? • Select...
Owners Manual - Page 12
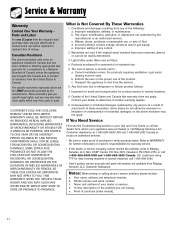
...: When writing or calling about a service problem, please include:
a. A clear description of residence from state to refrigerator or freezer product failures.
7. Incorrect electric current, voltage, electrical and/or gas supply. Light bulbs, water filters and air filters.
4. If You Need Service
First see the Troubleshooting section in remote locations.
8. customers using TTY for...
Installation Instructions - Page 2
... exhaust ducting.
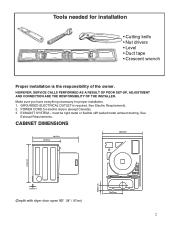
POWER CORD for proper installation. 1. CABINET DIMENSIONS
24" / 60 cm
33.5" / 85 cm
24" / 60 cm (Depth with dryer door open 90o -3388".2/ 59"7c/ m97) cm)
2 See Electric Requirements. 2. Tools needed for installation
Printed in U.S.A.. • Impreso en los Estados Unidos • Stampato negli Stati Uniti (revised 06/23...
Installation Instructions - Page 3

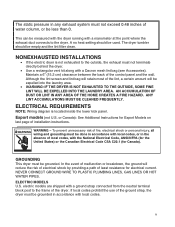
... EXPOSED TO WATER AND/OR WEATHER. See EXHAUST INFORMATION section.
• Minimum clearances between dryer cabinet and adjacent walls or other fuel-burning appliance installed in the same closet.
•... WARNING: To reduce the risk of fire, this closet contains both a washer and a dryer, doors must contain a minimum of 60 in2 (152.5 cm2) of open area equally distributed.
To...
Installation Instructions - Page 4
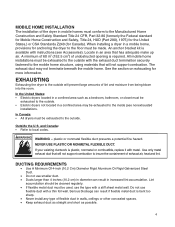
...to the outside with metal. In the United States: • Electric dryers located in a confined area such as possible.
4 If your existing ductwork is required. MOBILE HOME ... cleaned regularly. • If flexible metal duct must be exhausted to the outside . • Electric dryers not located in mobile homes must be exhausted to the outside will prevent large amounts of lint and...
Installation Instructions - Page 5
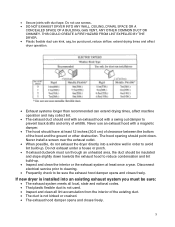
Disconnect electrical service prior to cleaning.
• Frequently check to be punctured, reduce airflow, extend drying times and affect
dryer operation.
• Exhaust systems longer than ...house or porch.
• If exhaust ductwork must be insulated and slope slightly down .
If new dryer is not kinked or crushed. • The exhaust hood damper opens and closes freely.
5 The hood...
Installation Instructions - Page 6
...dryer.
or Canada): See Additional Instructions for electrical current. NONEXHAUSTED INSTALLATIONS
• If the electric dryer is located inside the lower kick panel. To prevent unnecessary risk of fire, electrical... be expelled into the laundry area.
• WARNING: IF THE DRYER IS NOT EXHAUSTED TO THE OUTSIDE, SOME FINE LINT WILL BE EXPELLED INTO THE LAUNDRY AREA. The static pressure...
Installation Instructions - Page 7
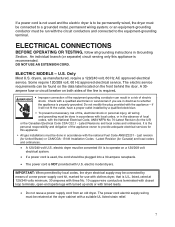
...and ordinances. • A 120/240-volt U.S. Check with clothes dryer, that is U.L. IMPORTANT: When permitted by local codes, the dryer electrical supply may be connected by a qualified electrician. • To ...with closed loop terminals, open-end spade lugs with turned up ends or with the national Fuel Code ANSI/Z2231 - The power cord electric supply wiring must be run with a suitable UL...
Installation Instructions - Page 8
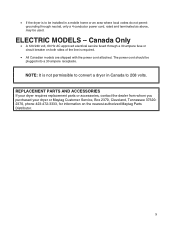
NOTE: It is required.
• All Canadian models are shipped with the power cord attached. ELECTRIC MODELS - REPLACEMENT PARTS AND ACCESSORIES
If your dryer requires replacement parts or accessories, contact the dealer from whom you purchased your dryer or Maytag Customer Service, Box 2370, Cleveland, Tennessee 373202370, phone 423-472-3333, for information on...
Installation Instructions - Page 12
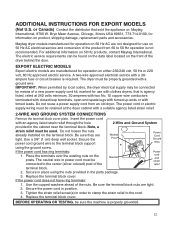
... be connected to 50 Hz operation is agency listed, rated at the dryer cabinet with a ground wire. The electric service requirements can be retained at 240 volts minimum, 30 amperes with ...two No. 10 copper wire conductors terminated with closed loop terminals, open-end spade lugs with turned up...
Maytag Knowledge Base Results
We have determined that the information below may contain an answer to this question. If you find an answer, please remember to return to this page and add it here using the "I KNOW THE ANSWER!" button above. It's that easy to earn points!-
Dryer does not heat - Electric dryer
...Model Number How do I find my model number? Dryer Dryer does not heat - Electric dryer My electric dryer does not heat. Did you recently install a power...Electric dryers use 2 household fuses or circuit breakers. The Air Fluff or Air Only temperature does not add heat to dry. Air Fluff or Air Only temperature can be found on the dryer? The power supply cord may be turning... -
Display shows L2 - Dryer
... the L2 code on , even if the dryer drum is turning and the load is the load not tumbling? Press any key to schedule service. Select a Timed Dry heated cycle, and restart the dryer. If the problem continues, call an electrician. Electric dryer The drum may not have heat? Did you... -
Can I turn off the button tones on my Bravos® dryer?
dryer? To turn off the invalid selections beeps. Can I turn on my Bravos® The controls will still light up when you open the door or touch the controls. To turn off the tones: Touch any button or open the door to activate the controls. Hold the End Signal button for 5 seconds. This...
Similar Questions

Dryer Turns On And Has Power But Wont Start
dryer turns on and has power but wont start
dryer turns on and has power but wont start
(Posted by winnielou3 8 years ago)

What Is The Average Dry Time For Maytag Dryer Mde2400ayw
(Posted by lencjfr19 9 years ago)

How To Put On Replacement Belt On Maytag Dryer Mde2400ayw
(Posted by herh 10 years ago)

How To Test Heating Coil For Dryer Mde2400ayw
(Posted by aogradebi 10 years ago)

How To Replace Drive Belt On Maytag Dryer Mde2400ayw
(Posted by plantna 10 years ago)