Lexmark X7550 Support Question
Lexmark X7550 Support Question
Find answers below for this question about Lexmark X7550.Need a Lexmark X7550 manual? We have 2 online manuals for this item!
Question posted by tinalocker on August 19th, 2012
How Do I Change The Print Size To Make It Bigger When It Prints?
The person who posted this question about this Lexmark product did not include a detailed explanation. Please use the "Request More Information" button to the right if more details would help you to answer this question.
Current Answers
Answer #1: Posted by LexmarkListens on August 20th, 2012 11:31 AM
LexmarkListens

Member since:
July 1st, 2011 Points: 1,410,540

Member since:
July 1st, 2011 Points: 1,410,540
Related Lexmark X7550 Manual Pages
User's Guide - Page 5

... ...71 Printing on custom-size paper ...71 Printing iron-on transfers ...71 Printing transparencies...72 Printing a banner ...72 Printing on both sides of the paper (duplexing 72 Understanding the two-sided printing (duplexing) function 72 Printing on both sides of the paper (duplexing) automatically 73 Printing on both sides of the paper (duplexing) manually 73 Changing printer settings...74...
User's Guide - Page 42

...user default settings.
Change Printer Default Settings
Specify the values you want for each of the Print File settings and save the values as the new user default settings. Change Copy Default Settings
..., press to the user default setting.
42
Note: While this
To
Paper Handling
Specify the size and type of paper loaded.
An asterisk (*) appears next to save the values as user ...
User's Guide - Page 67
....
3 Wait for the printer to save the values as user default settings and exit.
For more information, see "Using the Paper Handling submenu" on page 63.
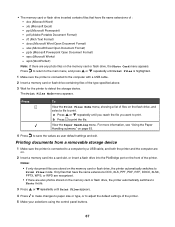
4 Press to detect the storage device. The Print Files Mode menu appears. a Press or repeatedly until Print Files appears.
4 Press to make changes to paper size or type, or to...
User's Guide - Page 75
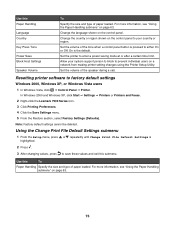
... Change Print File Default Settings is highlighted.
2 Press .
3 After changing values, press to either On or Off.
Set the volume of paper loaded. Change the language shown on the control panel to enter a power saving mode at or after a certain time limit.
For more information, see "Using the Paper Handling submenu" on a network from making printer...
User's Guide - Page 80

..., and values to make additional changes, continue to use the navigation buttons ( , , , and ).
• Press repeatedly to return to the previous menu, if needed.
4 Press to start printing the photo job. ... you can :
• Press or
• Press or to change print settings, or see a print preview. • To go into the printer. 1 From the control panel, press or repeatedly until you reach ...
User's Guide - Page 111

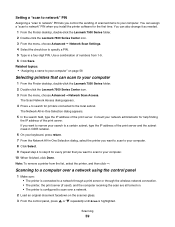
Scanning to a computer over a network using the control panel
1 Make sure: • The printer is connected to a network through a print server or through the wireless network connection. • The printer, the print server (if used), and the computer receiving the scan are all turned on. • The printer is configured to scan over a network.
2 Load an original...
User's Guide - Page 119
... Press or
repeatedly until Fax Setup is highlighted.
5 Press . 6 Press or
repeatedly until Fax Printing is highlighted.
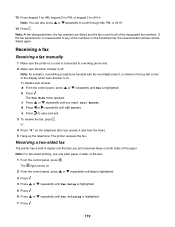
Note: An indicator, resembling a telephone handset with the word FAX under it and ...a two-sided fax
The printer has a built-in letter or A4-size.
1 From the control panel, press . Receiving a fax
Receiving a fax manually
1 Make sure the printer is connected to all of...
User's Guide - Page 150
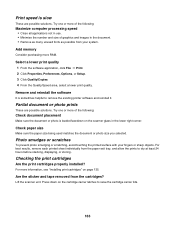
... reception improves if you experiment with the internal wireless print server already installed. Try one or more information, see "Check your computer and/or printer
Move the computer and/or printer closer to join the network because of the following :
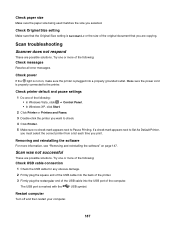
Check power
Make sure the printer power light is not lit". Reinstall software
Uninstall and...
User's Guide - Page 163
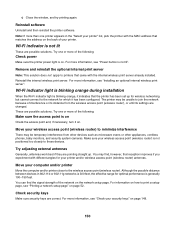
... paper exit tray, and allow the prints to dry at least 24 hours before stacking, displaying, or storing. Press down on the cartridge carrier latches to remove the existing printer software and reinstall it.
Check paper size
Make sure the paper size being used matches the document or photo size you selected.
Remove and reinstall the...
User's Guide - Page 169
... the following :
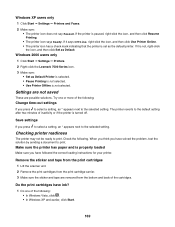
Change time-out settings
If you have followed the correct loading instructions for your printer. The printer reverts to print. When you think you press to select a setting, an * appears next to the selected setting.
Windows XP users only 1 Click Start ΠSettings ΠPrinters and Faxes. 2 Make sure:
• The printer icon does not...
User's Guide - Page 170

...printing another job
Wait until the printer has finished printing all fonts are designed to fix these problems, and then save the changes for more square end of the USB cable is plugged into the back of the printer...Not all other print jobs before sending this port.
2 Make sure that the USB cable is not possible if certain Spool Settings are trying to print may not be printed;
Use the ...
User's Guide - Page 171
... the computer screen. Next, test the solution by the
USB symbol.
Try printing a different image. Select Photo from the Quality/Copies tab in Printing Preferences. 1 Click File ΠPrint. 2 Click Properties, Preferences, Options, or Setup. 3 From the Quality/Copies tab, make changes as the Printer Status on . Is there a problem with the program? For more of...
User's Guide - Page 187
... the light is Automatic or the size of the following :
Check messages
Resolve all error messages. Scan was not successful
These are possible solutions. Restart computer
Turn off and then restart your computer.
187 If a check mark appears next to the printer. Check paper size
Make sure the paper size being used matches the size you print.
User's Guide - Page 220
... Default Settings submenu 82 Change Print File Default Settings submenu 75 Change Printer Default Settings submenu 74 Change Scan Default Settings submenu 110 changing temporary files preferences 86 changing default settings copy 105 scan 110 changing e-mail screen preferences 114 changing gamma value of a photo or image 90 changing library preferences 86 Changing photo resolution/size 88
220
User's Guide - Page 224

...duplex unit 181 paper jam in the paper support 179 paper jam in the printer 179 paper or photo size error 202 paper or specialty media misfeeds 179 paper support 18 paper type
choosing...photo paper, loading 57 Photo resolution/size changing 88 photo scratches 163 photo smudges 163 photo, changing gamma value 90 photos automatic red-eye reduction 88 changing print settings 81 copying photo using the ...
User's Guide (Mac) - Page 59
You can also change it as needed.
1 From the Finder desktop, double-click the Lexmark 7500 Series folder. 2 Double-click ... to scan to scan over a network using the control panel
1 Make sure: • The printer is connected to a network through a print server or through the wireless network connection. • The printer, the print server (if used), and the computer receiving the scan are all ...
User's Guide (Mac) - Page 74

Sending a fax
Entering a fax number
1 Make sure the printer is on and it is connected to
Enter .... • A fax number can include a calling card number as part of the paper. • The paper size fits within these dimensions:
Width: - 210.0 mm-215.9 mm - 8.27 in.-8.5 in .
• You ... Feeder tray.
• You do not use media printed with Name Search highlighted. c Press . Faxing
74
User's Guide (Mac) - Page 118

... can :
• Press or • Press or
to change print settings, or see a print preview. • To go into the printer.
1 From the control panel, press or repeatedly until you ....
Press or to start printing the photo job. When all the values have inserted a memory card or flash drive into other submenus, menu items, and values to make additional changes, continue to use the navigation...
User's Guide (Mac) - Page 120

... the quality of the photo or photos to the printer.
2 When the control panel display indicates, press . Editing photos The following tools are selected from your camera. Use this
To
Change Print Settings Change print settings. For more information, see "Using the Photo Default Settings menu" on making camera selections, see the documentation that are used...
User's Guide (Mac) - Page 175

...change the print size setting, change the print size selection to 4 x 6 in. (10 x 15 cm) on the typically used matches the size you are trying to print from the paper exit tray, and allow the prints to make sure your chosen photo size... • Try minimizing the number and size of 4 x 6" or L. You may have left the printer control panel Photo Size menu item setting at least 24 hours ...
Similar Questions

Lexmark X7550 Printer Won't Print Window Office Document
(Posted by MiHopkg5 10 years ago)


How To Change Print Last Page First On Lexmark X7550
(Posted by lililKaput 10 years ago)

Need Two Set Of Hinges
I need to replace hinges for printer X7550
I need to replace hinges for printer X7550
(Posted by jefalconettd1 12 years ago)