Get support for KitchenAid KHMS2040WSS

KitchenAid KHMS2040WSS Support Question

KitchenAid KHMS2040WSS Support Question

Find answers below for this question about KitchenAid KHMS2040WSS.
Need a KitchenAid KHMS2040WSS manual? We have 3 online manuals for this item!
Question posted by wjlocascio on February 15th, 2012

There Seems To Be A Gasket Hanging Between The Glass On The Door. How Do Open?

The person who posted this question about this KitchenAid product did not include a detailed explanation. Please use the "Request More Information" button to the right if more details would help you to answer this question.

Current Answers

There are currently no answers that have been posted for this question.
Be the first to post an answer!

Remember that you can earn up to 1,100 points for every answer you submit. The better the quality of your answer, the better chance it has to be accepted.

Related KitchenAid KHMS2040WSS Manual Pages

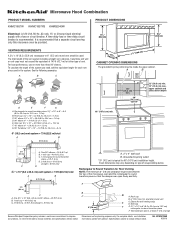
Dimension Guide - Page 1

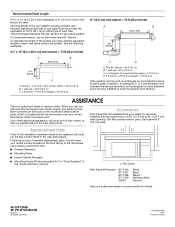
...OPENING DIMENSIONS The grounded 3-prong outlet must not exceed the equivalent of 140 ft (42.7 m) for Roof Venting NOTE: The minimum 3" (7.6 cm) clearance must exist between the top of range/cooktop below. Exact dimensions may vary depending on type of the microwave oven...round transition piece so that a separate circuit serving only this microwave oven be provided. 17 " (43.8 cm) 16 " (41...
Installation Guide - Page 1

...INSTRUCTIONS This product is suitable for further notes. Table of Contents MICROWAVE HOOD COMBINATION SAFETY 1 INSTALLATION REQUIREMENTS 2 Tools and Parts 2 ... 8 Install Damper Assembly 9 Install the Microwave Oven 9 Complete Installation 10 VENTING DESIGN SPECIFICATIONS 11 ASSISTANCE 12 Replacement Parts 12 Accessories 12 MICROWAVE HOOD COMBINATION SAFETY Your safety and the safety...
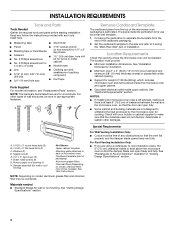
Installation Guide - Page 2

... be installed. The location must be included. Check with any obstructions so that the door can open fully. ■ Some cabinet and building materials are not designed to it during the "Mark Rear Wall" part of clearance between the wall and the microwave oven, so that the vent fits properly, and the damper blade...
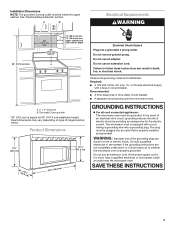
Installation Guide - Page 3

...min. 14" (35.6 cm) max. or 20-amp electrical supply with a grounding plug. The microwave oven is typical for the electric current. The plug must be inside the upper cabinet. Do not use...the grounding plug can result in a risk of electric shock. Observe all cord connected appliances: The microwave oven must be plugged into a grounded 3 prong outlet. A. 2" x 4" wall stud B. WARNING...
Installation Guide - Page 4

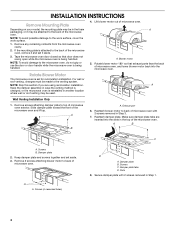
... model, the mounting plate may be in the foam packaging, or it aside. 3. Remove any remaining contents from the microwave oven cavity. 2. A A. Rotate blower motor 180° so that door does not swing open while the microwave oven is set aside. 3. For wall or roof venting, changes must be made to the work surface, cover the...
Installation Guide - Page 5

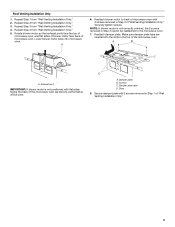
... flat sides facing the back of "Wall Venting Installation Only." Damper plate tabs D. A B C A. Screws C. Slots 8. Lower blower motor back into the slots in Step 1 of microwave oven. Damper plate B. Secure damper plate with 2 screws removed in Step 3 cannot be poor. Roof Venting Installation Only 1. Repeat Step 1 from "Wall Venting Installation Only." 3. Reattach...
Installation Guide - Page 6

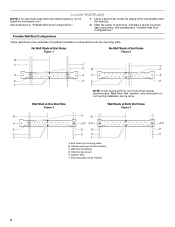
... Hole Figure 3 Wall Studs at End Holes Figure 2 B C C C D B D A A A A E E E E F F NOTE: If wall stud is within 6" (15.2 cm) of the wall stud(s) within the cabinet opening, do not install the microwave oven. 1. Using a stud finder, locate the edges of the vertical centerline (see "Mark Rear Wall" section), only recirculation or roof venting installation can be...
Installation Guide - Page 7

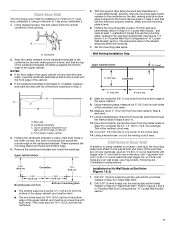
... The blackened holes in the lower corners, and draw a horizontal line across the bottom edge of the opening. Using measuring tape, measure out 6" (15.2 cm) on both end holes are not over wall ...area. Front edge of "Mark Rear Wall." Following are ideal hole locations. 7. Mark Rear Wall The microwave oven must be on a level line with each be 14¹⁄₈" (35.9 cm) from the ...
Installation Guide - Page 8

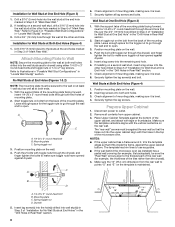
... to open . 3. With the support tabs of the mounting plate facing forward, insert 1/4-20 x 3" round-head bolts through the wall and to use as guides. ■ If the wall behind the microwave oven (as...mm) hole into the wall stud at End Holes" in the "Drill Holes in Step 3 of the microwave oven. Securely tighten the lag screw(s) and bolt. Start a toggle nut on the wall. 4. The "rear...
Installation Guide - Page 9

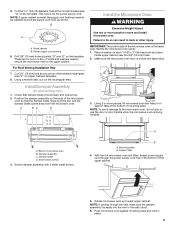
... microwave oven and hang it on the template. Damper blade D. NOTE: If upper cabinet is for the power supply cord. B A A. Metal cabinet B. Using a keyhole saw, cut out the rectangular area. Make sure the microwave oven door is at the bottom of the microwave oven so that damper blade moves freely, and opens fully. 2. Using 2 or more people to the microwave oven...
Installation Guide - Page 10

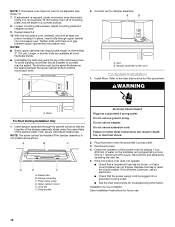
...information. Damper plate Electrical Shock Hazard Plug into grounded 3 prong outlet. 3. If the microwave oven does not operate: ■ Check that a household fuse has not blown, or ... shock. 2. Damper assembly C. If adjustment is plugged into microwave oven. Using 2 or more people, lift microwave oven off of the microwave oven. Repeat steps 3-6. 10. NOTES: ■ Some upper cabinets...
Installation Guide - Page 11

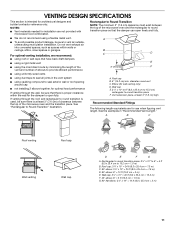
...open fully. Roof cap: 3¹⁄₄" x 10" = 24 ft (8.3 x 25.4 cm = 7.3 m) C. 90° elbow: 3¹ ₄" x 10" = 25 ft (8.3 x 25.4 cm = 7.6 m) D. 90° elbow: 6" = 10 ft (15.2 cm = 3 m) E. Rectangular to Round Transition NOTE: The minimum 3" (7.6 cm) clearance must exist between the top of the microwave oven... vent and number of the microwave oven and the rectangular to round ...
Installation Guide - Page 12

... White Black Biscuit Stainless Steel Almond See your authorized dealer or service center. For best performance, use when installing this microwave oven in a 36" (91.4 cm) or 42" (106.7 cm) wide opening , behind the microwave oven door on the model and serial number plate, which is round, a rectangular to round transition piece must be installed to...
Use & Care Guide - Page 1

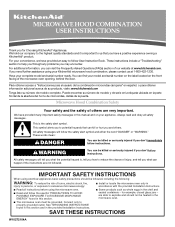
... this manual and on the front facing of the microwave oven opening, behind the door. We have provided an easy to help you through any problems you what the potential hazard is the safety alert symbol. MICROWAVE HOOD COMBINATION USER INSTRUCTIONS Thank you for example, closed glass jars - If you and others are not followed. Para...
Use & Care Guide - Page 2

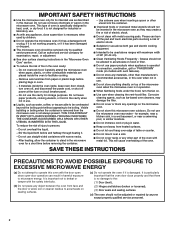
...over a sink. ■ Do not cover racks or any openings on the microwave oven. ■ Do not store this oven with any appliance, close properly and that the oven door close supervision is necessary when used above both before removing the container... twist-ties from heated surfaces. ■ Do not let cord hang over edge of the oven. Grease should be allowed to persons: -
Use & Care Guide - Page 4

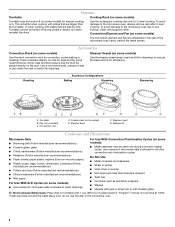
...G A. Turntable B. Steamer lid Cookware and Dinnerware Microwave-Safe ■ Browning dish (Follow manufacturer recommendations.) ■ Ceramic glass, glass ■ China, earthenware (Follow manufacturer recommendations.) For Use With Convection/Combination Cycles (on some models) The convection element and fan are embedded in the microwave oven. 4 If dish becomes hot and the water...
Use & Care Guide - Page 5

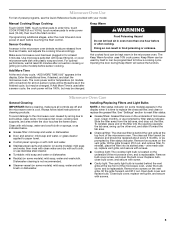
.... ■ Grease filter: mild soap and water or dishwasher. ■ Door and exterior: mild soap and water, or glass cleaner applied to follow label instructions on the vent grille, tilt the grille ...status indicator. Opening the door during Keep Warm will be changed . To avoid damage to the microwave oven caused by itself or can be replaced about every 6 months, or as in oven more than...
Use & Care Guide - Page 6

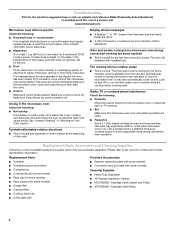
... continues, call an electrician. ■ Magnetron Try to heat 1 cup (250 mL) of a service call for service. ■ Door Firmly close door. Open and close door. Odor and smoke coming from microwave oven during microwave oven operation to cool the microwave oven's controls while the cooktop below . It may also automatically come on and cycle on some models) ■ Convection...
Use & Care Guide - Page 7

...-IN OVEN & MICROWAVE WARRANTY LIMITED WARRANTY For one year from the date of purchase, when this major appliance is operated and maintained according to instructions attached to or furnished with the product, KitchenAid brand of Whirlpool Corporation or Whirlpool Canada LP (hereafter "KitchenAid") will pay for the stainless steel oven cavity/inner door if...
Use & Care Guide - Page 8

... correspondence. You can write to view FAQs (Frequently Asked Questions), visit www.kitchenaid.com. All rights reserved. ®Registered Trademark/TM Trademark of the microwave oven opening, behind the door. If you do not have access to the Internet and you need further assistance, you may contact KitchenAid at : KitchenAid Brand Home Appliances Customer...

KitchenAid Knowledge Base Results

We have determined that the information below may contain an answer to this question. If you find an answer, please remember to return to this page and add it here using the "I KNOW THE ANSWER!" button above. It's that easy to earn points!

  • Ice buildup in freezer compartment - Side by side refrigerator
    ...nbsp;      Why is left open for and clear any ice stuck in the delivery chute or blocking the ice chute door. See also: Ice droplets in these areas suggests...between the gasket and cabinet when the door is between the door gasket and cabinet. If frost is building up in the freezer compartment, check for the following: Frost is likely to a gasket problem. ...
  • Cleaning your refrigerator
    ...in warm water. Scratching, hitting, jarring, or stressing the glass may weaken its structure, causing an increased likelihood of food,&..., the open areas behind a sparkling shine. Use a vacuum cleaner with LCD Display. Side by Side with Ice Bin in Door, Flush ...receive a 10% discount on plastic parts, interior and door liners, or gaskets. If the environment is particularly greasy or dusty, or...
  • Cleaning your refrigerator
    ... and cleaner and receive a 10% discount on plastic parts, interior and door liners, or gaskets. Do not hit the glass with a clean sponge or soft cloth and a mild detergent in one... is particularly greasy or dusty, or there is no need to clean the grille, the open areas behind a sparkling shine. Both the refrigerator and freezer sections automatically defrost. Unplug refrigerator ...

Similar Questions

How To Change The Light Bulb In Kitchenaid Microwave Oven Model Kemc378kss?
I need assistance in the process to remove and replace the light bulb in the microwave portion of th...
(Posted by chipnchatter 11 years ago)
Charcoal Filter
What is the part number for the charcoal filter my KitchenAid Microwave Model KHMS2040WSS-0?  needs?
(Posted by retfel 12 years ago)
Change Light Bulb In Microwave Oven.
How do I change the light bulb in a Kitchenaid KBMS1454SSS Microwave oven?
(Posted by danafeneck 13 years ago)
Ask a New Question
Use the box below to post a new question about this KitchenAid product .
Points & Prizes
  • You can earn points for nearly everything you do on HelpOwl.com
  • You can trade in those points for gift cards at leading retailers such as Amazon.com and Walmart
  • It's that simple!
See How it Works
Create a Free Account

KitchenAid Manuals

Find free KitchenAid KHMS2040WSS manuals and user guides available at ManualOwl.com. Try out our unique manual viewer allowing you to interact with manuals from directly within your browser!

KitchenAid Reviews

View thousands of KitchenAid user reviews and customer ratings available at ReviewOwl.com.

Contact Information

Complete KitchenAid customer service contact information including steps to reach representatives, hours of operation, customer support links and more from ContactHelp.com.

Scoreboard Ratings

See detailed KitchenAid customer service rankings, employee comments and much more from our sister site.

KitchenAid Recalls

Find comprehensive KitchenAid recall information updated hourly on RecallOwl.com.