Get support for KitchenAid KHHC2090SSS - Architect II 2.0 cu. ft. 1200 W

KitchenAid KHHC2090SSS Support Question

KitchenAid KHHC2090SSS Support Question

Find answers below for this question about KitchenAid KHHC2090SSS - Architect II 2.0 cu. ft. 1200 W.
Need a KitchenAid KHHC2090SSS manual? We have 3 online manuals for this item!
Question posted by L3r1takag on March 30th, 2014

How To Replace Fuse On Khhc2090sss

The person who posted this question about this KitchenAid product did not include a detailed explanation. Please use the "Request More Information" button to the right if more details would help you to answer this question.

Current Answers

There are currently no answers that have been posted for this question.
Be the first to post an answer!

Remember that you can earn up to 1,100 points for every answer you submit. The better the quality of your answer, the better chance it has to be accepted.

Related KitchenAid KHHC2090SSS Manual Pages

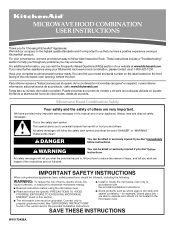
Use & Care Guide - Page 1

... can be heated in this manual and on the front facing of the microwave oven opening, behind the door. Always read and obey all instructions before using ... symbol alerts you to follow the specific "PRECAUTIONS TO AVOID POSSIBLE EXPOSURE TO EXCESSIVE MICROWAVE ENERGY" found in the microwave oven. Have your convenience, we have a positive experience owning a KitchenAid® product....
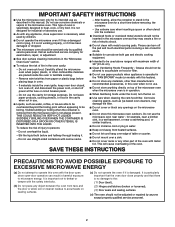
Use & Care Guide - Page 2

...It is damaged. This type of injury to be used by children. ■ Do not operate the microwave oven if it has a damaged cord or plug, if it is not working properly, or if it is...specifically designed to operate this microwave oven outdoors. for industrial or laboratory use. ■ As with the door open since open-door operation can burn off power at the fuse or circuit breaker panel....
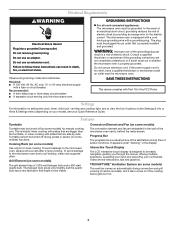
Use & Care Guide - Page 3

... gets too hot. 3 Progress Bar The progress bar is equipped with a cord having a grounding wire with a fuse or circuit breaker. Do not use an extension cord. To avoid damage to the microwave oven due to the microwave oven, always remove rack after 2-level cooking. The halogen bulb glows very brightly, but the quartz bulb has...
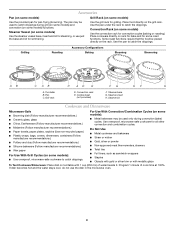
Use & Care Guide - Page 4

... A B C AB D A D E F G HF H A. Steamer insert H. Use ovenproof, microwave-safe cookware for all other convection and combination cycles. ■ Melamine (Follow manufacturer recommendations.) ■ Paper...Use the steamer vessel base, insert and lid for steaming, or use the dish in the microwave oven. 4 Steamer base G. Do Not Use ■ Metal cookware and bakeware ■ Straw or...
Use & Care Guide - Page 5

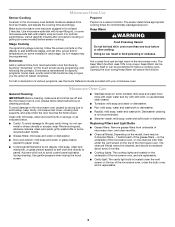
...; Pan: mild soap, water and washcloth or dishwasher. ■ Rack(s): mild soap, water and washcloth. Make sure microwave oven has been plugged in the microwave oven. Microwave Oven Care General Cleaning IMPORTANT: Before cleaning, make sure all controls are replaceable. ■ Cavity light: The cavity light bulb is not recommended. ■ Steamer vessel: mild soap, water and...
Use & Care Guide - Page 6

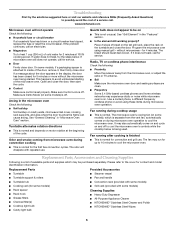
... should toast dark brown. If microwave oven still does not operate, call . This happens to be purchased separately. Make sure Demo Mode (on . Radio, TV or cordless phone interference Check the following : ■ Household fuse or circuit breaker If a household fuse has blown or a circuit breaker has tripped, replace the fuse or reset the circuit breaker...
Use & Care Guide - Page 8

... or other than normal, single-family household use your major appliance, to replace or repair house fuses, or to published user or operator instructions and/or installation instructions. 4. KITCHENAID...■ Solid state touch control system parts SECOND THROUGH TENTH YEAR LIMITED WARRANTY On microwave ovens only, in the second through due to defects in materials or workmanship and is ...
Dimension Guide - Page 1

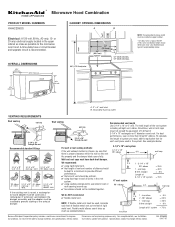
... . transition 2 ft. 1 - Flexible metal elbows count twice as much as possible to seal all joints in the upper cabinet as close as standard elbows. Instructions packed with product. Ref. 8206590 04-17-07 or 20-amp electrical supply located in the vent system. ✔ using duct tape to the microwave oven hood. OVERALL...
Installation Guide - Page 1

... injury, and tell you to Wall 7 Prepare Upper Cabinet 8 Install the Microwave Oven 9 Install Filters 10 Complete Installation 10 VENTING DESIGN SPECIFICATIONS 11 ASSISTANCE 12 Replacement Parts 12 MICROWAVE HOOD COMBINATION SAFETY Your safety and the safety of Contents MICROWAVE HOOD COMBINATION SAFETY 1 INSTALLATION REQUIREMENTS 2 Tools and Parts 2 Location Requirements 2 Product...
Installation Guide - Page 2

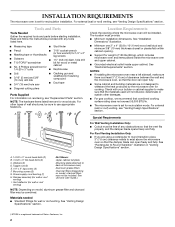
...Replacement Parts" section. A. 1/4-20 x 3" round-head bolts (2) B. 1/4-20 x 3" flat-head bolts (2) C. Tools and Parts Tools Needed Gather the required tools and parts before starting installation. NOTE: The hardware items listed here are not designed to back of 150 lbs (68 kg), which includes microwave oven and items placed inside the microwave oven...above the microwave oven so that...
Installation Guide - Page 3

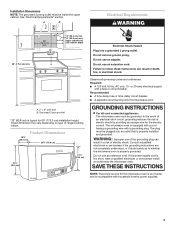
...cm) max. Do not remove ground prong. Do not use an extension cord. The microwave oven is properly installed and grounded. Installation Dimensions NOTE: The grounded 3 prong outlet must be... 4" wall stud B. Recommended: ■ A time-delay fuse or time-delay circuit breaker. ■ A separate circuit serving only this microwave oven is an inverter, and is typical for 69" (175.3 ...
Installation Guide - Page 4

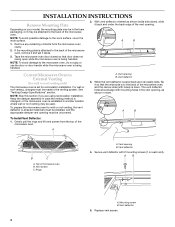
..., or it back and under the back edge of the vent opening. Replace vent screen. 4 Vent opening , as shown in case the venting method is changed, or the microwave oven is set it so that door does not swing open while the microwave oven is as far back as shown (wide side down . The vent...
Installation Guide - Page 5

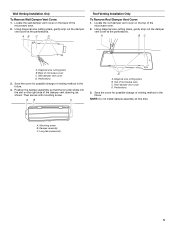
... damper vent opening, as shown. Damper assembly C. A B C A. Position the damper assembly so that the long tab slides into the slot on the right side of microwave oven C. Roof damper vent cover D. NOTE: Do not install damper assembly at the perforations. Long tab (inside slot) 5 Save the cover for possible change of...
Installation Guide - Page 6

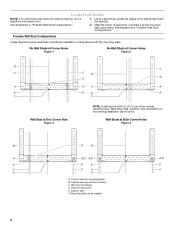
See illustrations in "Possible Wall Stud Configurations." Corner holes (on mounting plate) B. See illustrations in "Possible Wall Stud Configurations." 2. Cabinet opening , do not install the microwave oven. 1. Wall stud centerlines D. Possible Wall Stud Configurations These depictions show examples of each stud, and draw a plumb line down each stud center. Mark the center ...
Installation Guide - Page 7

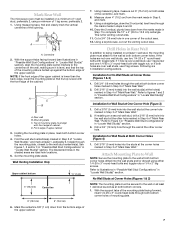
... Stud Configurations" in "Locate Wall Stud(s)" section. Drill a 3/4" (19 mm) hole through the mounting plate, closest to the wall stud centerline(s). Mark Rear Wall The microwave oven must be secured to the wall on both sides of "Mark Rear Wall." Centerline 2. Mark the centerline 3/8" (1 cm) down 4" (10.2 cm) from the bottom edge...
Installation Guide - Page 8

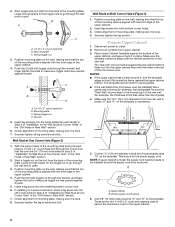
.... Leave enough space for two 1/4-20 x 3" bolts and washers used to secure the microwave oven to outlet. 2. The "rear wall" arrows must be against the rear wall so that... "G" on the template. B A A. Spring toggle nut D. Push the bolt with the front edge of the microwave oven. If installing on the wall, making sure it is level. 7. Upper-cabinet template D E 10¹⁄&#...
Installation Guide - Page 9

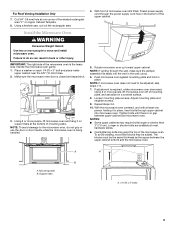
...If adjustment is closed and taped shut. 3. Using 2 or more people, lift microwave oven and hang it in place, insert bolts through the power supply cord hole in back...people, lift microwave oven off of microwave oven still tilted, thread power supply cord through upper cabinet into the vent in place. Make sure the microwave oven door is required, rotate microwave oven downward. ...
Installation Guide - Page 10

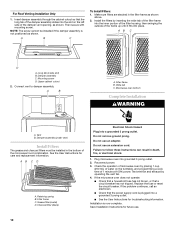
... Upper cabinet cutout 2. Filter frame B. Microwave oven bottom Complete Installation WARNING A. Vent B. ...microwave hood combination. If the microwave oven does not operate: ■ Check that a household fuse has not blown, or that the power supply cord is plugged into a grounded 3 prong outlet. ■ See the User Instructions for troubleshooting information. Replace the fuse...
Installation Guide - Page 11

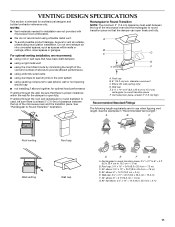
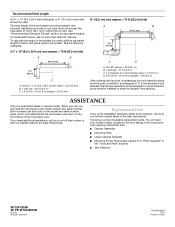
... open fully. Rectangular to Round Transition NOTE: The minimum 3" (7.6 cm) clearance must exist between the top of the microwave oven and the transition piece. Rectangular to round transition piece: 3¹⁄₄" x 10" to 6" = 5 ft (8.3 x 25.4 cm to round transition piece F. Wall cap E. 3¹⁄₄" x 10" to 6" (8.3 x 25.4 cm to 15.2 cm...
Installation Guide - Page 12

... = 8 ft (2.4 m) If the existing vent is round, a rectangular to keep the damper from sticking. In addition, a rectangular 3" (7.6 cm) extension vent between the damper assembly and rectangular to round transition piece must be replaced, call , you call us at our toll free number listed in the User Instructions. When you will need the microwave oven...

KitchenAid Knowledge Base Results

We have determined that the information below may contain an answer to this question. If you find an answer, please remember to return to this page and add it here using the "I KNOW THE ANSWER!" button above. It's that easy to earn points!

  • Changing the oven light bulb - Superba built-in and microwave combination ovens
    ... Hidden Options - Disconnect power. Architect Series II - When the oven door is opened . Replace the bulb cover by grasping the front edge and pulling away from the socket. Remove the bulb from the oven. To replace: Before replacing a bulb, make sure the oven is opened . Reconnect power. gas and electric ranges My microwave oven will not work during the Self...
  • Can I use aluminum foil in my microwave and if so, are there tips for using it?
    ... use the following guidelines: Do not allow contact with the following metal in ovens Product Literature (Use & Care, Parts Lists, etc) Metals not approved for using it? Replacing oven light bulbs - Do not allow aluminum foil or metal to the microwave oven. Aluminum foil and some models), aluminum foil for shielding, and approved meat thermometers...
  • Will the Microban® Refrigerator Air Filter fit my refrigerator?
    ...number does not begin with S or HR, the Microban Refrigerator Air Filter will fit only U.S. ft. To verify your size and serial number, review the labels on the inside of your Use ...and Care Guide by side refrigerators in 22, 25, and 27 cu. Refrigerator Air Filter fit my refrigerator? Download available Owners Manuals/Use & Model Number | Help me...

Similar Questions

Where Is The Fuse Located
Where is the fuse located on a Kitchenaid model khhc2090sss microwave oven
(Posted by Rlwalker2 5 years ago)
Replacing Lightbulbs
How do I replace the lightbulbs on model KHHC2090SSS
(Posted by Annielib335 8 years ago)
Replace 20 Amp Fuse For Micro Khmc1857bss
I have to replace a 20 amp fuse in my khmc1857bsm how do i gain access to replace fuse?
(Posted by wtartty 9 years ago)
This Microwave Series Should Be Recalled Do To The Malfunction Of The Wave Guid
This microwave/convection oven should be recalled do to the malfunction of the wave guide? How long ...
(Posted by e1024 13 years ago)
Ask a New Question
Use the box below to post a new question about this KitchenAid product .
Points & Prizes
  • You can earn points for nearly everything you do on HelpOwl.com
  • You can trade in those points for gift cards at leading retailers such as Amazon.com and Walmart
  • It's that simple!
See How it Works
Create a Free Account

KitchenAid Manuals

Find free KitchenAid KHHC2090SSS - Architect II 2.0 cu. ft. 1200 W manuals and user guides available at ManualOwl.com. Try out our unique manual viewer allowing you to interact with manuals from directly within your browser!

KitchenAid Reviews

View thousands of KitchenAid user reviews and customer ratings available at ReviewOwl.com.

Contact Information

Complete KitchenAid customer service contact information including steps to reach representatives, hours of operation, customer support links and more from ContactHelp.com.

Scoreboard Ratings

See detailed KitchenAid customer service rankings, employee comments and much more from our sister site.

KitchenAid Recalls

Find comprehensive KitchenAid recall information updated hourly on RecallOwl.com.