KitchenAid KCM1402ES Support Question
KitchenAid KCM1402ES Support Question
Find answers below for this question about KitchenAid KCM1402ES.Need a KitchenAid KCM1402ES manual? We have 1 online manual for this item!
Question posted by PBhansen on June 16th, 2020
Kitchenaid Kcm1402er 14 -cup Water Tank Gasket Is Leaking. How To Change Gasket
KitchenAid KCM1402ER 14 -Cup 110vThe removable Water tank fit into a gasket that is leaking occasionallyWhat is the Spareparts the can be changed - How to change gasketLooking forward to hear from you Kind regards Peter [email protected] +45 40208560
Current Answers
Answer #1: Posted by techyagent on June 16th, 2020 9:32 PM
techyagent

Member since:
June 17th, 2014 Points: 4,799,800

Member since:
June 17th, 2014 Points: 4,799,800
Please check this link below:-
Thanks
Techygirl
Related KitchenAid KCM1402ES Manual Pages
Use & Care Guide - Page 1
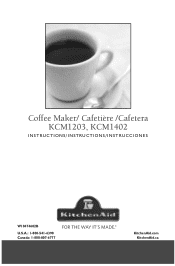
Coffee Maker/ Cafetière /Cafetera KCM1203, KCM1402
INSTRUCTIONS/INSTRUCTIONS/INSTRUCCIONES
W10474602B
U.S.A.: 1-800-541-6390 Canada: 1-800-807-6777
KitchenAid.com KitchenAid.ca
Use & Care Guide - Page 2
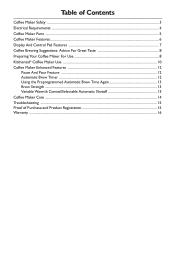
...: Advice For Great Taste 8 Preparing Your Coffee Maker For Use 8 Kitchenaid® Coffee Maker Use 10 Coffee Maker Enhanced Features 12
Pause And Pour Feature ...12 Automatic Brew Timer ...12 Using the Preprogrammed Automatic Brew Time Again 13 Brew Strength ...13 Variable Warmth Control/Selectable Automatic Shutoff 13 Coffee Maker Care ...14 Troubleshooting ...15 Proof of Purchase and...
Use & Care Guide - Page 3
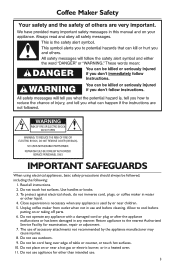
... touch hot surfaces. The use appliance for examination, repair or adjustment. 7. Coffee Maker Safety
IMPORTANT SAFEGUARDS
When using electrical appliances, basic safety precautions should always be ..., do not immerse cord, plugs, or coffee maker in use and before
putting on or near children. 5. Unplug coffee maker from outlet when not in water
or other than intended use outdoors. 9. ...
Use & Care Guide - Page 4
...
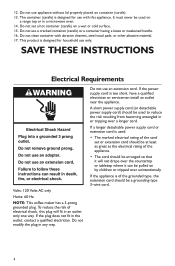
Electrical Requirements
Volts: 120 Volts AC only
Hertz: 60 Hz
NOTE: This coffee maker has a 3-prong grounded plug. To reduce the risk of electrical shock, this appliance. If the plug does not fit in any way.
If the power supply cord is designed for use an...Do not clean container with this plug will not drape over the countertop or tabletop where it will fit in a microwave oven. 14.
Use & Care Guide - Page 5
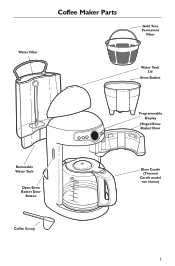
Coffee Maker Parts
Water Filter
Gold Tone Permanent
Filter
Water Tank Lid
Brew Basket
Programmable Display
Hinged Brew Basket Door
Removable Water Tank
Open Brew Basket Door
Button
Coffee Scoop
Glass Carafe (Thermal
Carafe model not shown)
5
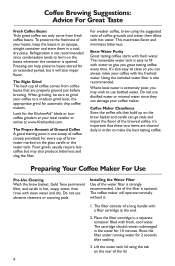
Use & Care Guide - Page 6
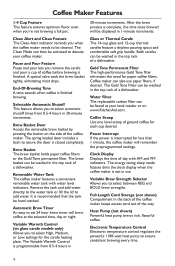
... filter. Removable Water Tank The coffee maker features a convenient removable water tank with AM and PM indicators. It is interrupted for the carafe heating plate. Automatic Brew Timer An easy to set 24 hour brew timer will remember the preprogrammed settings.
Gold Tone Permanent Filter The high-performance Gold Tone filter eliminates the need for each cup desired.
Power...
Use & Care Guide - Page 7
... cycle.
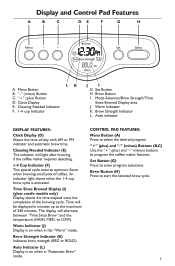
7 Brew Button (H) Press to select the desired program. "-" (minus) Button C. Warm Indicator
K. Cleaning Needed Indicator (E) The indicator will light after brewing if the coffee maker requires descaling.
1-4 Cup Indicator (F) This special cycle ensures optimum flavor when brewing small pots of the brewing cycle. Brew Strength Indicator (K) Indicates brew strength (REG or BOLD...
Use & Care Guide - Page 8
... cleansers or scouring pads. T he filter consists of coffee comes from fresh coffee beans. Using the included water filter is not recommended since they can damage your coffee maker. Do not use distilled water or mineral water since condensation tends to form on the glass carafe or the water tank.
The removable water tank is optional. It's also easy to clean so...
Use & Care Guide - Page 9
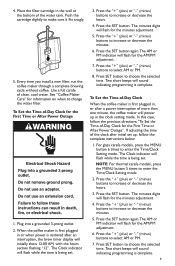
... more than one minute, the coffee maker will sound indicating programming is complete.
9 N OTE: For thermal carafe models, press the MENU button 5 times to enter the Time/Clock Setting mode.
2. Press the "+" (plus ) or "-" (minus) buttons to increase or decrease the hours.
4. Use a full carafe of the water tank. The Clock indicator will flash...
Use & Care Guide - Page 10
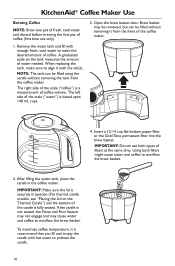
..., see "Placing the Lid on the tank measures the amount of water needed. N OTE: The tank can be filled using the carafe without removing it is securely in the coffee maker.
IMPORTANT: Make sure the lid is recommend that you fill and empty the carafe with the tab(s). Insert a 12-14 cup flat bottom paper filter or the...
Use & Care Guide - Page 11
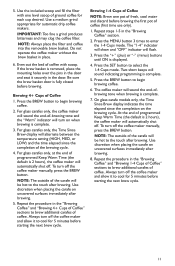
... 2 hours), the coffee maker will automatically shut off the coffee maker manually, press the BREW button.
NOTE: The outside of coffee. Brewing 4+ Cups of Coffee
1. Press the BREW button to cool for automatic drip coffee makers.
IMPORTANT: Too fine a grind produces bitterness and may clog the coffee filter.
NOTE: Always place the filter and coffee into the removable brew basket. Always...
Use & Care Guide - Page 12
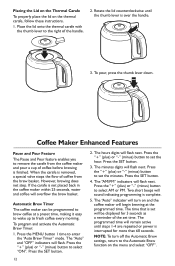
...short beeps will flash next. The time that is removed, a special valve stops the flow of coffee from the coffee maker and pour a cup of the handle.
2. Coffee Maker Enhanced Features
Pause and Pour Feature
The Pause and ... the coffee maker within 25 seconds, water and coffee will flash next. Placing the Lid on the Thermal Carafe
To properly place the lid on and the coffee maker will begin...
Use & Care Guide - Page 13
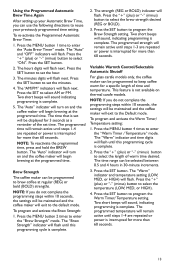
..." mode. Variable Warmth Control/Selectable Automatic Shutoff
For glass carafe models only, the coffee maker can be programmed to the default mode. To program and activate the Warm Timer/... select the brew strength desired (REG or BOLD).
3.
The time range can be maintained and the coffee maker will flash next. Press the "+" (plus ) or "-" (minus) button to select the temperature...
Use & Care Guide - Page 14
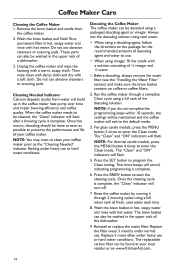
... solution using cool water.
• When using a full water tank of your coffee maker. B efore descaling, always remove the water filter (see the "Installing the Water Filter" section) and make sure the brew basket contains no coffee or coffee filters.
2. R un the coffee maker through 2 brewing cycles using a descaling agent, follow the directions on www.KitchenAid.com.
14 NOTE: If you...
Use & Care Guide - Page 15
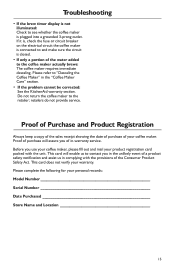
... complying with the unit. Before you use your coffee maker, please fill out and mail your coffee maker.
Troubleshooting
• If the brew timer display is not illuminated: Check to see whether the coffee maker is closed.
• If only a portion of the water added to the coffee maker actually brews: The coffee maker requires immediate descaling. If it is, check...
Use & Care Guide - Page 16
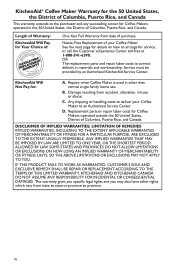
..., INCLUDING TO THE EXTENT APPLICABLE WARRANTIES OF MERCHANTABILITY OR FITNESS FOR A PARTICULAR PURPOSE, ARE EXCLUDED TO THE EXTENT LEGALLY PERMISSIBLE. Length of Warranty:
KitchenAid Will Pay for Your Choice of:
One Year Full Warranty from state to state or province to province.
16
KitchenAid® Coffee Maker Warranty for the 50 United States, the District...
Use & Care Guide - Page 17
... Appliances, P.O.
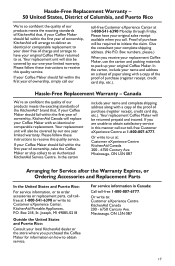
Please follow these instructions to receive this quality service. Mississauga, ON L5N 0B7
17 Give the consultant your Coffee Maker should fail within the first year of ownership, KitchenAid will replace your Coffee Maker with a copy of the proof of purchase (register receipt, credit card slip, etc.). Box 218, St.
If your complete shipping...
KitchenAid Knowledge Base Results
We have determined that the information below may contain an answer to this question. If you find an answer, please remember to return to this page and add it here using the "I KNOW THE ANSWER!" button above. It's that easy to earn points!-
Water leak - Top freezer
... of the refrigerator. See also: Changing/removing the water filter . The sound of water flowing can easily be leaking from under the refrigerator door, look and feel under the door On exterior dispenser models, if water appears to the refrigerator is not damaged or cracked. Check all fittings are accessible such as a leaking sound. Top freezer Moisture in... -
Cleaning the Espresso Machine housing, filters, drip tray, drip plate reservoir, and pitcher
.... Stale coffee oils can I clean the Espresso Machine housing, filters, drip tray, drip plate, reservoir, and pitcher? Wash the portafliter in warm, soapy water and rinse with a soft cloth. Use the shower screen brush or a damp cloth to turn off the espresso machine and unplug it from the brew head gasket and shower... -
Leaking coffee grounds
..." over edge of the brew basket to find coffee or coffee grounds on the warming plate. The brew basket is in Coffee Maker. Coffee maker is pause and pour leaking (drip stop may be removed (using pause and pour) for too long. Sizzling sounds and steam will restrict water flow and could cause you to clean the seal...
Similar Questions

Kitchenaid Kcm222cs Coffee Maker, 14 Cup Architect Instructions On How To Use
it
it
(Posted by gmeSupe 10 years ago)

Kitchenaid Coffee Maker Carafe Leaks When Pouring
(Posted by Shanrspalm 10 years ago)
Kitchenaid 14 Cup Coffee Maker Clean Indicator Display Will Not Disappear
(Posted by Anjaesteba 10 years ago)

I Have A Kcm1110b Coffee Maker The Water Will Not Disperse From The Tank
(Posted by jswilson1 11 years ago)

How Many Cups Is This Coffee Maker?
(Posted by twinnie921 11 years ago)