Haier HWD1000 Support Question
Haier HWD1000 Support Question
Find answers below for this question about Haier HWD1000 - 1.7 cu. Ft. Washer/Dryer Combo.Need a Haier HWD1000 manual? We have 2 online manuals for this item!
Question posted by 65kchin on November 14th, 2011
Close Door
How does the door close? Does power need to be on? Door does not want to close and latch.
Current Answers
Related Haier HWD1000 Manual Pages
Instruction Manual - Page 2
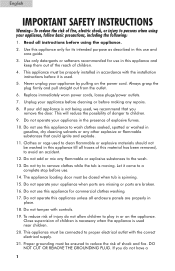
Replace immediately worn power cords, loose plugs/power outlets.
7. If your old appliance is moving. The appliance loading door must be closed when tub is spinning.
15. Proper grounding ...explosive materials should not be properly installed in or on the power cord. To reduce risk of children.
4. If you remove the door. English
IMPORTANT SAFETY INSTRUCTIONS
Warning- Do not add or ...
Instruction Manual - Page 3

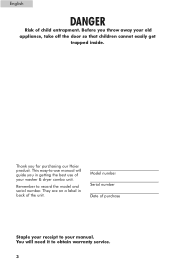
... heat dry for a few minutes. Do not use extension cords or adapters to connect the unit to avoid an accident, as they give off vapors that could be properly grounded. 22. ...electric appliance, smoke, light a match/lighter or use a flame to electrical power source. English
three-prong electric receptacle outlet in your dryer. This could cause a load to cooking oils in the wall, have ...
Instruction Manual - Page 4
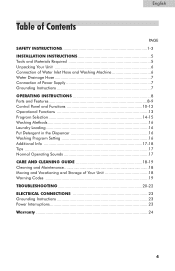
Remember to your old appliance, take off the door so that children cannot easily get
trapped inside. Model number Serial number Date of your washer & dryer combo unit. They are on a label in getting the best use manual will need it to obtain warranty service.
3 This easy-to-use of purchase
Staple your receipt to record the...
Instruction Manual - Page 5
... 5 Tools and Materials Required 5 Unpacking Your Unit 6 Connection of Water Inlet Hose and Washing Machine 6 Water Drainage Hose 7 Connection of Power Supply 7 Grounding Instructions 7 OPERATING INSTRUCTIONS 8 Parts and Features 8-9 Control Panel and Functions 10-12 Operational Functions 13 Program Selection 14-15 Washing Methods 16 Laundry Loading 16 Put Detergent in the Dispencer...
Instruction Manual - Page 6
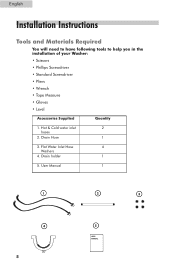
... MANUAL Hot & Cold water inlet
2
hoses
2. Drain Hose
1
3. Drain holder
1
5. English
Installation Instructions
Tools and Materials Required
You will need to have following tools to help you in the installation of your Washer: • Scissors • Phillips Screwdriver • Standard Screwdriver • Pliers • Wrench • Tape Measure • Gloves • Level...
Instruction Manual - Page 7
... valve for hot water (marked with "C"), the HOT inlet hose is a plastic jacket packing the door catch. Remove the rear panel of the washing machine: The washing machine is normal that the COLD...unpack the machine. It is leveled, as shown in Fig.2. Before use . English
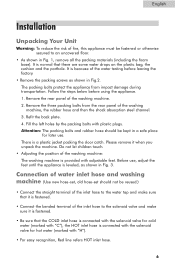
Installation
Unpacking Your Unit
Warning: To reduce the risk of fire, this appliance must be kept in a safe place for ...
Instruction Manual - Page 8
... that is equipped with accordance to the required value (120V/60Hz). • The power supply socket and the plug of the washing machine are in water. WARNING: Certain ...parts are not compatible, refer to whether the appliance is energized: electromagnetic valve, computer board, door lock, drain pump, drying motor, capacity bracket assembly, etc...
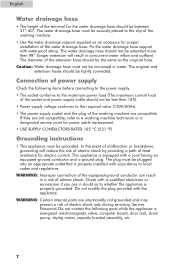
7 WARNING: Improper connection of...
Instruction Manual - Page 9
... Selection Button
15
16
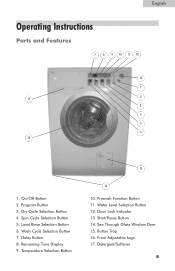
10. Start/Pause Button 14. Front Adjustable Legs 17. Remaining Time Display 9. Water Level Selection Button 12. See Through Glass Window Door 15. Detergent/Softener
8 Program Button 3. Delay Button 8. Prewash Function Button 11. Button Trap 16. English
Operating Instructions
Parts and Features
7 8 9 10 11 12
13 1 2 17...
Instruction Manual - Page 10
English
2 1
3
5 7
6
4
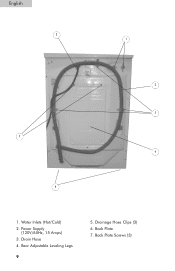
1. Rear Adjustable Leveling Legs
9
5. Water Inlets (Hot/Cold) 2. Back Plate 7. Drain Hose 4. Back Plate Screws (3) Drainage Hose Clips (3) 6. Power Supply
(120V/60Hz, 15 Amps) 3.
Instruction Manual - Page 11
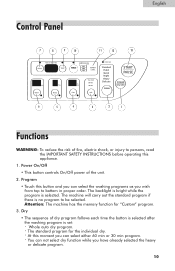
...select dry function while you wish from top to be selected. Power On/Off
• This button controls On/Off power of the unit.
2. The machine will carry out the standard program if there...PREWASH
WATER LEVEL
00 rpm SPIN
Standard 60 Min 30 Min
DRY
Door lock
Standard Habit Quick Night Heavy
Delicate
PROGRAM PROGRAMME
START PAUSE
POWER ON/OFF
6
5
4
3
2
1
Functions
WARNING: To ...
Instruction Manual - Page 12
... actual time because of the water temperature, water pressure and the distrubution of the laundry in the tube. If the START/PAUSE button is pressed the current setting is ...button to select the rinsing time. C-cold water.
• Lock buttons on the control panel, including the Power button, by one press.
7. Remaining time: Min (Digital display screen)
• This display is used...
Instruction Manual - Page 13
... operation state and the door can not be opened .
13. If the condition for reference. use the second gear when the quantity is less then 2 lbs.; The default program will be opened . Start/Pause • The set . English
11. When this button again if you want to the laundry quantity. Detergent/Softener Dispenser...
Instruction Manual - Page 14
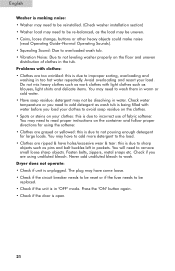
...white clothes from colors.
• Remove all objects from pockets that produced for one load of laundry into cartidge at a time.
• Sort out clothes according to type and extent of detergent...market.
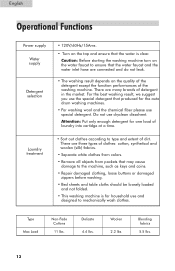
Type Max Load
Non-Fade Cottons
11 lbs. English
Operational Functions
Power supply Water supply
Detergent selection
Laundry treatment
• 120V/60Hz/15Ams.
• Turn on the tap...
Instruction Manual - Page 17
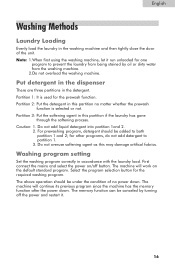
... For prewashing program, detergent should be under the condition of the unit. The above operation should be canceled by oil or dirty water...close the door of no matter whether the prewash
function is used for one
program to both partition 1 and 2; First connect the mains and select the power on the default standard program. English
Washing Methods
Laundry Loading
Evenly load the laundry...
Instruction Manual - Page 18
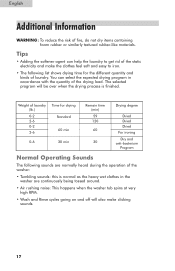
... are normally heard during the operation of laundry. Weight of laundry (lb.)
0-2 2-6 0-2
2-6
Time ...for drying Standard 60 min
0-6
30 min
Remain time (min) 59 120
60
30
Drying degree
Dried Dried Dried For ironing
Dry and anti-bacterium
Program
Normal Operating Sounds
The following list shows drying time for the different quantity and kinds of the washer...
Instruction Manual - Page 19
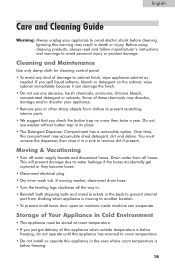
...to another location. • To prevent mold leave door open so moisture inside machine can damage the finish. • Do not use washer without button trap in Cold Environment
• This ...is below freezing.
18
Drain water from clothes to cabinet finish, wipe appliance cabinet as
needed. Cleaning and Maintenance
Use only damp cloth for cleaning control panel. • To avoid...
Instruction Manual - Page 20
...
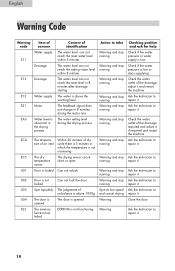
Water level is abnormal in the drying process
The temperature of air vent
The dry temperature sensor Door is locked
Door is not locked Spin lopsidely
The door is opened The memory function has failed
Content of identification The water level can not... the technician to repair it
Ask the technician to repair it
Ask the technician to repair it
Close the door
Ask the technician to repair it
19
Instruction Manual - Page 21
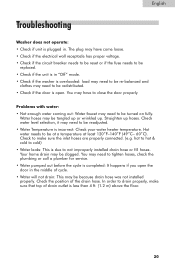
... outlet is less than 4 ft. (1.2 m) above the floor.
20 The plug may have to close the door properly. Check to make sure that top of the drain hose. English
Troubleshooting
Washer does not operate: • Check if unit is plugged in "Off" mode. • Check if the washer is overloaded: load may need to be re-balanced...
Instruction Manual - Page 22
... may not be dissolving in water. You will need to wash. Press the "ON" button again. • Check if the door is unplugged. Fasten belts, zippers, metal snaps etc. Never add undiluted bleach to remove small loose sharp objects. Dryer does not operate: • Check if unit is open.
21 Avoid overloading and resort...
Instruction Manual - Page 23
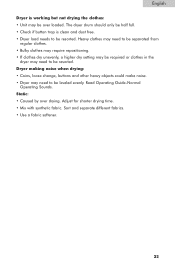
... be over drying. English Dryer is clean and dust free. • Dryer load needs to be resorted. The dryer drum should only be half full. • Check if button trap is working but not drying the clothes: • Unit may be leveled evenly. Read Operating Guide-Normal
Operating Sounds. Static: • Caused by over loaded...
Similar Questions

Doesn't Fill Up With Water.
I connected the inlet tubes to my water source and followed the directions. It doesn't do anything.
I connected the inlet tubes to my water source and followed the directions. It doesn't do anything.
(Posted by idreamincolor 4 years ago)
Where Does Detergent Go On Thor Washer Dryer Combo Manual
(Posted by keymoham 9 years ago)
How To Use Dryer Only On Haier Washer Dryer Combo
(Posted by stumpronni 10 years ago)

How Do I Select The Dryer Temperature For My Haier Hwd1000 Washer/dryer?
(Posted by Anonymous-71716 11 years ago)

Set Dryer Temperature
How do I select the dryer temperature for my Haier HWD1000 washer/dryer?
How do I select the dryer temperature for my Haier HWD1000 washer/dryer?
(Posted by randomnothin 12 years ago)