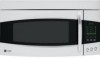
GE PVM2070SMSS Support Question
GE PVM2070SMSS Support Question
Find answers below for this question about GE PVM2070SMSS.Need a GE PVM2070SMSS manual? We have 3 online manuals for this item!
Question posted by monicairelan on April 6th, 2010
Has Anyone Had Issues With All Power In This Unit?
Requests for more information
Is the control panel/clock working? Does the light inside the cooking cavity light up when you open the door?
Responses to this request
Response submitted April 6th, 2010 8:35 AMNothing is working. No control panel, clock or light when the door is open.
Current Answers
Answer #1: Posted by NancyGE on April 6th, 2010 6:20 PM

Member since:
April 3rd, 2010 Points: 13,340

The problem may be the fuse, which is usually located behind the grille or on the floor of the oven behind the control panel or between the door switches. If the fuse is good, it may be an open thermostat or thermal cutout (TCO) / thermal fuse on or near the magnetron or on top of the cavity / body of the oven.
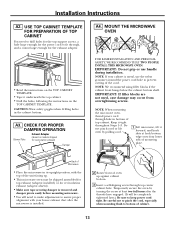
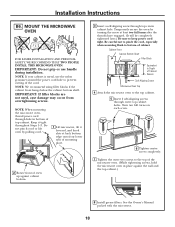
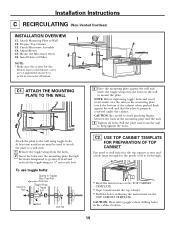
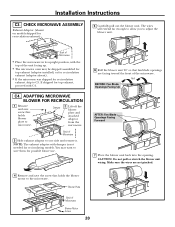
When checking TCOs or thermostats, if it has a hood fan thermostat, that should read open, as opposed to the others, which should read closed. If the cavity thermostat needs to be checked or replaced you'll need to pull the oven from the wall, in which case you can download the owner's manual, installation instructions, and CAD drawings.
You should do a continuity test on the fuse while it's in the holder (with the microwave unplugged, of course) then turn the fuse by hand or take it out and put it back in, then test it again. If you remove the fuse, then press the meter leads against the ends, it can allow internal contact to be made and make a bad fuse appear to be good.
There should be a "mini-manual" hidden inside the unit behind the control panel or hidden on the left side behind the grille, which is very helpful when troubleshooting & testing. You can find an exploded view diagram here. Once you have the part numbers, though, I would suggest ordering parts here at a much lower cost.
Hope this helps!
Related GE PVM2070SMSS Manual Pages


Similar Questions

My microwave stopped working. When I unplugged it then plugged it back in it worked, now that does n...


This morning I pressed the light button and a loud pop and flash occured.Microwave is completely dea...

Is there a known defect in or recallforthis item manufactured in Summer 2011?The "Start/Pause" and "...

Microwave oven front control panel LED display doesn't power up but the fan and lights switch functi...