Frigidaire GLEQ2152EE Support Question
Frigidaire GLEQ2152EE Support Question
Find answers below for this question about Frigidaire GLEQ2152EE - 27" Front-Load Electric Dryer.Need a Frigidaire GLEQ2152EE manual? We have 4 online manuals for this item!
Question posted by thoje on August 17th, 2014
How Remove The Back Of Frigidaire Dryer Model Leq2152ee0
The person who posted this question about this Frigidaire product did not include a detailed explanation. Please use the "Request More Information" button to the right if more details would help you to answer this question.
Current Answers
Related Frigidaire GLEQ2152EE Manual Pages
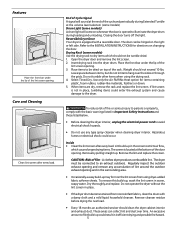
Use and Care Manual - Page 2
... gas supplier, call your
Purchase Date dryer. All safety messages will help prevent potential negative consequences for the recycling of electrical and electronic equipment. Follow the gas ... - This
Record Your Model and Serial Numbers
book contains valuable information about recycling
of this product, please contact your local city office, your dryer are not followed.
This...
Use and Care Manual - Page 3
... Items contaminated with these warnings could cause a load to cover every possible condition and situation that...dryer if the lint screen is removed from electrical power cord.
Risk of all warnings on or near dryer at any type of aerosol into, on or in , or spotted with rugs, bedspreads or plastic sheets can become airtight chambers. • Keep laundry products out of the dryer...
Use and Care Manual - Page 4
... items, dry only 2 or 3 at a time. Fill out the load with local codes. Failure to persons, read and follow fabric care labels and laundry product labels.
To reduce the risk of a gas dryer must never be removed. Check that attract lint. Load the dryer.
• The average load will stop before drying. • Place small items in...
Use and Care Manual - Page 5
... lint screen after every load. Open the dryer door and remove the lint screen. ...remove any type spray cleanser when cleaning dryer interior. Drying Rack (some models) A drum light will sound at the bottom of the
lint screen opening and in Important Safety Instructions and those listed below.
• Before cleaning the dryer interior, unplug the electrical power cord to avoid electrical...
Use and Care Manual - Page 6
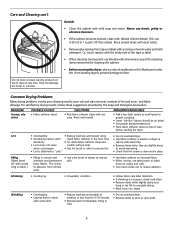
...dryer to
electricity.
• Or, add a fabric softener sheet and
reduce static electricity.
• Lint screen not clean
tumble without heat.
• Remove...concern, check load often. • Remove items while slightly damp and
hang or lay flat to small loads for proper ...laundry products on top of dryer at medium or low heat for cleaning the cabinet.
• Before moving the dryer...
Use and Care Manual - Page 7
...
or buttons are not the result of the drum.
Dryer should heat when utility service is open (gas models). Drying cycle takes too long, outside of items.
See....
7
Electric dryer is overloaded.
Always remove foreign objects from drum and restart dryer.
House fuse blown or circuit breaker tripped. Make sure electrical line is not overloaded and the dryer is on...
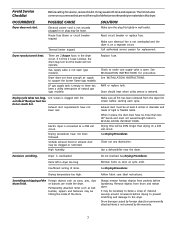
Use and Care Manual - Page 8

...keep all costs for repairing or replacing any parts of this appliance that have been removed, altered or cannot be performed by unauthorized service companies; USA 1.800.944.9044 ...PROVIDED HEREIN. Service calls to correct the installation of Alaska.
12. Products purchased "as removal of trim, cupboards, shelves, etc.,which do not involve malfunction or defects in materials ...
Technical Data Sheet - Page 1

... door seal not correctly seated. CAUTION: DISCONNECT ELECTRICAL CURRENT BEFORE SERVICING Please Return This Sheet to HIGH HEAT and touch START. Control NTC Open Control thermistor or its wiring is exited. Microcontroller has been reset by internal Watchdog timer.
Remove wires from dryer. Digital Readout Display Models: rotate the timer knob (1) click counterclockwise. Take...
Technical Data Sheet - Page 2
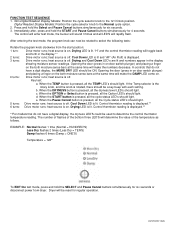
...LED's should light.
5 turns: Drive motor runs; Dryer will make the DAMP LED come on . Digital Readout Display Models: Position the cycle selector knob to determine the control ...LED is displayed. 3 turns: Drive motor runs; d. When the Pause Cancel button is displayed.**
**For models that do not have a digit display, the MORE DRY LED should be reset for 4 seconds. heat ...
Installation Instructions - Page 2
...Dryer
CIRCUIT -
If your dryer. Ensure the present duct is to be exhausted into the laundry...27 m)
14 ft. (4.27 m)
10 ft. (3.05 m)
NOT RECOMMENDED
Printed in any circumstances remove grounding prong from the neutral, (2) use 4-conductor cord for washers and dryers, and DO NOT operate a washer and a dryer on dryer...
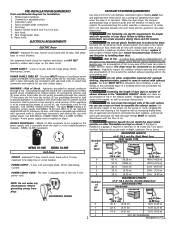
ELECTRICAL REQUIREMENTS
ELECTRIC Dryer
CIRCUIT -
The dryer ...
Installation Instructions - Page 3
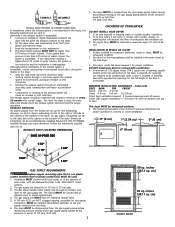
... orientation of the exhaust system is less than 0.75 inches of 1/2 inch (1.27 cm) pipe. 3. The more often you should be used , the more the dryer is acceptable. EXHAUST DUCT LOCATING DIMENSIONS
LOCATION OF YOUR DRYER
DO NOT INSTALL YOUR DRYER: 1. Your dryer needs the space around it will come in contact with equivalent air...
Installation Instructions - Page 4

... to clear knobs (70.49cm) 28.5 to clear door handle (72.39cm)
2.375" (6.03cm)
(34.29cm) 13.5" To rear & base exhausts
27.0"
(68.58cm)
Stacked Dryer Installation Dimensions
(68.58cm) 27.0"
Electrical supply on rear of unit
28.25" to front of cabinet(71.76cm)
28.75" to clear knobs (73.03cm) 29.5" to...
Installation Instructions - Page 5

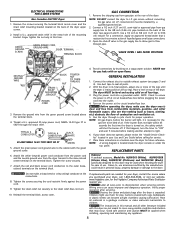
... help pull out the plugs. Rigid metal duct is designed so the door swing may need a plastic knife to scratch the paint.
2.
UNPACKING
1. Open the dryer door. REMOVE 4 SCREWS (ONE FROM EACH HINGE FIRST)
5 Metal ducting must be not less than twice the area of the door opening . If...
Installation Instructions - Page 6

Open the dryer door. NOTE: You may need a plastic knife to help remove the plugs. Remove the two handle screws and remove the handle by removing the handle screws in Step 4. 7. Reinstall alignment screw. 8. Remove the screws from Step 1 into the holes left side of the hinges. 10. Step 1
Step 2
Steps 4 & 5
Step 7 Install the plugs from the...
Installation Instructions - Page 7

... Electrical shock can create electrical shock and/or a fire hazard. Locate the dryer within reach of the mounting bracket.
Remove the...dryer: 1. Reattach the strain relief mounting bracket to the equipment-grounding terminal or lead on the terminal block. A chemical reaction occurs between copper and aluminum and can melt, creating electrical shock and/or fire hazard. The laundry...
Installation Instructions - Page 8
.... Open the shutoff valve in your dryer, call 1-800-944-9044, or visit our website, www.frigidaire.com, for proper operation.
Remove the ground wire from combustible materials, ...Use a 1/2 inch to 3/8 inch (1.27 cm to cover every possible condition and situation that is off .
ELECTRICAL CONNECTIONS FOR 4-WIRE SYSTEM
Non Canadian ELECTRIC Dryer
1. Also see pages 3 and 4). NOTE...
Operating Instructions - Page 1
... temperature, dryness level and options will be indicated for drying. 2. When the cycle ends, remove items immediately and hang or fold.
7. Clean the lint filter after the cycle has begun,... the guesswork out of installation and electrical voltage or gas pressure can also affect drying time.
Operating Steps Read "Drying Procedures" in place. 3. Load the dryer. To resume the cycle, press ...
Operating Instructions - Page 2
... approximately 10 minutes.
to delete an option. Select Normal for most cotton fabrics. Occasionally a load may be removed any Auto Dry cycle will be heard periodically. To increase drying time for similar loads in any time during Press Saver.
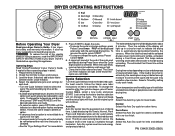
Dryer Features
(Control Lock) To avoid having someone accidentally start or stop the washer, press...
Operating Instructions - Page 3
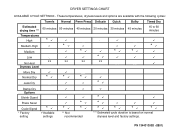
... Options
Shrink Guard
Press Saver
Cycle Signal * Factory
setting
*
Available settings
*
*
*
** Not recommended
*
*
*
*
*
*
*** Estimated cycle duration is based on normal dryness level and factory settings. DRYER SETTINGS CHART
AVAILABLE CYCLE SETTINGS - PN 134431300D (0801)
Similar Questions

Need To Fix Ed68 Code On My Model Gleq2152ee0 Front Load Dryer
need to fix e68 code on my model GLEQ2152EE0 FRONT LOAD DRYER
need to fix e68 code on my model GLEQ2152EE0 FRONT LOAD DRYER
(Posted by Ledesma2020 3 years ago)

Tumbler Won't Spin I Have A Frigidaire Dryer Model Agq7000ego
Frigidaire Dryer Model Agq7000ehgo Tumbler Wont Spin
Frigidaire Dryer Model Agq7000ehgo Tumbler Wont Spin
(Posted by KRISTYLYSHUZ 6 years ago)

Frigidaire Electric Dryer Model Gleq2152es1
My dryer started out by displaying "dr" and wouldn't start. I finally got an error code of E68 with ...
My dryer started out by displaying "dr" and wouldn't start. I finally got an error code of E68 with ...
(Posted by kathymoffatt61 7 years ago)

What Is The Washer Model That Matches This Dryer? I Have One But The Model #
I can not find the model number of a washer machine that was sold with this dryer as a combo or set ...
I can not find the model number of a washer machine that was sold with this dryer as a combo or set ...
(Posted by leeguerrero13 7 years ago)

How To Replace Electronic Control
(Posted by c21smm 9 years ago)