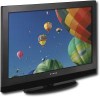
Dynex DX-PDP42-09 Support Question
Dynex DX-PDP42-09 Support Question
Find answers below for this question about Dynex DX-PDP42-09.Need a Dynex DX-PDP42-09 manual? We have 3 online manuals for this item!
Question posted by texasag2003 on September 1st, 2013
How Do You Adjust The Vertical Size Of The Screen Image?
The person who posted this question about this Dynex product did not include a detailed explanation. Please use the "Request More Information" button to the right if more details would help you to answer this question.
Current Answers
Answer #1: Posted by StLFanMan on September 4th, 2013 1:54 PM
StLFanMan

Member since:
August 14th, 2013 Points: 1,576,405

Member since:
August 14th, 2013 Points: 1,576,405
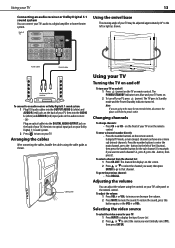
On page 15 of the User Manual: http://www.dynexproducts.com/products/televisions/DX-PDP42-09.html, it shows you how to adjust the TV's aspect ratio.
Related Dynex DX-PDP42-09 Manual Pages
Warranty (English) - Page 1
...the product in -home warranty service for a television with the product.
The Warranty Period lasts for... on the receipt you received with a screen 25 inches or larger, call 1-888-...be defective by static (non-moving) images applied for lengthy
periods (burn-in ...8226; Customer instruction • Installation • Set up adjustments • Cosmetic damage • Damage due to acts ...
User Manual (English) - Page 2
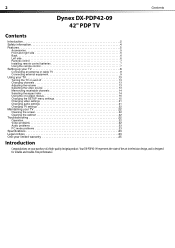
... the screen 22 Cleaning the cabinet 22 Troubleshooting 22 Operation 22 Video problems 22 Audio problems 23 PC mode problems 23 Specifications 23 Legal notices 23 One-year limited warranty 25
Introduction
Congratulations on your purchase of the art in television design, and is designed for reliable and trouble-free performance. Your DX-PDP42-09...
User Manual (English) - Page 3
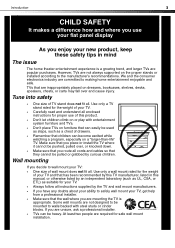
...always supported on the proper stands or installed according to wall mount your TV:
• One size of drawers.
• Remember that children can be used as steps, such as suitable for safe... wall mount installation.
Tune into safety
• One size of TV stand does not fit all instructions supplied by an independent laboratory (such as UL, ...
User Manual (English) - Page 4
... To prevent electric shock, match the wide blade on the power cord plug to the wall, follow the manufacturer's instructions. Warnings Use of controls or adjustments or performance of procedures other than the other. To prevent injury, this can result in a fire or electric shock. Caution The AC power plug is...
User Manual (English) - Page 5
...Antenna discharge unit
6
Grounding clamp
7
Antenna lead-in wire to an antenna discharge unit, size of grounding conductors, location of the antenna-discharge unit, connection to open the on the ...If the screen breaks, be disposed of power source indicated on -screen menu. Features
Accessories
Make sure that are covered by the operating instructions because incorrect adjustment of other...
User Manual (English) - Page 7
...
Choices include Cool, Warm, and Normal. symbols on the back side of the remote control sensor on -screen menus. If the remote control is depleted. Options include 0, 5, 10, 15, 30, 45, 60... of your TV, and within 30° vertically of the remote control.
2 Insert two 1.5 V AAA batteries into the battery compartment.
Press to adjust the volume. symbols in the battery compartment.
...
User Manual (English) - Page 12
...with the resolution, vertical pattern, contrast, or brightness. The fixed image could become permanently imprinted on the back of time. If the signal from the system is not standard, adjust the screen resolution by referring ... then into the HDMI1 IN or HDMI2 IN jacks on Page 12. If noise is adjusted automatically. The screen resolution of your TV.
3 Turn on your TV and the PC.
4 Press INPUT...
User Manual (English) - Page 13
... digital amplifier or home theater system. Note If you want (initially select TV), then press ENTER.
To adjust the volume:
1 Press VOL+ or VOL- to increase or decrease the volume. 2 Press MUTE to ...Standby mode and the Power/Standby indicator turns red. The channel list displays on the screen. 2 Press or to select the channel you want , then press ENTER to go to turn off ...
User Manual (English) - Page 14
...
Noise Reduction
Medium
Video
2 Press or
Enter
Select
Exit
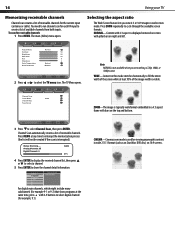
to cycle through the available screen formats. Note NORMAL is not available when you view 4:3 or 16:9 images in this mode stretches horizontally to fill the entire width of the screen while at any time to create a list of available channels from both inputs...
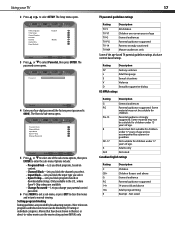
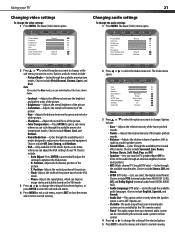
User Manual (English) - Page 15
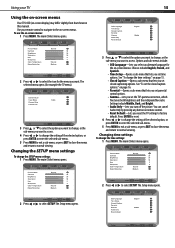
...• Parental-Opens a sub-menu that lets you set the closed caption options:" on -screen menus. Picture Mode
Normal
Contrast
50
Brightness
50
Saturation
50
Hue
0
Sharpness
4
Color Temperature
Natural...
Medium
Video
Enter
Select
Exit
2 Press or to select SETUP. To use the on -screen display) may differ slightly from that lets you set the TV's gamma correction, which fine...
User Manual (English) - Page 16
...• Analog Closed Caption-Press or to select the type of analog closed caption. • Font Size-Sets the word size. • Font Color-Selects a typeface for the text. • Font Opacity-Specifies the opacity ... Closed Caption
Off
Digital Caption Style
Timer
Select
Back
4 Press or to select one of the screen. • T3/T4-Shows extended data for the window. 5 Press MENU to exit a ...
User Manual (English) - Page 17
..., then press ENTER to normal viewing. NC-17
Not suitable for children under 17 years of age.
Most television programs and television movies can be blocked by broadcasting stations. The Setup menu opens. The password screen opens.
Not rated
Setting program blocking
Rating guidelines are available. • Change Password-Lets you change your...
User Manual (English) - Page 18
... the Canadian (English) rating system.
• Canadian French Ratings-Opens a sub-menu that rating are unrated. Options are unrated. The Setup menu opens. The password screen opens.
U.S.TV Ratings
U.S. Options are No and Yes.
7 If you open one of the ratings sub-menus, press , , , or to change. When you want to...
User Manual (English) - Page 19
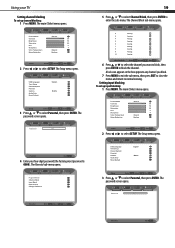
...input blocking To set up input blocking:
1 Press MENU. The Setup menu opens. The password screen opens.
The main (Video) menu opens.
Password
****
Parental
Back OSD Language Time Setup Closed ...then press ENTER to block the channel. The Parental sub-menu opens. The password screen opens.
Program Block Channel Block Input Block Open V-Chip Change Password
Parental
Enter
Select...
User Manual (English) - Page 20
....
7 Press MENU to exit the sub-menu, then press EXIT to close the menus and return to normal viewing. The Setup menu opens. The password screen opens. Password
****
Parental
Back
4 Enter your four-digit password (the factory preset password is 0000).
this may be different, depending on the information provided by...
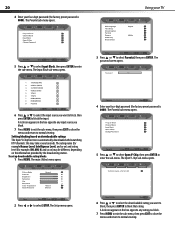
User Manual (English) - Page 21
.... Note If you select the User mode, you can improve
image clarity and stability based on the VGA
mode. • Phase-Adjusts the signal phase, which can individually set to right) in VGA... to change , or the sub-menu you select the digital sound format. Position-Adjusts the vertical position of the picture. • Clock-Adjusts the width of the picture based on the VGA mode. 3 Press or to...
User Manual (English) - Page 22
...front panel and other electronic devices, such as radios and televisions, and keep magnetic or electronic devices away from your TV... level and mute setting.
• Check the picture control and adjust color. • Make sure you want on your antenna connection,...to wipe the screen. Install fresh batteries.
• Make sure that the power connection is normal for the image to select the ...
User Manual (English) - Page 23

... the product is turned on the background, horizontal noise, or incorrect position
The screen color is unstable or a single color
• Adjust the resolution, horizontal frequency, or vertical frequency.
• Check the input source. • Adjust the clock, phase, or horizontal/vertical
position, or try Auto to configure these options.
• Check the signal cable...
User Manual (English) - Page 25

... this new NS-PDP42-09 ("Product"), that the... -home warranty service for a television with this warranty cover?
Warranty coverage...brand products and packaged with a screen 25 inches or larger, call ...instruction • Installation • Set up adjustments • Cosmetic damage • Damage due ...than a facility
authorized by static (non-moving)
images applied for 1 year (365 days) from ....
Similar Questions

What Size Screws Do I Need To Attach The Dx-pdp42-09 To The Table Tv Stand?
(Posted by mgraf1942 8 years ago)

Picture Image Size
It appears that this is only on one channel that I can discern; however, when watching FoxNews the i...
It appears that this is only on one channel that I can discern; however, when watching FoxNews the i...
(Posted by cjwhite 11 years ago)

Changing Chanels
When I change satation using the "up channel' button on the remote I see displayed on the screen: 65...
When I change satation using the "up channel' button on the remote I see displayed on the screen: 65...
(Posted by rixinn 12 years ago)

Wireless Headphones
I connected wireless headphones to headphone jack at back of TV. Is there a way to mute tv to make...
I connected wireless headphones to headphone jack at back of TV. Is there a way to mute tv to make...
(Posted by shellmanpaul 12 years ago)

How Do I Get The Picture To Fit The Screen On My Dynex Dx-46l262a12
(Posted by big02750 12 years ago)