Dell XPS 8500 Support Question
Dell XPS 8500 Support Question
Find answers below for this question about Dell XPS 8500.Need a Dell XPS 8500 manual? We have 2 online manuals for this item!
Question posted by lijeg on November 12th, 2013
How To Change Light Setting For Dell Xps 8500
The person who posted this question about this Dell product did not include a detailed explanation. Please use the "Request More Information" button to the right if more details would help you to answer this question.
Current Answers
Related Dell XPS 8500 Manual Pages
Owner's Manual (PDF) - Page 2
Information in this text: Dell™, the DELL logo, and XPS™ are either trademarks or registered trademarks of Microsoft Corporation in this document to refer to either potential damage to change without the written permission of your product. is a registered trademark owned by Dell under license. and is subject to hardware or loss of data...
Owner's Manual (PDF) - Page 13
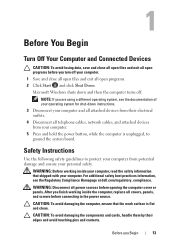
... turn off .
WARNING: Disconnect all open files and exit all power sources before you are using a different operating system, see the Regulatory Compliance Homepage at dell.com/regulatory_compliance. CAUTION: To avoid damaging the computer, ensure that shipped with your personal safety. Microsoft Windows shuts down instructions.
3 Disconnect your computer and all...
Owner's Manual (PDF) - Page 14
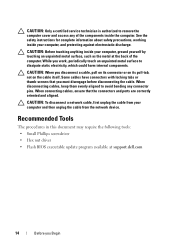
... instructions for complete information about safety precautions, working inside your computer, ground yourself by touching an unpainted metal surface, such as the metal at support.dell.com
14
Before you work, periodically touch an unpainted metal surface to avoid bending any of the computer. While you Begin Some cables have connectors...
Owner's Manual (PDF) - Page 17
Technical Overview
17 3
Technical Overview
WARNING: Before working inside your computer, read the safety information that shipped with your computer and follow the steps in "Before You Begin" on page 13. For additional safety best practices information, see the Regulatory Compliance Homepage at dell.com/regulatory_compliance.
Owner's Manual (PDF) - Page 19
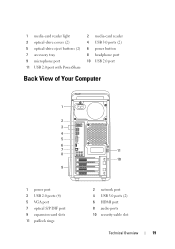
1 media-card reader light 3 optical-drive covers (2) 5 optical-drive eject buttons (2) 7 accessory tray 9 microphone port 11 USB 2.0 port with PowerShare
2 media-card reader 4 USB 3.0 ports (2) 6 power button 8 headphone port ...
Owner's Manual (PDF) - Page 23
... that secures the computer cover to support the computer with the computer cover removed-at dell.com/regulatory_compliance. For additional safety best practices information, see the Regulatory Compliance Homepage at least...the Computer Cover
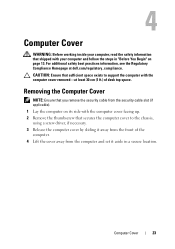
NOTE: Ensure that you remove the security cable from the computer and set it away from the front of desk top space. 4
Computer Cover
WARNING: Before ...
Owner's Manual (PDF) - Page 27
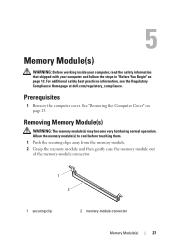
... your computer and follow the steps in "Before You Begin" on page 23. For additional safety best practices information, see the Regulatory Compliance Homepage at dell.com/regulatory_compliance. Allow the memory module(s) to cool before touching them. 1 Push the securing clips away from the memory module. 2 Grasp the memory module and...
Owner's Manual (PDF) - Page 28
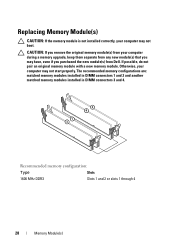
... purchased the new module(s) from any new module(s) that you remove the original memory module(s) from your computer during a memory upgrade, keep them separate from Dell. The recommended memory configurations are: matched memory modules installed in DIMM connectors 1 and 2 and another matched memory modules installed in DIMM connectors 3 and 4. If possible...
Owner's Manual (PDF) - Page 31
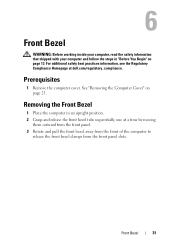
... safety information that shipped with your computer and follow the steps in an upright position. 2 Grasp and release the front bezel tabs sequentially, one at dell.com/regulatory_compliance.
Owner's Manual (PDF) - Page 35
...-Card Bracket (optional)
35
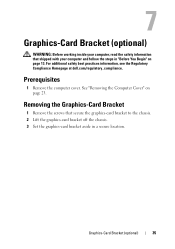
For additional safety best practices information, see the Regulatory Compliance Homepage at dell.com/regulatory_compliance. See "Removing the Computer Cover" on page 13. Prerequisites
1 Remove the computer cover...card bracket to the chassis. 2 Lift the graphics-card bracket off the chassis. 3 Set the graphics-card bracket aside in "Before You Begin" on page 23.
Owner's Manual (PDF) - Page 37
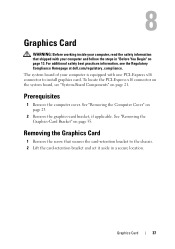
...locate the PCI-Express x16 connector on the system board, see the Regulatory Compliance Homepage at dell.com/regulatory_compliance. Removing the Graphics Card
1 Remove the screw that shipped with one PCI-Express... x16 connector to the chassis. 2 Lift the card-retention bracket and set it aside in "Before You Begin" on page 35.
See "Removing the Computer Cover" ...
Owner's Manual (PDF) - Page 77
... 3 Remove the optical drive. For additional safety best practices information, see the Regulatory Compliance Homepage at dell.com/regulatory_compliance.
See "Removing the Computer Cover" on page 13. 16
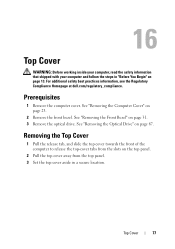
Top Cover
WARNING: Before working ... top panel.
2 Pull the top cover away from the top panel. 3 Set the top cover aside in "Before You Begin" on page 23.
2 Remove the front bezel. Prerequisites
...
Owner's Manual (PDF) - Page 104

Set the processor lightly in the processor socket.
3 Orient the alignment notches on the processor with the alignment tabs on the socket.
4 Align the pin-1 corner of the processor with the pin-1 corner of the processor socket, and then place the processor in the socket and ensure that the processor is positioned correctly.
1 processor 2 socket
2 1
104
Processor
Owner's Manual (PDF) - Page 107
... 13.
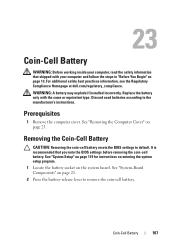
Removing the Coin-Cell Battery
CAUTION: Removing the coin-cell battery resets the BIOS settings to the manufacturer's instructions. See "System Setup" on page 119 for instructions on entering ...additional safety best practices information, see the Regulatory Compliance Homepage at dell.com/regulatory_compliance. See "System-Board Components" on page 21. 2 Press the battery-release lever to...
Owner's Manual (PDF) - Page 119
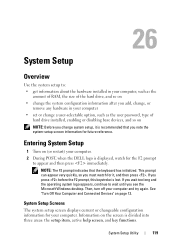
... the hard drive, and so on • change the system configuration information after you add, change, or
remove any hardware in your computer • set or change a user-selectable option, such as the user ... Your Computer and Connected Devices" on (or restart) your computer. 2 During POST, when the DELL logo is divided into three areas: the setup item, active help screen, and key functions. NOTE...
Owner's Manual (PDF) - Page 120

... view information about each option listed in the Setup Item are changeable.
Press to make changes to highlight an option.
Setup Item -
Key Functions - System Setup Options
NOTE: Depending... manually when the service tag is a scrollable list containing features that option and available settings. This field appears below the Help Screen and lists keys and their functions within the...
Owner's Manual (PDF) - Page 125
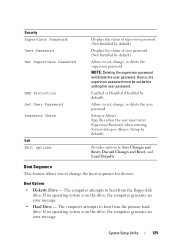
... Setup or Always (Setup by default)
Provides options to Save Changes and Reset, Discard Changes and Reset, and Load Defaults
Boot Sequence
This feature allows you to set, change, or delete the user password
Setup or Always Specifies when the user must be set , change the boot sequence for devices. System Setup Utility
125 Enabled or...
Owner's Manual (PDF) - Page 126

... detects the device and adds the USB flash option to run Dell Diagnostics from .
For example, if you are booting to boot from the Drivers and Utilities disc. Changing Boot Sequence for the Current Boot
You can use this feature to change the current boot sequence, for example, to boot from a USB device...
Owner's Manual (PDF) - Page 127

...highlight the Boot menu option and press to clear the CMOS setting. 1 Remove the computer cover. NOTE: Write down -arrow...For additional safety best practices information, see the Regulatory Compliance Homepage at dell.com/regulatory_compliance.
See "Removing the Computer Cover" on page 23....electrical outlet to access the menu. Changing Boot Sequence for Future Boots 1 Enter system setup. and down...
Owner's Manual (PDF) - Page 129

... jumper (RTCRST) on page 13. See "System-Board Components" on page 21. 3 Remove the 2-pin jumper plug from the electrical outlet to clear the CMOS setting. 1 Remove the computer cover. CMOS:
System Setup Utility
129 For additional safety best practices information, see the Regulatory Compliance Homepage at...
Similar Questions


Xps 8500 Cd Drive
How do you open the cd drive on a XPS 8500 computer?
How do you open the cd drive on a XPS 8500 computer?
(Posted by pplus10 11 years ago)