Dell Vostro 3550 Support Question
Dell Vostro 3550 Support Question
Find answers below for this question about Dell Vostro 3550.Need a Dell Vostro 3550 manual? We have 2 online manuals for this item!
Question posted by vandiax on January 21st, 2014
Vostro 3550 Does Not Recognize Hard Drive
The person who posted this question about this Dell product did not include a detailed explanation. Please use the "Request More Information" button to the right if more details would help you to answer this question.
Current Answers
Related Dell Vostro 3550 Manual Pages
User Manual - Page 5
...power button
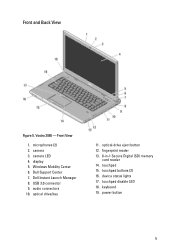
5 Front View
1. display 5. Dell Instant Launch Manager 8. optical drive/bay
11. fingerprint reader 13. 8-in-1 Secure Digital (SD) memory
card reader 14. Dell Support Center 7. keyboard 19. Windows Mobility Center 6. touchpad buttons (2) 16. Front and Back View
Figure 5. Vostro 3550 - microphones (2) 2. camera 3. camera LED 4. USB 3.0 connector 9. audio connectors 10...
User Manual - Page 9
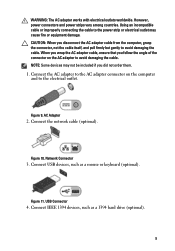
... adapter to the AC adapter connector on the AC adapter to the electrical outlet. Connect the network cable (optional). Connect USB devices, such as a 1394 hard drive (optional).
9 Using an incompatible cable or improperly connecting the cable to avoid damaging the cable. NOTE: Some devices may cause fire or equipment damage. AC...
Owners Manual - Page 4

Installing The Optical Drive 22
8 Hard Drive 23
Removing The Hard Drive 23 Installing The Hard Drive 24
9 ExpressCard 25
Removing The ExpressCard 25 Installing The ExpressCard 26
10 ExpressCard Board 27
Removing The ExpressCard Board 27 Installing The ExpressCard Board 29
...
Owners Manual - Page 23
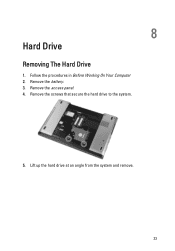
8
Hard Drive
Removing The Hard Drive
1. Remove the screws that secure the hard drive to the system.
5. Lift up the hard drive at an angle from the system and remove.
23 Remove the battery. 3. Remove the access panel. 4. Follow the procedures in Before Working On Your Computer 2.
Owners Manual - Page 24
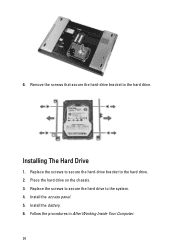
.... 6. Installing The Hard Drive
1. Replace the screws to secure the hard drive to the hard drive. 2. Replace the screws to secure the hard-drive bracket to the system. 4. Follow the procedures in After Working Inside Your Computer.
24 Place the hard drive on the chassis. 3. Install the access panel. 5.
6. Remove the screws that secure the hard-drive bracket to the hard drive.
Owners Manual - Page 53
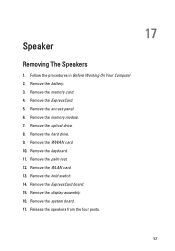
... the system board. 17. Remove the ExpressCard. 5. Remove the hard drive. 9. Remove the WLAN card. 13. Remove the battery. 3. Remove the keyboard. 11. Remove the display assembly. 16. Release the speakers from the four posts.
17
...
Owners Manual - Page 55
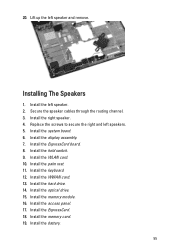
... speaker. 4. Install the hold switch. 9. Install the palm rest. 11. Install the optical drive. 15. Install the memory module. 16. Installing The Speakers
1. Install the WWAN card. 13... ExpressCard board. 8. Install the battery.
55 20. Install the display assembly. 7. Install the hard drive. 14.
Install the keyboard. 12. Install the left speaker. 2. Install the access panel. 17.
Owners Manual - Page 63
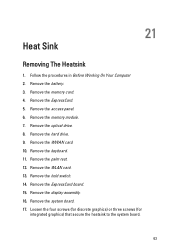
... heatsink to the system board.
63 Remove the keyboard. 11. Remove the hold switch. 14. Remove the display assembly. 16. Remove the ExpressCard. 5. Remove the hard drive. 9. Remove the WLAN card. 13. Remove the system board. 17. Follow the procedures in Before Working On Your Computer 2. Remove the optical...
Owners Manual - Page 65
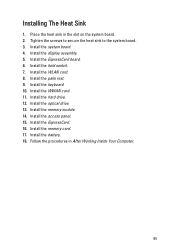
... keyboard. 10. Install the WWAN card. 11. Tighten the screws to secure the heat sink to the system board. 3. Install the optical drive. 13. Install the WLAN card. 8. Install the hard drive. 12. Install the access panel. 15. Install the memory card. 17. Installing The Heat Sink
1. Install the system board. 4. Install the...
Owners Manual - Page 67
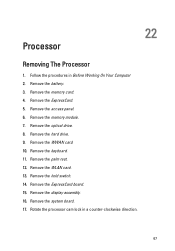
... the keyboard. 11. Remove the display assembly. 16. Remove the memory card. 4. Remove the hard drive. 9. Rotate the processor cam lock in Before Working On Your Computer 2. Remove the palm rest. 12. Remove the ExpressCard. 5. Remove the WLAN card. 13. Remove ...
Owners Manual - Page 69
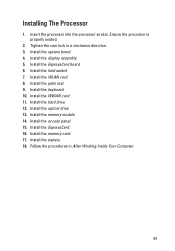
.... 4. Install the WWAN card. 11. Install the memory card. 17. Install the optical drive. 13. Install the memory module. 14. Ensure the processor is properly seated.
2. Install the WLAN card. 8. Follow the procedures in a clockwise direction. 3. Install the hard drive. 12. Install the access panel. 15. Install the hold switch. 7. Installing The Processor...
Owners Manual - Page 81

Remove the keyboard. 8. Remove the hard drive. 7. Release the antenna cables from the right hinge.
81 Remove the memory card. 4. Remove the access panel. 5. Remove the palm rest. 10. Remove the display ...
Owners Manual - Page 85
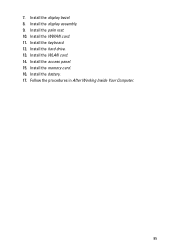
Install the display bezel. 8. Install the keyboard. 12. Install the memory card. 16. Follow the procedures in After Working Inside Your Computer.
85 Install the WWAN card. 11. Install the battery. 17. 7. Install the access panel. 15. Install the palm rest. 10. Install the display assembly. 9. Install the hard drive. 13. Install the WLAN card. 14.
Owners Manual - Page 87
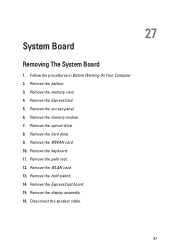
... the palm rest. 12. Remove the ExpressCard board. 15. Remove the display assembly. 16. System Board
Removing The System Board
1. Remove the hard drive. 9. Disconnect the speaker cable.
27
87 Remove the battery. 3. Remove the access panel. 6. Remove the WLAN card. 13. Remove the WWAN card. 10. Remove the ...
Owners Manual - Page 89
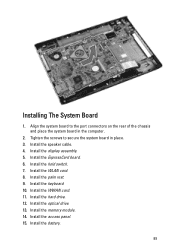
Installing The System Board
1. Install the hard drive. 12. Install the access panel. 15. Tighten the screws to the port connectors on the rear of ... the memory module. 14. Install the battery.
89 Install the ExpressCard board. 6. Install the palm rest. 9. Install the optical drive. 13. Install the WLAN card. 8. Install the keyboard. 10. Install the speaker cable. 4.
Owners Manual - Page 91
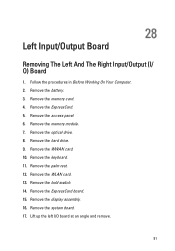
Remove the memory card. 4. Remove the hard drive. 9. Remove the keyboard. 11. Remove the WLAN card. 13. Remove the hold switch. 14. Remove the access panel. 6. Remove the WWAN card. 10. Remove the ... system board. 17. Remove the palm rest. 12. Remove the display assembly. 16. Follow the procedures in Before Working On Your Computer. 2. Remove the optical drive. 8.
Owners Manual - Page 93
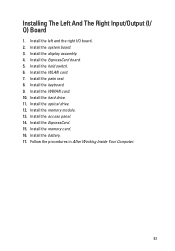
Install the left and the right I / O) Board
1. Install the hard drive. 11. Install the battery. 17. Follow the procedures in After Working Inside Your ...card. 10. Install the access panel. 14. Install the system board. 3. Install the optical drive. 12. Install the memory card. 16. Install the WLAN card. 7. Install the ExpressCard. 15. Install the memory module. 13.
Owners Manual - Page 95

... computer. • set or change a user-selectable option such as the user password. • read the current amount of memory or set the type of hard drive installed.
29
System Setup
System Setup Overview
System Setup allows you to: • change the system configuration information after you see the Microsoft Windows desktop...
Owners Manual - Page 98

Displays the memory speed.
Displays information about the installed eSATA device. Displays the type of the hard drive. Enable or disable the power Default: Enabled supply to
Default: Disabled
wake-up the computer from
... in-built on -board network card. Displays the model number and capacity of the optical drive.
Enable or disable the Intel Default: Enabled SpeedStep feature.
Owners Manual - Page 99

... field displays your computer. Allows you enable or disable various on board devices. Enable or disable the Computrace feature on the computer's internal hard drive (HDD). Specifies the behavior of different devices in which hard drive the computer can be charged when connected to change or delete the administrator password. Boot
Boot Priority Order...
Similar Questions


Hi!
How Can I Make My Dell Vostro 3550 Hotspot?
i want to use my dell vostro 3550 as hotspot.
i want to use my dell vostro 3550 as hotspot.
(Posted by mshoaibaq 11 years ago)