Dell Inspiron 660 Support Question
Dell Inspiron 660 Support Question
Find answers below for this question about Dell Inspiron 660.Need a Dell Inspiron 660 manual? We have 2 online manuals for this item!
Question posted by commmeme on February 7th, 2014
How Many Hard Drive Slots In Inspiron 660s
The person who posted this question about this Dell product did not include a detailed explanation. Please use the "Request More Information" button to the right if more details would help you to answer this question.
Current Answers
Answer #1: Posted by geekyankit1991 on February 7th, 2014 3:19 AM
geekyankit1991

Member since:
December 16th, 2013 Points: 166,010

Member since:
December 16th, 2013 Points: 166,010
I added a second hard drive to the machine. This drive contains all my data (files, music, pictures, etc.)
The boot drive is plugged into sata 0.
The dvd was plugged into sata 1.
I plugged the second hdd into sata 2.
It would not recognize the 2nd hdd.
So I switched the dvd and 2nd hdd. The dvd now in the sata 2 slot and the 2nd hdd in sata 1.
The PC found the 2nd hdd, but did not pick up the dvd. Oddly, it showed an E drive as System Reserve (it must have picked up one of the system partitions that I noticed windows uses).
I rebooted a few times, then noticed that I would sometimes lose the 2nd hdd on sata 1.
Is this simply a cabling issue? I thinking it maybe HOWEVER does not explain why NOTHING is picked up in the sata 2 slot.
In terms of other partitions: the OS is on C and I have a Programs partition labeled G. when it picks up the 2nd hdd, I have an H,I and J partition on it. And like I said, it shows that System Reserve partition as E.
hope this helps
Tech freak
Related Dell Inspiron 660 Manual Pages
Owners Manual - Page 1
Dell Inspiron 660 Owner's Manual
Computer model: Inspiron 660 Regulatory model: D11M Regulatory type: D11M002
Owners Manual - Page 2
... potential damage to change without the written permission of Microsoft corporation in this document is used in this text: Dell™, the DELL logo, and Inspiron™ are not followed. Bluetooth® is strictly forbidden.
Owners Manual - Page 4
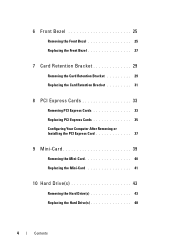
... Your Computer After Removing or Installing the PCI Express Card 37
9 Mini-Card 39
Removing the Mini-Card 40 Replacing the Mini-Card 41
10 Hard Drive(s 43
Removing the Hard Drive(s 43 Replacing the Hard Drive(s 48
4
Contents
Owners Manual - Page 5
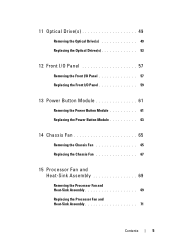
11 Optical Drive(s 49
Removing the Optical Drive(s 49 Replacing the Optical Drives(s 53
12 Front I/O Panel 57
Removing the Front I/O Panel 57 Replacing the Front I/O Panel 59
13 Power Button Module 61
Removing the Power Button Module ...
Owners Manual - Page 13
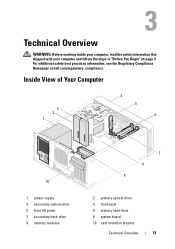
Inside View of Your Computer
3 2
1
4 5
6
10
1 power supply 3 secondary optical-drive 5 front I/O panel 7 secondary hard-drive 9 memory modules
7 8 9
2 primary optical-drive 4 front bezel 6 primary hard-drive 8 system board 10 card retention bracket
Technical Overview
13
Technical Overview
WARNING: Before working inside your computer, read the safety information that shipped with your ...
Owners Manual - Page 19
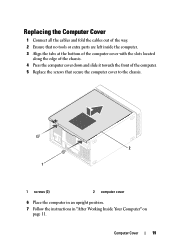
... way. 2 Ensure that no tools or extra parts are left inside the computer. 3 Align the tabs at the bottom of the computer cover with the slots located
along the edge of the chassis. 4 Press the computer cover down and slide it towards the front of the computer. 5 Replace the screws that...
Owners Manual - Page 26

... front panel.
3 Rotate and pull the front bezel away from the front of the computer to release the front bezel clamps from the front panel slots.
1
2
3
4
5
1 front bezel 3 front bezel tabs (4) 5 front panel
2 front panel slots (4) 4 front bezel clamps (4)
4 Set aside the front bezel in a secure location.
26
Front Bezel
Owners Manual - Page 27

Replacing the Front Bezel
Procedure
1 Align and insert the front bezel clamps into the front panel slots. 2 Rotate the front bezel towards the computer until the front bezel tabs
snap into place.
1 2
3
4
1 front bezel 3 front panel slots (4) 5 front panel
5
2 front bezel tabs (4) 4 front bezel clamps (4)
Front Bezel
27
Owners Manual - Page 34
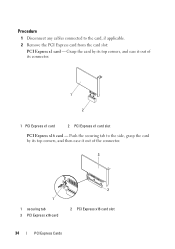
...the card by its connector.
1
2
1 PCI Express x1 card
2 PCI Express x1 card slot
PCI Express x16 card - Procedure
1 Disconnect any cables connected to the side, grasp the card ...it out of the connector.
3
1
1 securing tab 3 PCI Express x16 card
2 2 PCI Express x16 card slot
34
PCI Express Cards Push the securing tab to the card, if applicable. 2 Remove the PCI Express card from the card...
Owners Manual - Page 35
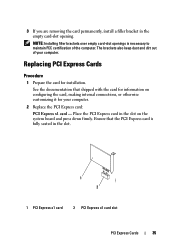
Replacing PCI Express Cards
Procedure
1 Prepare the card for your computer. 3 If you are removing the card permanently, install a filler bracket in the slot on configuring the card, making internal connections, or otherwise customizing it for installation. See the documentation that the PCI Express card is necessary to maintain ...
Owners Manual - Page 43
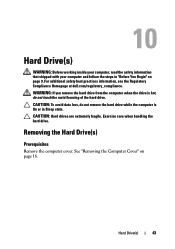
CAUTION: To avoid data loss, do not remove the hard drive while the computer is hot, do not touch the metal housing of the hard drive. CAUTION: Hard drives are extremely fragile. Removing the Hard Drive(s)
Prerequisites
Remove the computer cover. Hard Drive(s)
WARNING: Before working inside your computer, read the safety information that shipped with your computer and follow the...
Owners Manual - Page 44
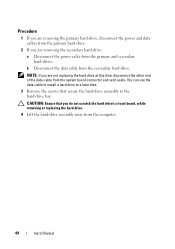
... hard-drive, disconnect the power and data cables from the primary hard-drive.
2 If you are not replacing the hard drive at a later time.
3 Remove the screws that you are removing the secondary hard-drive:
a Disconnect the power cable from the secondary hard-drive.
NOTE: If you do not scratch the hard drive's circuit board, while removing or replacing the hard drive.
4 Lift the hard-drive...
Owners Manual - Page 47
Hard Drive(s)
47
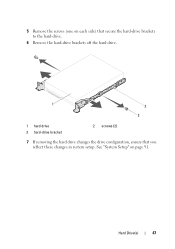
See "System Setup" on each side) that secure the hard-drive brackets to the hard-drive.
6 Remove the hard-drive brackets off the hard drive.
1
3
2
1 hard drive 3 hard-drive bracket
2 screws (2)
7 If removing the hard drive changes the drive configuration, ensure that you reflect these changes in system setup. 5 Remove the screws (one on page 91.
Owners Manual - Page 48
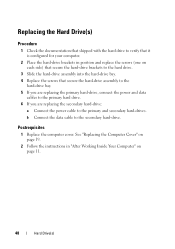
... each side) that secure the hard-drive brackets to the hard drive.
3 Slide the hard-drive assembly into the hard-drive bay. 4 Replace the screws that secure the hard-drive assembly to the
hard-drive bay. 5 If you are replacing the primary hard-drive, connect the power and data
cables to the primary hard drive. 6 If you are replacing the secondary hard-drive:
a Connect the power cable to...
Owners Manual - Page 91
.... See "Turn Off Your Computer and Connected Devices" on page 9.
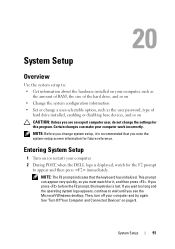
If you see the Microsoft Windows desktop. NOTE: Before you change the settings for it is lost. Entering System Setup
1 Turn on (or...the hardware installed on your computer, such as
the amount of RAM, the size of the hard drive, and so on • Change the system configuration information • Set or change a user-selectable ...
Owners Manual - Page 94
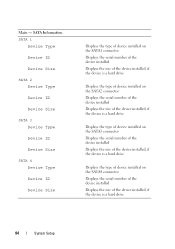
... of the device installed Displays the size of the device installed, if the device is a hard drive
Displays the type of device installed on the SATA2 connector Displays the serial number of the device... installed Displays the size of the device installed, if the device is a hard drive
Displays the type of device installed on the SATA3 connector Displays the serial number of the device...
Owners Manual - Page 96

... Mode may prevent booting of keyboard-related errors during boot
On or Off (On by default)
Allows you to set the status of the integrated hard-drive controller
ATA Mode;
Owners Manual - Page 97
...
Enabled or Disabled (Disabled by default)
Auto Power On Mode
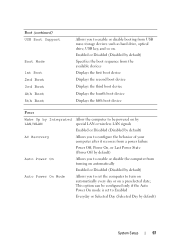
Allows you to enable or disable the computer from USB mass storage devices such as hard drive, optical drive, USB key, and so on. Enabled or Disabled (Disabled by default) Specifies the boot sequence from the available devices Displays the first boot device...
Owners Manual - Page 100

... menu. The computer attempts to boot from the network, ensure that your device is on the floppy disk, the computer generates an error message.
• Hard Drive - If no operating system is bootable, check the device documentation.
• Network - Insert the memory device into a USB port and restart the computer.
To ensure...
Owners Manual - Page 101
...booting from a USB device, connect the USB device to run Dell Diagnostics from the CD/DVD/CD-RW drive to a USB port.
2 Turn on page 91. 2 Use the arrow keys to highlight the Boot ...menu option and press
to wait until you see the Microsoft Windows desktop. Then, shut down -arrow keys to move through the list of devices. 4 Press plus (+) or minus (-) ...
Similar Questions


How To Install Hard Drive In Inspiron One 2305
(Posted by hartsharif 10 years ago)

How To Partition New Dell Inspiron 660 Hard Drive?
I'm ready to boot up my Inspiron 660 for the 1st time, but before I start loading data on the hard d...
I'm ready to boot up my Inspiron 660 for the 1st time, but before I start loading data on the hard d...
(Posted by jfrey007 11 years ago)