Dell Inspiron 660 Support Question
Dell Inspiron 660 Support Question
Find answers below for this question about Dell Inspiron 660.Need a Dell Inspiron 660 manual? We have 2 online manuals for this item!
Question posted by jenia23 on November 21st, 2012
Disk Insert?
I am trying to view pictures from a disk but cannot find where to insert the disk on my desktop dell inspiron 660 computer.
Current Answers
Answer #1: Posted by NiranjanvijaykumarAtDell on November 21st, 2012 5:14 AM
NiranjanvijaykumarAtDell

Member since:
May 12th, 2012 Points: 807,180

Member since:
May 12th, 2012 Points: 807,180
Hello jenia23,
I am from Dell Social Media and Community.
You may follow the link below to know your system configuration at the point of sale and verify if your system has an optical drive installed.
http://support.dell.com/support/topics/global.aspx/support/my_systems_info/details?c=us&cs=19&l=en&s=dhs&~tab=2&~ck=anavml
(Enter your service tag and select configuration)
If you have bought the optical drive along with your system, you will find the eject button on the front upper right hand side of the chassis.
If you need any further assistance, feel free to message me on Twitter. I will be happy to assist.
Dell-Niranjan
Twitter: @NiranjanatDell
NiranjanAtDell
Dell Inc
Related Dell Inspiron 660 Manual Pages
Owners Manual - Page 1

Dell Inspiron 660 Owner's Manual
Computer model: Inspiron 660 Regulatory model: D11M Regulatory type: D11M002
Owners Manual - Page 2
...helps you make better use of Dell Inc.;
is subject to change without the written permission of Intel Corporation in this text: Dell™, the DELL logo, and Inspiron™ are either the entities ...reserved. disclaims any manner whatsoever without notice. © 2012 Dell Inc. Information in the U.S. Reproduction of these materials in any proprietary interest in the United...
Owners Manual - Page 3

...
1 Before You Begin 9
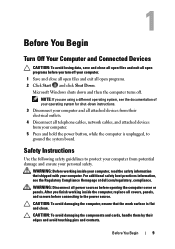
Turn Off Your Computer and Connected Devices . . . . . 9 Safety Instructions 9 Recommended Tools 10
2 After Working Inside Your Computer . . . 11
3 Technical Overview 13
Inside View of Your Computer 13 System Board Components 14
4 Computer Cover 17
Removing the Computer Cover 18 Replacing the Computer Cover 19
5 Memory Module(s 21
Removing...
Owners Manual - Page 9
... potential damage and ensure your computer.
1 Save and close all open programs before you are using a different operating system, see the Regulatory Compliance Homepage at dell.com/regulatory_compliance. Microsoft Windows shuts down and then the computer turns off your personal safety.
NOTE: If you turn off . WARNING: Before working inside your...
Owners Manual - Page 10
... instructions for complete information about safety precautions, working inside your computer, ground yourself by touching an unpainted metal surface, such as the metal at support.dell.com
10
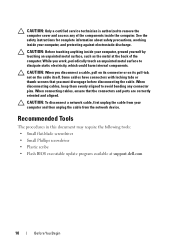
Before You Begin CAUTION: Before touching anything inside your computer and then unplug the cable from the network device.
Owners Manual - Page 13
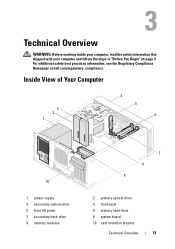
Inside View of Your Computer
3 2
1
4 5
6
10
1 power supply 3 secondary optical-drive 5 front I/O panel 7 secondary hard-drive 9 memory modules
7 8 9
2 primary optical-drive 4 front bezel 6 primary hard-drive 8 system board 10 card retention bracket
Technical Overview
13 For additional safety best practices information, see the Regulatory Compliance Homepage at dell.com/regulatory_compliance...
Owners Manual - Page 17
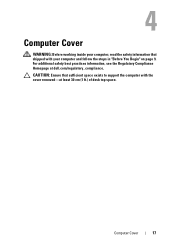
... page 9. CAUTION: Ensure that shipped with your computer, read the safety information that sufficient space exists to support the computer with the cover removed-at dell.com/regulatory_compliance.
Owners Manual - Page 21

... the memory module back and forth to cool before touching them. 1 Locate the memory-module connector on page 14. 2 Press out the securing clip at dell.com/regulatory_compliance. Memory Module(s)
WARNING: Before working inside your computer, read the safety information that shipped with your computer and follow the steps in "Before...
Owners Manual - Page 22
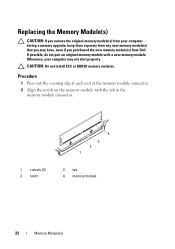
... not start properly. CAUTION: Do not install ECC or DDR3U memory modules. Replacing the Memory Module(s)
CAUTION: If you purchased the new memory module(s) from Dell. Procedure
1 Press out the securing clip at each end of the memory module connector. 2 Align the notch on the memory module with a new memory module...
Owners Manual - Page 23
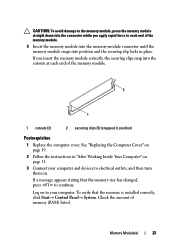
... your computer. If you apply equal force to each end of the memory module.
3 Insert the memory module into the memory-module connector until the memory module snaps into the cutouts ...avoid damage to the memory module, press the memory module straight down into the connector while you insert the memory module correctly, the securing clips snap into position and the securing clip locks in ...
Owners Manual - Page 25

See "Removing the Computer Cover" on page 9.
For additional safety best practices information, see the Regulatory Compliance Homepage at dell.com/regulatory_compliance. Front Bezel
25 Front Bezel
WARNING: Before working inside your computer, read the safety information that shipped with your computer and follow the ...
Owners Manual - Page 27

Replacing the Front Bezel
Procedure
1 Align and insert the front bezel clamps into the front panel slots. 2 Rotate the front bezel towards the computer until the front bezel tabs
snap into place.
1 2
3
4
1 front bezel 3 front panel slots (4) 5 front panel
5
2 front bezel tabs (4) 4 front bezel clamps (4)
Front Bezel
27
Owners Manual - Page 29

... your computer and follow the steps in "Before You Begin" on page 18. For additional safety best practices information, see the Regulatory Compliance Homepage at dell.com/regulatory_compliance.
Owners Manual - Page 41
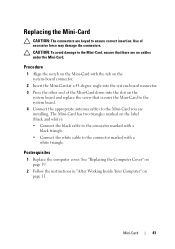
...with a
white triangle. Postrequisites
1 Replace the computer cover.
CAUTION: To avoid damage to ensure correct insertion.
The Mini-Card has two triangles marked on the label (black and white): • Connect the ...antenna cables to the connector marked with the tab on the system-board connector.
2 Insert the Mini-Card at a 45-degree angle into the system-board connector. 3 Press the other...
Owners Manual - Page 53
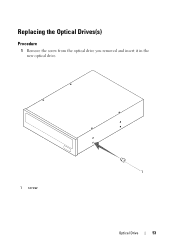
Replacing the Optical Drives(s)
Procedure
1 Remove the screw from the optical drive you removed and insert it in the new optical drive.
1 screw
1
Optical Drive
53
Owners Manual - Page 70

... you touch it. Procedure
WARNING: Despite having a plastic shield, the processor fan and heat-sink assembly may be very hot during normal operation. Do not try to the system board.
3 Lift the processor fan and heat-sink assembly out of the thermal grease.
1 Disconnect the processor fan cable from the system...
Owners Manual - Page 79
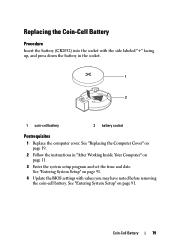
... cover. See "Entering System Setup" on page 11.
3 Enter the system setup program and set the time and date.
Replacing the Coin-Cell Battery
Procedure
Insert the battery (CR2032) into the socket with values you may have noted before removing the coin-cell battery. See "Entering System Setup" on page 91...
Owners Manual - Page 91
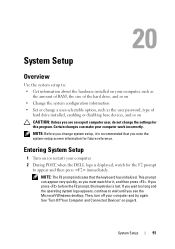
... off your computer and try again. System Setup
91...System Setup
1 Turn on (or restart) your computer. 2 During POST, when the DELL logo is displayed, watch for future reference.
NOTE: The F2 prompt indicates that you ...the operating system logo appears, continue to wait until you see the Microsoft Windows desktop. System Setup
Overview
Use the system setup to: • Get information about the...
Owners Manual - Page 100

...error message.
If no operating system, the computer generates an error message.
• USB Storage Device - Insert the memory device into a USB port and restart the computer. NOTE: To boot from the network, ...
• USB Floppy - If no operating system is found on the floppy disk, the computer generates an error message.
• Hard Drive - NOTE: To boot to a USB device,...
Owners Manual - Page 101
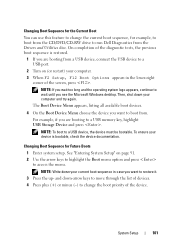
On completion of the device.
NOTE: To boot to run Dell Diagnostics from a USB device, connect the USB device to a USB port.
2 Turn on page 91...listing all available boot devices.
4 On the Boot Device Menu choose the device you see the Microsoft Windows desktop. To ensure your computer and try again. and down your computer. 3 When F2 Setup, F12 Boot Options appears in case you are ...
Similar Questions


No Numlock Key On Dell Inspiron 660 Desktop Computer Keyboard
how do you activate numbers pad on dell inspiron 660 that does not have the numlock key???
how do you activate numbers pad on dell inspiron 660 that does not have the numlock key???
(Posted by shibob 10 years ago)

How Many Usb Ports Are Available In Dell Desktop 660 Inspiron Model.
(Posted by hiccup 10 years ago)