
2004 Chrysler Concorde Support Question
2004 Chrysler Concorde Support Question
Find answers below for this question about 2004 Chrysler Concorde.Need a 2004 Chrysler Concorde manual? We have 1 online manual for this item!
Question posted by appraisal951 on July 27th, 2012
Valve Body Assembly
Could you tell me how many labor hours is called for to replace a 2004 Chrysler Concorde LX Valve Body Assembly
Current Answers
Related Manual Pages
Owner Manual - Page 31
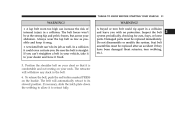
... A frayed or torn belt could even cut into you with no protection. Seat belt assemblies must be replaced immediately. The belt will withdraw any slack in a collision. If necessary, slide the latch...belt system periodically, checking for cuts, frays, or loose parts. The belt forces won't be replaced after an accident if they have it is straight. Position the shoulder belt on the buckle....
Owner Manual - Page 40
... a very high speed and with such a high force, that it has airbags. Be sure to tell anyone who works on the crash side of the vehicle is triggered, releasing a quantity of the airbag... Modifications to any part of badges or stickers to children. Do not modify the front bumper or vehicle body structure. • You need it. This especially applies to the airbag covers. 40 THINGS TO KNOW ...
Owner Manual - Page 49
... disassemble or modify the system.
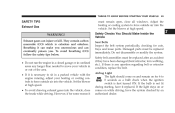
Set the blower at high speed. Damaged parts must be replaced after an accident if they have been damaged (bent retractor, torn webbing, etc.). WARNING!...speed. • To avoid drawing exhaust gases into the vehicle.
Safety belt assemblies must be replaced immediately. Adjust the heating or cooling system to force outside air into the vehicle...
Owner Manual - Page 76
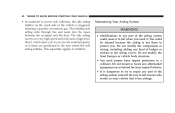
no batteries are needed. For additional information on HomeLink, call 1-800-355-3515, or on the internet at the push of...second time, so be sure they have the optional Overhead Travel Information System (OTIS) The HomeLink Universal Transceiver replaces up to three remote controls (hand held transmitters) that have been turned off your vehicle's battery and charging system; ...
Owner Manual - Page 78
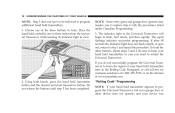
... the Universal Transceiver. Using both hands, press the hand held transmitter, refer to the Rolling Code Paragraph, or call toll free for customer assistance at 1-800-355-3515, or on the internet at www.homelink.com.
4. If... the signal of the three buttons to train. Choose one to replace step 4 with the procedures listed under Canadian Programming. 5. Place the hand held transmitters. 3.
Owner Manual - Page 81
... that may be received including interference that operate devices such as garage door openers, motorized gates, or home lighting. For additional information on HomeLink, call 1-800-355-3515, or on the internet at the push of a button, located on the overhead console. This device may cause undesired operation. GARAGE DOOR...
Owner Manual - Page 84
... and hold the programmed button on the internet at www.homelink.com. NOTE: If you need to replace step 4 with the "Rolling Code" feature, the transmitter code changes after 1996, your hand held .... Be sure to keep your hand-held transmitter appears to the Rolling Code Paragraph, or call toll-free for mention of your code. 84 UNDERSTANDING THE FEATURES OF YOUR VEHICLE
both buttons...
Owner Manual - Page 111

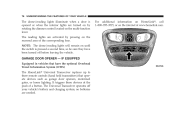
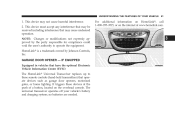
... engine start . U.S. Malfunction Indicator Light This light is part of an onboard diagnostic system called OBD that could lead to the purchaser the
4 The vehicle should be serviced if the... power or severe catalytic converter damage. Federal regulations require that you can also turn it replaced. Certain conditions such as possible if this heat. The vehicle should be serviced as soon...
Owner Manual - Page 177

You or others could damage your vehicle. You may want to a service center where it to call for service.
6
WARNING!
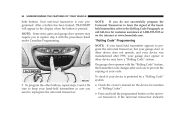
Driving with the air conditioner turned off immediately, and call a service center if your body under a vehicle that is on a lift.
If temperature gauge reads "H", pull over and stop the vehicle. Idle the vehicle...
Owner Manual - Page 187
... System (OBD II) ...191 Ⅵ Emissions Inspection And Maintenance Programs ...192 Ⅵ Replacement Parts ...193 Ⅵ Dealer Service ...193 Ⅵ Maintenance Procedures ...194 ▫ Engine... ▫ Chassis Lubrication ...207 ▫ Drive Shaft Universal Joints ...207 ▫ Body Mechanism Lubrication ...207 ▫ Windshield Wiper Blades ...209 ▫ Windshield Washers ...209...
Owner Manual - Page 188
...8549; Fuses ...224 ▫ Fuse Block Relays ...224 ▫ Underhood Fuses ...224 Ⅵ Replacement Light Bulbs ...226 Ⅵ Bulb Replacement ...227 ▫ Headlight, Parking Light Replacement ...227 ▫ Front Park And Turn Signal Light ...230 ▫ Front Sidemarker Light ...230
..., Lubricants And Genuine Parts ...233 ▫ Engine ...233 ▫ Chassis ...234 ▫ Body ...234
Owner Manual - Page 202
... hose for indication of the fuel filter which a vehicle can result in the fuel tank, frequent replacement of damage or plugging deposits. Fuel Filter A plugged fuel filter can cause hard starting the vehicle with a new valve. Replace if necessary. Should an excessive amount of dirt accumulate in serious personal injury. If, however, you...
Owner Manual - Page 207

... Inspect tie rod ends whenever the vehicle is evident, replace the universal joint boot and grease immediately. They are ...Body and other operating mechanisms and linkages should be inspected, cleaned, and lubricated, as required, to water and dirt contamination of the grease. Continued operation could result in failure of the universal joint due to maintain ease of the joint assembly...
Owner Manual - Page 210
... entry into the passenger compartment. have a competent mechanic inspect the complete exhaust system and adjacent body areas for lubrication or oil change in the ON position. • You or others can ...from under the hood, don't open a cooling system pressure cap when the radiator is damaged; Replace as possible.
If you unconscious and can injure or kill. Never try to open the hood ...
Owner Manual - Page 215

... the assembly of cracking, scuffing, or worn spots, have your foot resting or riding on leakage. Hard and brittle rubber, cracking, checking, tears, cuts, abrasion, and excessive swelling suggest deterioration of heat and mechanical damage. Riding the brakes can burst and cause brake failure. You wouldn't have the brake hoses replaced immediately...
Owner Manual - Page 217
...they are designed with hoses and clamps which have unique material characteristics to replace all clamps that recommended by deteriorated gasoline. Selection of Lubricant It is used...correct fluid type. Using a transmission fluid other than that have a transaxle and differential assembly contained within a single housing. It is important that the proper lubricant is important ...
Owner Manual - Page 225
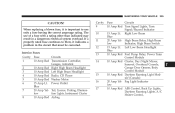
...fuse with a rating other than indicated may result in the circuit that must be corrected. When replacing a blown fuse, it indicates a problem in a dangerous electrical system overload. Right Low Beam ... Module 10 Amp Red Cluster, Day/Night Mirror, Sunroof, Overhead Console, Garage Door Opener, Body Control Module 10 Amp Red Daytime Running Light Module (Canada) 20 Amp Yel- MAINTAINING YOUR ...
Owner Manual - Page 226
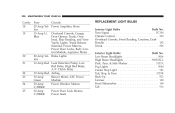
...Back-Up ...921 License ...168 Front Sidemarker...168 Tail ...916 Blue
Circuits Power Amplifier, Horn
REPLACEMENT LIGHT BULBS Interior Light Bulbs Turn Signal ...Climate Control ...Overhead Console, Front Handle ...Trunk ......Reading, and Visor Vanity Lights, Trunk Release Solenoid, Power Mirrors, Power Door Locks, Body Control Module, Aspirator Motor 20 Amp Yel- Brake Lights low 10 Amp Red Leak ...
Owner Manual - Page 229
...
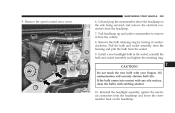
7 Do not touch the new bulb with rubbing alcohol. 10.
Reinstall the headlight assembly, replace the electrical connectors from the headlamp. 7. Pull headlamp up and under crossmember to remove ... with your fingers. Remove the speed control servo screw.
6. Pull the bulb and socket assembly from the housing and pull the bulb from the vehicle. 8. MAINTAINING YOUR VEHICLE 229
5....
Owner Manual - Page 231
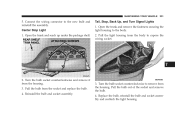
... socket assembly.
3. Tail, Stop, Back Up, and Turn Signal Lights 1. Pull the bulb from the housing. Turn the bulb socket counterclockwise to expose the wiring socket.
7
2. Center Stop Light 1. Replace the bulb, reinstall the bulb and socket assembly and reattach the light housing. MAINTAINING YOUR VEHICLE 231
5. Connect the wiring connector to the body. 2.
Similar Questions


How Does Fuel Rollover Valve Work On Chrysler 2004 Concorde Lxi
(Posted by weHoo 10 years ago)
How To Replace Chrysler Concorde 2004 Radiator
(Posted by cotaylor 10 years ago)

How To Tell If Ur Air Bleeder Assy Is Bad 2004 Concorde
(Posted by sb270Pierc 10 years ago)
How To Replace Rollover Valve In 2004 Concorde Lxi
(Posted by jackabrown 11 years ago)