Canon PIXMA MX410 Support Question
Canon PIXMA MX410 Support Question
Find answers below for this question about Canon PIXMA MX410.Need a Canon PIXMA MX410 manual? We have 3 online manuals for this item!
Question posted by korevand on September 3rd, 2013
How To Set Up Canon Pixma Mx410 To Receive Faxes
The person who posted this question about this Canon product did not include a detailed explanation. Please use the "Request More Information" button to the right if more details would help you to answer this question.
Current Answers
Related Canon PIXMA MX410 Manual Pages
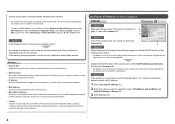
Network Setup Troubleshooting - Page 2
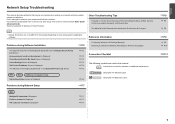
... Windows users. Find a description related to connect is Displayed
P.7
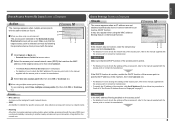
PIN codes do not match is Not Displayed (Detected) on the Detected Printers List Screen
P.5
WPS WCN Additional Computers Setup
Set Up New Printer Screen is Changed
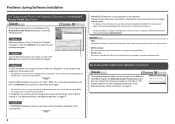
• Names of functions, etc. Problems during Software Installation
P.2
The Target Access Point is Displayed
P.7
P.8
P.8
P.8
P.8
P.8 P.10
P.11...
Network Setup Troubleshooting - Page 3
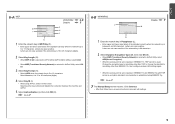
... via "ANY" SSID, etc.) or disable the stealth mode, then click Refresh (A) to "7 Set Up a Wireless Connection" in the printed manual: Getting Started. Glossary • SSID
An identifier ...security protocol (encryption standard) for the access point again.
Check 4
Is "WPA/WPA2 Enterprise" set as a security protocol (encryption standard) on page 11, then click Refresh (A) to search ...
Network Setup Troubleshooting - Page 4
... connecting to another nearby access point upon interruption of "Set Printer IP Address Screen is displayed. • For details on how to change the settings of the access point, refer to identify the specific... or contact its manufacturer.
• To specify the IP address of the machine, click Set IP Address (B), then follow the procedure in the Detected Access Points List screen will be ...
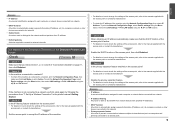
Network Setup Troubleshooting - Page 5
... (A).
It protects computers and corporate networks against unauthorized access, or restricts unauthorized access to each of your security software active? Set Printer IP Address Screen is Displayed
Check
Check 1
Make sure that Canon software is not solved even after following Check 1 to 3, follow the procedure below to specify the IP address.
1 Select Use...
Network Setup Troubleshooting - Page 6
...Set the access point to accept the IP address of the access point, refer to the manual supplied with the
access point or contact its manufacturer. Check 4 When obtaining an IP address automatically, make sure that Link Status is Not Displayed (Detected) on the Detected Printers... required information (IP address, etc.) to computers, printers or other devices connected to the network.
•...
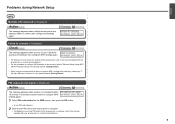
Network Setup Troubleshooting - Page 7

... feature A function to prevent communication between multiple wireless devices (such as computers and printers) connected to an access point.
Enable the DHCP function of the access point, then click Redetect.
• For details on how to change the settings of the access point, refer to the manual supplied with the access point...
Network Setup Troubleshooting - Page 8
... Setup
WPS
Multiple APs detected is not completed within 10 minutes. Check the access point settings, then configure WPS settings again.
• For details on how to set PIN codes to the access point or computer, refer to "7 Set Up a Wireless Connection" in the printed manual: Getting Started.
• When using an access point...
Network Setup Troubleshooting - Page 9
... Not Know the Access Point Name/Network Name (SSID), Security Protocol (encryption standard), and Network Key
Check
Check the access point settings. • For details on how to check the settings of the following steps according
to the computer.
You may need to restart your computer. • Search for the access
D
point...
Network Setup Troubleshooting - Page 10
...that, follow the on-screen instructions to operate in IEEE802.11n and IEEE802.11g with TKIP set to proceed with settings.
Letters are not case sensitive if the network key is 64 characters.
2 Select...Utility, select AES(Secure Encryption).
• When the access point is set as an encryption standard, communication is set to operate in IEEE802.11n, TKIP cannot be used. Change the ...
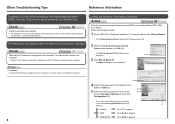
Network Setup Troubleshooting - Page 11

... the machine to the default state.
1 Use the Menu button to select Device settings.
2 Use the [ or ] button to select LAN settings, then press the OK button.
3 Select Reset LAN settings, then press the OK button.
4 Select Yes, then press the OK button.
5 Make sure that the screen shown to the default state...
Network Setup Troubleshooting - Page 12
... firewall function of the access point, refer to the network?
If the warning message appears, set the security software to corporate networks and the Internet.
11 ENGLISH
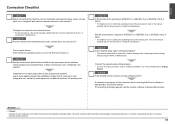
Connection Checklist
Check 1 Before connecting... is attempting to change the operating mode of your security software active? so that Canon software is already turned on, turn it off, then turn it back on how...
Network Setup Troubleshooting - Page 24

QT5-3490-V01
XXXXXXXX
©CANON INC.2011
PRINTED IN XXXXXXXX
MX410 series Getting Started - Page 65
... bandwidth: 2.4 GHz Channel: 1-11 or 1-13 * Frequency bandwidth and available channels differ depending on ITU-T No.1 chart for US specifications and Canon FAX Standard chart No.1 for others , both in standard mode.)
Fax resolution Black Standard: 203 pels/inch X 98 lines/inch (8 pels/mm X 3.85 lines/mm) Black Fine, Photo: 203 pels/inch...
Quick Menu Guide - Page 3
... when using a product that is prohibited.
• In principle, Canon shall change or delete the contents of this guide without prior notice ...Canon shall not be liable for any damage suffered by customers as "this guide"), in whole or in part, is not described in this guide. Select
(Tools) > Print > Page setup....
2. Alternatively, from the right arrow of Options to print this guide. To set...
Quick Menu Guide - Page 4
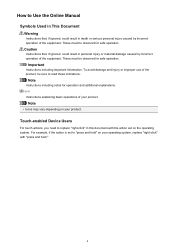
... replace "right-click" in this document with "press and hold " on the operating system. For example, if the action is set on your operating system, replace "right-click" with the action set to "press and hold ."
4
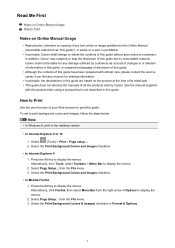
How to Use the Online Manual
Symbols Used in This Document Warning
Instructions that , if ignored...
Quick Menu Guide - Page 8

... the Canon website. Read the displayed license agreement, then click I Agree. 3. The screen for products supporting Quick Menu.
• Available functions and settings vary depending on your scanner or printer. click...displayed in Image Display. 2. Keep these points in mind.
• Refer to the Canon website for selecting the folders to be used.
General Notes (Quick Menu)
Quick Menu ...
Quick Menu Guide - Page 23

....
(Close) Closes the Main Menu.
23 The model name display format varies depending on the registered printer/scanner. Start Starts the selected application, opens the selected manual, or accesses the Canon website. Click to the Shortcut Menu.
(3) Model Name Area
The printer/scanner model name registered in the Preferences dialog box is displayed.
Quick Menu Guide - Page 30
...you want to Canon when accessing a website, etc. in
the displayed menu.
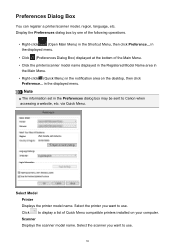
• Click (Preferences Dialog Box) displayed at the bottom of Quick Menu compatible printers installed on ...the desktop, then click Preference... via Quick Menu. Preferences Dialog Box
You can register a printer/scanner model, region, language, etc. Note
The information set in ...
Quick Menu Guide - Page 31
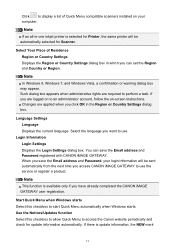
... or Region. Note
If an all-in the Region or Country Settings dialog box.
Such dialog box appears when administrative rights are applied when you click OK in -one inkjet printer is update information, the NEW mark
31 When you access CANON iMAGE GATEWAY to start Quick Menu automatically when Windows starts. Use...
Quick Menu Guide - Page 32
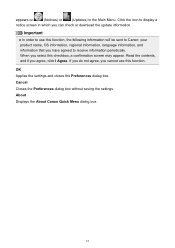
... this function. About Displays the About Canon Quick Menu dialog box.
32 Cancel Closes the Preferences dialog box without saving the settings. OK Applies the settings and closes the Preferences dialog box. Important
In order to use this checkbox, a confirmation screen may appear.
Click the icon to receive information periodically. If you do not...
Similar Questions


