Canon PIXMA MG5420 Support Question
Canon PIXMA MG5420 Support Question
Find answers below for this question about Canon PIXMA MG5420.Need a Canon PIXMA MG5420 manual? We have 2 online manuals for this item!
Question posted by Kandie737 on March 24th, 2014
What Is Error 0x00000643?
RE: Canon Pixma MG 5420. Installed printer using included disk, control Panel verifies printer is installed, have connectivity to WiFi. Attempted to print using WiFi received printer error message: The printer installation failed. Operation could not be completed error 0x00000643. Went to document print area checked printer status: No printer installed. Reinstalled from disk, this time connected computer directly to printer, again received printer error message: The printer installation failed. Operation could not be completed error 0x00000643. Went to control panel, hardware/software, printers to check status, says printer ready, attempted to print document from computer connected to printer and WiFi, received error message: word cannot print there is no printer installed. Thank you for any assistance you can offer. Lady
Current Answers
Answer #1: Posted by waelsaidani1 on March 24th, 2014 9:58 AM
waelsaidani1

Member since:
May 12th, 2013 Points: 19,501,797

Member since:
May 12th, 2013 Points: 19,501,797
Open Computer Management console - Device Manager - WSD Print Provider
Now right click 'WSD Print Device' & click uninstall.
Now install printer normally using add printer wizard.
Now installation will fail with same error message.
Now In device manager - right click on the name of your computer & select scan for Hardware Changes.
Now it will find the newly installed device & the printer will work properly.
Related Canon PIXMA MG5420 Manual Pages
Setup Guide - Page 2

Setup Guide
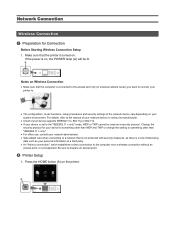
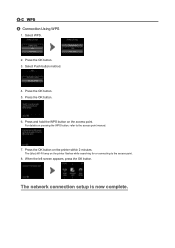
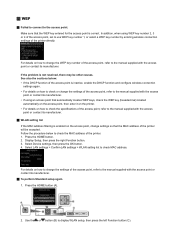
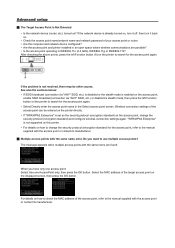
This guide provides information for setting up a network connection for Connection Printer Setup Setup Procedure Selection
Push Button Method Standard setup WPS Other setup (Advanced setup)
Disable WEP WPA/WPA2
Character Entry
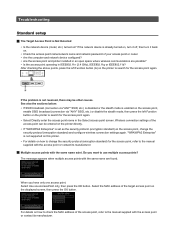
Troubleshooting Network Connection
Wireless Connection Preparation for the printer.
Setup Guide - Page 3
... access point (A) (or wireless network router) you want to connect your printer to the "IEEE802.11 n only" mode, WEP or TKIP cannot be lit. Change the
security protocol for Connection
Before Starting Wireless Connection Setup 1. Press the HOME button (A) on , the POWER lamp (A) will be used as your system environment. If the power is turned...
Setup Guide - Page 4
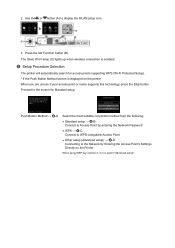
... Standard setup. The (blue) Wi-Fi lamp (C) lights up when wireless connection is displayed on the Printer
When using WEP key number 2, 3 or 4, select "Advanced setup". Push Button Method → d-A
Select the most suitable connection method from the following.
• Standard setup → d-B Connect to Access Point by entering the Network Password
• WPS →...
Setup Guide - Page 5

... lamp on the access point.
When the left screen appears, press the OK button. Press and hold the WPS button on the printer flashes while searching for or connecting to the access point manual.
2. Press the OK button on pressing the WPS button, refer to the access point.
3.
For details on...
Setup Guide - Page 6
...displayed on the printer.
5. Press the OK button. 6. Enter the network password (WEP key or passphrase). Make sure that the network password is now complete. The network connection setup is correct.... left Function button. 8. Character entry is case-sensitive.
9.
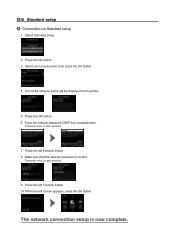
d-B Standard setup d Connection via Standard setup
1. Press the left screen appears, press the OK button.
Select ...
Setup Guide - Page 7
... the access point manual.
7. The (blue) Wi-Fi lamp on the printer within 2 minutes.
The network connection setup is now complete. Press the OK button.
6.
Select Push button method.
4. When the left screen appears, press the OK button. d-C WPS d Connection Using WPS
1. Select WPS.
2. Press the OK button. 5.
For details on the access point...
Setup Guide - Page 8
Press the OK button. 3. Select your access point, then press the OK button.
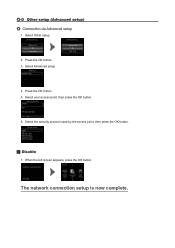
6. d-D Other setup (Advanced setup) d Connection via Advanced setup
1. Select Advanced setup.
4.
The network connection setup is now complete. Select the security protocol used by the access point, then press the OK button.
Disable
7. When the left screen appears, press the...
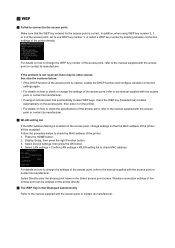
Setup Guide - Page 9

Press the OK button. 9. Press the OK button.
10.Enter the WEP key.
Character entry is correct.
13.Press the left Function button. 14.When the left Function button. 12.Make sure that the WEP key is case-sensitive.
11. Press the left screen appears, press the OK button. WEP
7. The network connection setup is now complete. Select the WEP key number you want to use.
8.
Setup Guide - Page 10

Press the OK button.
8. The network connection setup is case-sensitive.
9. WPA/WPA2
7. Enter the passphrase. Character entry is now complete. Press the left screen appears, press the OK button.
Press the left Function button. 12.When the left Function button. 10.Make sure that the passphrase is correct.
11.
Setup Guide - Page 11
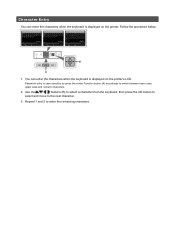
Use the
buttons (B) to select a character from the keyboard, then press the OK button to
select and move to enter the remaining characters. Repeat 1 and 2 to the next character.
3. You can enter the characters when the keyboard is displayed on the printer's LCD. Password entry is case sensitive so press the center Function...
Setup Guide - Page 12
... on the printer to change the security protocol (encryption standard) and configure wireless connection settings again.
The message appears when ...one access point: Select Use one AccessPoint only, then press the OK button. Wireless connection settings of the target... and printer installed in the Select access point screen. If the network device is not supported on this printer. •...
Setup Guide - Page 13
... AccessPoints, then press the OK button.
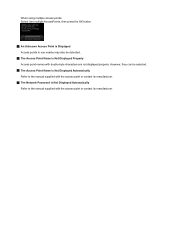
An Unknown Access Point is Displayed Access points in use nearby may also be selected.
The Access Point Name is Not Displayed Automatically Refer to the manual supplied with the access point or contact ...
Setup Guide - Page 14
... the access point is not resolved, there may be accepted. WEP
Failed to connect to use WEP key number 1, or select a WEP key number by entering wireless connection settings of the printer directly.
Press the HOME button (A).
2. Use the or button (B) to the manual supplied with the access point or contact its manufacturer...
Setup Guide - Page 15
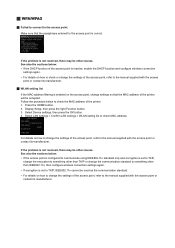
...11n, then configure wireless connection settings again. • If encryption is set to TKIP,
change the encryption to something other than TKIP or change the settings of the printer. 1. Select LAN settings ...or contact its manufacturer. For details on how to change the settings of the printer will be used as the communication standard. • For details on the access point, change ...
Setup Guide - Page 16
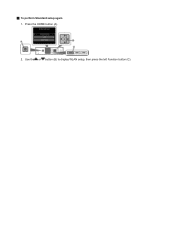
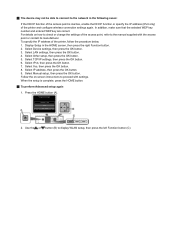
To perform Standard setup again 1. Press the HOME button (A).
2. Use the or button (B) to display WLAN setup, then press the left Function button (C).
Setup Guide - Page 17

... to check the settings of the access point, refer to connect. The screen appears when an error occurs. Connections are being attempted from multiple access points simultaneously. For details on . Press the WPS button on ? WPS
Cannot connect. The screen appears when connections are being attempted from multiple access points simultaneously. The screen appears when WPS...
Setup Guide - Page 18
... SSID broadcast (connection via "ANY" SSID, etc.) or disable the stealth mode, then press the left Function button (A) on the printer to search for the access point, refer to use multiple access points...device configured? • Are the access point and printer installed in the Select access point screen. Wireless connection settings of the target access point on the displayed screen, then press...
Setup Guide - Page 20
... Directly enter the access point name in the Select access point screen.
Wireless connection settings of the access point, refer to use WEP key number 1, or select a WEP key number by entering wireless connection settings of the printer. 1. In addition, when using an access point that the MAC address of the access point, refer to...
Setup Guide - Page 21
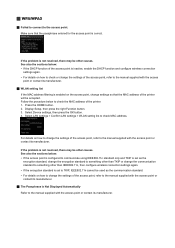
..., enable the DHCP function or specify the IP address (IPv4 only) of the printer and configure wireless connection settings again. Display Setup in the following cases: If the DHCP function of the... setup, then press the OK button. 5. Select TCP/IP settings, then press the OK button. 6. Use the or button (B) to proceed with the access point or contact its manufacturer. Select IP address, then ...
Setup Guide - Page 22
... passphrase entered for the access point is enabled on how to change the settings of the printer will be other causes. Make sure that the MAC address of the access point, refer ... something other than IEEE802.11n, then configure wireless connection settings again. • If the encryption standard is set to TKIP, IEEE802.11n cannot be used as the communication standard. • For details ...
Similar Questions

How To Remove Paper Jam From Pixma Mg 5420 Canon Printer
(Posted by debbrag 9 years ago)


My Canon Pixma Mg 5420 Wont Connect To My Wireless Home Wii Conection ?
(Posted by pinkfairy111389 10 years ago)

Where Can Idownload Free Cannon Mg 5420 Operating Manual
Where can I find free download of manuals for canon mg5420
Where can I find free download of manuals for canon mg5420
(Posted by alanb1786 10 years ago)

Cannon Pixma Mg 5320 Can You Use Just The Balck Ink
(Posted by jsFerenc 10 years ago)