Get support for Bernina Bernette 56

Bernina Bernette 56 Support Question

Bernina Bernette 56 Support Question

Find answers below for this question about Bernina Bernette 56.
Need a Bernina Bernette 56 manual? We have 1 online manual for this item!
Question posted by fabianaletourdie on July 28th, 2021

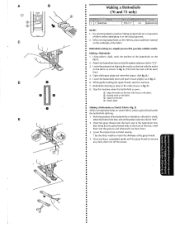
How To Oil Bernette 56

how to oil bernette 56

Current Answers

Answer #1: Posted by Technoprince123 on July 28th, 2021 2:48 AM
This answer was accepted by the poster of the original question.
Technoprince123

Member since:
February 8th, 2021

Points: 1,205,190
1,110
points


Please response if this answer is acceptable and solw your problem thanks
Answer #2: Posted by Ashutosh2398 on July 28th, 2021 7:18 AM
Ashutosh2398

Member since:
July 18th, 2021

Points: 1,390
100
points

Answer #3: Posted by SonuKumar on July 28th, 2021 8:38 AM
SonuKumar

Member since:
May 9th, 2021

Points: 16,617,800
100
points
https://www.manualslib.com/manual/389102/Bernina-Bernette-56.html

https://www.youtube.com/watch?v=4CShLxAfViQ

https://www.youtube.com/watch?v=4CShLxAfViQ&t=41s

https://www.youtube.com/watch?v=4CShLxAfViQ&t=192s

https://www.youtube.com/watch?v=-SbSqnr5xpY

https://www.youtube.com/watch?v=hJCRfpO_MVo

What kind of oil do you use on a sewing machine?

While there are natural and synthetic oils that could do a decent oiling job, the best kind of oil meant for oiling sewing machines is mineral oil. This oil is created from petrochemicals or certain substances made from crude oil. The sewing machine oil is white watery, odorless, and has a light viscosity.

=========================

Thank you, Happy to serve!

"Accept my work -- Sonu Kumar

=========================


Please respond to my effort to provide you with the best possible solution by using the "Acceptable Solution" and/or the "Helpful" buttons when the answer has proven to be helpful.

Regards,
Sonu
Your search handyman for all e-support needs!!

Related Bernina Bernette 56 Manual Pages

Instruction Manual - Page 2

... use by qualified service personnel. No grounding means is being administered. 8. Use this manual. 3. Always use a bent needle. 13. The sewing machine should only be supervised to the product. Switch the sewing machine to break. 14. See instructions for examination, repair, electrical or mechanical adjustment. 4. Servicing double-insulated products (220V - 240V) In a double...
Instruction Manual - Page 5

Always replace the fuse cover. When leaving the sewing machine unattended, the main switch ofthe machine must be switched off and an appropriate three pin plug ...of the wiring in your sewing machine is not suitable for the main power and sewlight. 0 Turn on 8 Turn off When servicing the sewing machine, or when removing covers or changing lamps, the machine or the electrical set must ...
Instruction Manual - Page 6

... Thread Tension 37 CHART OF SEWING FABRICS, NEEDLES AND THREAD COMBINATIONS 39 Making a Buttonhole (70 and 75 only 52 Making a Buttonhole (50 and 60 only 54 Buttonhole Fine Adjustment 57 Button Sewfng 59 , . MAINTENANCE . ·. : -' Changing the Bulb 67 Oiling 68 Cleaning 69 Performance Checklist 70 Repacking the machine 76 Straight Stitching 41...
Instruction Manual - Page 14

...decharge etectrique. •• (Pour les E.-U. When changing the light bulb or when the sewing machine is not •• in use, the power supply plug must be disconnected from the ...de stekker van het voetpedaal in de aansluiting in het stopcontact. Steck nude (stroom) stekker in de machine. and Canada only) • 2. Deze stekker zit tussen bet voetpedaal en de stekker voor het ...
Instruction Manual - Page 15

mark) ® Turn off . (See fig. A.) (j) Turn on ·or off (toward the"!" A Main Power and Sewing Light Switches This switch turns the main power and sewing light on (toward the "0" mark) Foot Controller When the foot controller is depressed lightly, the ma
Instruction Manual - Page 17

... Foot ••• It may be necessary to change the presser foot according to your sew- • ing needs. •• SNAP-ON TYPE • Turn power switch to ...uitsparing in de uitsparing. De persvoet vervangen Voor bet uitvoeren van de verschil!ende functies met uw machine, zijn er verschillende naaldvoeten, ook we! 'persvoeten' genoemd, nodig. MODELE A CLIQUET Mettre l'...
Instruction Manual - Page 18

A.} 0 Uft the bottom of the extension table up on garments. areas on the extension fable and pull it To change your machine to the free"arm style, lift up toward you. 8 Pull the extension table out to remove it out. (See fig.
Instruction Manual - Page 33

.... Do; A.) •• Reglage de Ia couture en points 81astiques • a A Ia sortfe d'usfne, Ia machine coudre est r9gl€e de sorte que Ia • a piqOre en points e!astiques se fasse Ia position norma!e "&#...etastique. (Voir fig. A.) Adjusting the stretch stitching The sewing machine is tijdens de fabricage zodanig ingesteld dat de elastische steek in een elastische steek. (Zk fig.
Instruction Manual - Page 37

... du pied-de,biche. 2. Open de spoelhuisklep achter bet afneembare vakje aan de voorkant van.de machine en verwijder bet spoelhuis door het geheel aan het hendeltje naar u toe uit de spoelbaan te trekken...the shuttle immediately after starting to sew. B-2, until it will fall out from the shuttle race (fig. NOTE: If the bobbin case is , tot in fig. I 'avant de Ia machine, et retirer Je bonier de ...
Instruction Manual - Page 40

Turn the balance wheel toward you {counterclockwise) until the bottom of th~ needle holder aligns with the bottom of the needlethreading-hook holder. Using the Needle Threader (75 only) Turn power switch to "0". 1. Lower the presser foot.lever. 2.
Instruction Manual - Page 42

...machine. • 5. Close the shuttle cover while pulling the thread through the slit in the cover. ® Shuttle cover @Slit 3. Tenir l'extrSmite du fi! CD Bobbin case ® Shuttle 2. de Ia navette et introduire le boitier dans !a • navette. • Start sewing...thread as explained on the cutter to start sewing immediately after inserting the bobbin without drawing up ...
Instruction Manual - Page 49

... rechte steek, af¥ • hankelijk van uw voorkeur. • 2. Sew 5 to start sewing in zo~ •• dat de machine vooruit begint te naaien. Leg nu het materiaal onder de persvoet en zet de ... afstand van de rand van de stof. • 5. Release the reverse sewing !ever and step down on the reverse sewing lever as far as possible, then lightly step on the foot controller to 10...
Instruction Manual - Page 50

... nou- Abaisser le levier de couture en marche arri6re et appuyer IBge- B) 1. Zorg, dat de naald in the new direction. • Finishing Sewing (fig. Naaien beCindigen (fig. Stop the machine at the point where you wish to stitch backward over the stitch for 1 em (3/811} from its new direcH tion using the...
Instruction Manual - Page 51

... the next seam, puf! about 10 em (4'~) of thread through the toes of the presser foot toward the back of the face plate. 5. Stop the machine. 2. lift the presser foot and pull the fabric out gently to its highest position and make sure that the thread take-up lever is also...
Instruction Manual - Page 52

...zigzag souhaitee. Deze steek wordt gebruikt voor knoopsgaten en als decoratieve steek. It is recommended to sew using the Straight Stitch at the beginning and • end of the Zigzag Stitch SATIN STITCH ...BOURDON Lorsque Ia longueur du point zigzag est dSfinie dans Ia plage "c::J", Ia machine effectue un point de bourdon (point zigzag tres s~rre) qui a peut servir faire des boutonnieres ou ...
Instruction Manual - Page 56

...SeW the Scallop Stitch along the edge of fabric, for example, when making patchwork. {See fig. a Ce point sert assembler deux morceaux de tissu,' par exemp!e pour faire du patchwork. (Voir fig. A.) Mettre !e sSiecteur de mod91e sur le point universaL Point feston Cette machine...patroonkeuzeknop in op de schelpsteek. 2. Deze machine naait automatisch een schelpsteek, die als decOratieve ...
Instruction Manual - Page 60

...button plate and insert the button. (See fig. Lower the presser foot and start the machine. 7. C. 6. CD Align the marks on the foot with tailor's chalk, •... of the fabric. Buttonhole stitching is sewn. Stop the machine when the buttonhole is done in the order shown in fig. Making a Buttonhole 1. E) When sewing buttonholes on the actual garment. 2. A B (j) c...
Instruction Manual - Page 76

...dient deze eenmaal per week te worden gesmeerd. Sewing machine oil is ingeregen. 5. Retirer Ia plaque aiguille et le capot de Ia machine. • 3. Si elle est utilie plus...3. centre technique. Verwijder de stekker uit bet contact. 2. • Oiling 1. Remove the power supply plug from your local sewing machine dealer or service center. • < G•ra•i•s•...
Instruction Manual - Page 84

... •• Keep the carton and packing material's for repacking the machine are illustrated. is designed to prevent damage in transit. • SaVe this sewing machine. BELANGRIJK Dit verpakkingsmateriaal is needed to reship the sewing machine. Bewaar het goed ingeval de naaimachine vervoerd of wanneer het verkeerde verpakkingsmateriaal wOrdt gebruikt, kan ze beschadigd raken...
Instruction Manual - Page 85

...8226; 0 Page Accessories 3 : Oiling 68 Appliques 64 o Overedge Stitching 50 B Balancing the Machine 10 Blindhem Stitching 45 0 p Patchworking 49 Pattern Lengths 12-15 Bobbin o Pattern Selection Dial 11 ! Finishing a Seam 42-43 • Stretch Overlock (Left 50 Foot Controller Stretch Overlock (Right 50 Connecting 6 Operati rtg 7 Free-Arm Sewing 10 o • •...

Similar Questions

Bernette 66 Sewing Machine
How do I thread a Bernette 66 sewing machine?
(Posted by stringpam 8 years ago)
How To Sew A Stright Line On Abernina Bernette 56
What is the tension on all 3 dials for the B.B. 56 to sew a striaght line
(Posted by catakuhata 10 years ago)
How Do I Oil My Bernette 56?
(Posted by Hnnhgoddard 12 years ago)
Ask a New Question
Use the box below to post a new question about this Bernina product .
Points & Prizes
  • You can earn points for nearly everything you do on HelpOwl.com
  • You can trade in those points for gift cards at leading retailers such as Amazon.com and Walmart
  • It's that simple!
See How it Works
Create a Free Account

Bernina Manuals

Find free Bernina Bernette 56 manuals and user guides available at ManualOwl.com. Try out our unique manual viewer allowing you to interact with manuals from directly within your browser!

Bernina Reviews

View thousands of Bernina user reviews and customer ratings available at ReviewOwl.com.

Contact Information

Complete Bernina customer service contact information including steps to reach representatives, hours of operation, customer support links and more from ContactHelp.com.

Scoreboard Ratings

See detailed Bernina customer service rankings, employee comments and much more from our sister site.