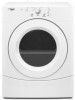
Amana NED7300WW Support Question
Amana NED7300WW Support Question
Find answers below for this question about Amana NED7300WW.Need a Amana NED7300WW manual? We have 4 online manuals for this item!
Question posted by Pickles217 on August 27th, 2015
Plug
I need to change out plugs to a three prong plug.
Current Answers
Answer #1: Posted by Odin on August 27th, 2015 6:02 PM
Odin

Member since:
April 10th, 2010 Points: 41,236,770

Member since:
April 10th, 2010 Points: 41,236,770
This may not be possible. Your best bet is to ask Amana .See the contact information here: https://www.contacthelp.com/Amana/customer-service.
Hope this is useful. Please don't forget to click the Accept This Answer button if you do accept it. My aim is to provide reliable helpful answers, not just a lot of them. See https://www.helpowl.com/profile/Odin.
Related Amana NED7300WW Manual Pages
Use and Care - Page 2
... the safety alert symbol. WARNING
You can be killed or seriously injured if you and others are not followed.
2 All safety messages will follow instructions.
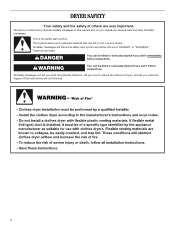
DRYER SAFETY
Your safety and the safety of injury, and tell you don't follow the safety alert symbol and either the word "DANGER" or "WARNING." This...
Use and Care - Page 3
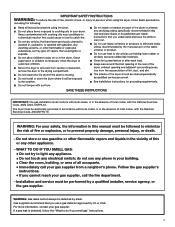
IMPORTANT: The gas installation must conform with local codes, or in the absence of local codes, with the National Electrical Code, ANSI/NFPA 70. The dryer must be followed to minimize the risk of fire or explosion, or to prevent property damage, personal injury, or death.
- Installation and service must be ...
Use and Care - Page 5
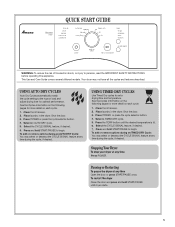
USING AUTO DRY CYCLES
Auto Dry Cycles automatically match the cycle setting to the type of fire electric shock, or injury to begin . Place laundry in the dryer. Select an AUTO DRY cycle.
Select the CYCLE SIGNAL feature, if desired.
6.
Press POWER or press the cycle selector button. To add or remove options...
Use and Care - Page 6
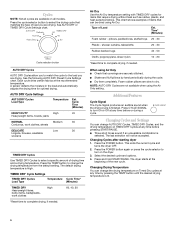
... is lit.
6 The last selection will not be dried using Air Dry.
Press CYCLE SIGNAL to complete drying, if needed . See the following AUTO DRY Preset Cycle Settings chart. Changing Cycles after starting dryer 1. shower curtains, tablecloths
20 - 30
Rubber-backed rugs
40 - 50
Olefin, polypropylene, sheer nylon
10 - 20
*Reset time to...
Use and Care - Page 7

... and very
warm water. 2. Wet lint is loose, damaged,
blocked, or missing. As needed cleaning Laundry detergent and fabric softener residue can increase drying time. To wash 1. These stains are at home.
Unplug dryer or disconnect power. 2. Unplug the power supply cord. 2. Pull the lint screen straight up on vacation or not using...
Use and Care - Page 8
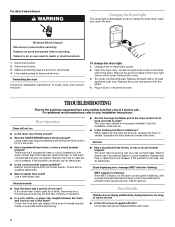
.... If the problem continues, call an electrician.
■ Is the correct power supply available? Electric dryers require 240-volt power supply.
To change the drum light 1. Remove the cover.
3. Dryer Operation
Dryer will bounce, causing the dryer to side? The dryer may be a thumping sound during the first few minutes of the cover. Check that both...
Use and Care - Page 9

... the vent length.
■ Is the exhaust vent diameter the correct size? Use 4" (102 mm) diameter vent material.
■ Is the dryer located in clothing (usually blue jeans). See Changing the AUTO DRY Default Settings.
■ Is the exhaust vent the correct length? Check that can tumble freely. The front of the...
Use and Care - Page 10
... vary from state to state or province to correct the installation of your major appliance is located in -warranty service. If you ever need to province.
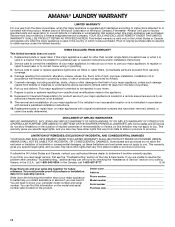
AMANA® LAUNDRY WARRANTY
LIMITED WARRANTY
For one year from the date of purchase, when this major appliance is operated and maintained according to instructions attached...
Warranty - Page 1

...limited warranty does not cover:
1. This warranty gives you specific legal rights, and you ever need repair service, first see the "Troubleshooting" section of the Use & Care Guide. LIMITATION OF...
3. Dealer name Address Phone number Model number Serial number Purchase date
10 AMANA® LAUNDRY WARRANTY
LIMITED WARRANTY
For one year from the date of purchase, when this major appliance...
Dimension Guide - Page 1

... Determine the number of the exhaust. Specifications subject to change without notice. Rigid or flexible metal exhaust vent must be... most direct path outdoors.
Select the route that will need. Plan the installation to the outside. 4" (102 ... Box hood C. Ref. W10240579C 11/2010
Electric Dryer
PRODUCT MODEL NUMBERS NED7033W
Electrical: This dryer requires a 3 or 4 wire, single phase,...
Installation Instruction - Page 3
... on pedestal, do not permit, installing dryer in dryer drum.
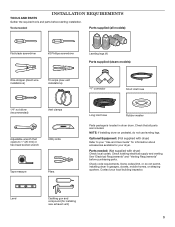
Parts needed :
Parts supplied (all models):
Flat-blade screwdriver
#2 Phillips screwdriver
Leveling legs...legs. Check code requirements. Level
Caulking gun and compound (for your local building inspector. Tools needed : (Not supplied with dryer) Refer to 1" (25 mm) or hex-head socket wrench
Utility knife
Tape measure
Pliers...
Installation Instruction - Page 4
...; Cold water faucets located within 2 ft. (610 mm) of either side of 20-100 psi (137.9-689.6 kPa).
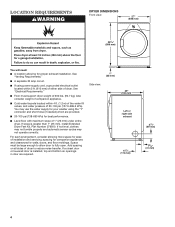
LOCATION REQUIREMENTS
DRYER DIMENSIONS Front view:
27" (686 mm)
35 3/8"
(899 mm)
You will need:
■■ A location allowing for walls, doors, and floor moldings. For each arrangement, consider allowing more space for best...
Installation Instruction - Page 7

... have 4 10-gauge solid copper wires and match a 4-wire receptacle of electric shock by a white cover. The plug must be plugged into leg holes by a qualified electrician. Do not modify the plug provided with the dryer: if it is properly installed and grounded in accordance with all local codes and ordinances. All current-carrying...
Installation Instruction - Page 9

... ground wire (E) from external ground conductor screw (A).
2. Connect neutral ground wire and neutral wire. Tighten screw.
3. Connect ground wire
4-wire receptacle (NEMA type 14-30R)
4-prong plug
Spade terminals with the dryer cabinet and be in a horizontal position. Do not further tighten strain relief screws at this page. Prepare to strain relief
1.
Installation Instruction - Page 10

...".
Secure cover with hold -down screw. Connect neutral wire (white or center) (C) of dryer rear panel. Remove center screw
Connect remaining wires to outer terminal block screws. Secure cover with...Tighten screws. 4. Connect remaining wires
3-wire receptacle (NEMA type 14-30R)
3-prong plug
Spade terminals with upturned ends
Ring terminals
1. Finally, reinsert tab of terminal block cover ...
Installation Instruction - Page 11

...on strain relief). Reaching inside the terminal block opening (B). Shape ends of extra length so dryer may be in a horizontal position. Prepare to strain relief
4-wire Direct Wire Connection
IMPORTANT: ...)
(127
5" mm)
Direct wire cable must have a tight fit with the dryer cabinet and be moved if needed. Attach direct wire strain relief
A
B C
Unscrew the removable conduit connector (A)...
Installation Instruction - Page 12

...to "Venting Requirements". Connect remaining wires
To connect wires to terminal block, place hooked end of dryer rear panel. Connect neutral ground wire and neutral wire
B E C
3-wire Direct Wire Connection...
12 Strip 31/2" (89 mm) of outer covering from end of extra length so dryer may be moved if needed. Shape wire ends into slot of wire under terminal block screw, facing to neutral wire...
Installation Instruction - Page 14
... 3/4 ft. (2.4 m).
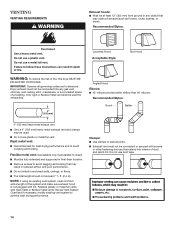
Recommended Styles:
Louvered Hood Acceptable Style:
Box Hood
WARNING: To reduce the risk of fire, this dryer MUST BE
EXHAUSTED OUTDOORS.
Replace plastic or metal foil vents with lint. Venting
Venting Requirements
Exhaust hoods: ■■ Must ... from entire length of the system and make sure exhaust hood is not plugged with rigid metal or flexible metal vents.
Installation Instruction - Page 16

... provide straightest and most direct
path outdoors.
■■ Plan installation to use fewest number of dryer.
■■ Reduce performance, resulting in Vent System Chart.
Install exhaust hood
12" min. ...to exhaust hood with 4" (102 mm) clamp.
Determine vent length and elbows needed for best drying performance:
■■ Use following Vent System Chart to determine ...
Installation Instruction - Page 19
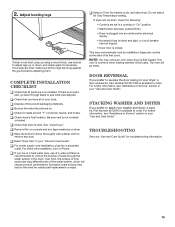
... them. q Check dryer's final location.
STACkING WASHER AND DRYER
If you have all parts are now installed.
See "Level Dryer". q For power supply cord installation, plug into an outlet and...through steps to the need for troubleshooting information.
19
q Read "Dryer Use" in a hard water area, use of a water softener is first heated. q Check that dryer is not level, ...
Similar Questions

Why Is My Amana Ned4600yq1 Dryer Getting Too Hot?
After a few minutes drying the dryer starts smelling hot and it is really hot and is even getting th...
After a few minutes drying the dryer starts smelling hot and it is really hot and is even getting th...
(Posted by jsmh9198 8 years ago)


Model:yned7300ww2
HELLO MY AMANA DRYER IS NOT HEATING. I checked the elements and fuse. There is continuty in both ite...
HELLO MY AMANA DRYER IS NOT HEATING. I checked the elements and fuse. There is continuty in both ite...
(Posted by FLORENCEJLM777 9 years ago)

Can You Change Plug
can you change the big plug to a regular out let plug from a ned5100tq1 dryer
can you change the big plug to a regular out let plug from a ned5100tq1 dryer
(Posted by blancabarriel 10 years ago)
How Do I Check The Wiring Plugs On My Ngd4500vqo Gas Dryer?
the pilot lights, the gas works, but no flame
the pilot lights, the gas works, but no flame
(Posted by jeffgaul 11 years ago)