Acer Aspire V5-471 Support Question
Acer Aspire V5-471 Support Question
Find answers below for this question about Acer Aspire V5-471.Need a Acer Aspire V5-471 manual? We have 1 online manual for this item!
Question posted by robjorgin on September 3rd, 2014
How To Remove The Battery Of Acer Aspire V5-431 Series Model Ms2360
The person who posted this question about this Acer product did not include a detailed explanation. Please use the "Request More Information" button to the right if more details would help you to answer this question.
Current Answers
Related Acer Aspire V5-471 Manual Pages
Acer V5-471 Notebook Service Guide - Page 2
... servicing, repair, and any incidental or consequential damages resulting from any defect in this Aspire MS2360 Service Guide.
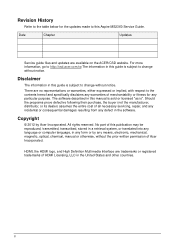
Disclaimer
The information in this guide is ". There are trademarks or registered... written permission of this manual is sold or licensed "as is subject to http://csd.acer.com.tw.The information in the software. ii Revision History
Refer to the table below ...
Acer V5-471 Notebook Service Guide - Page 6
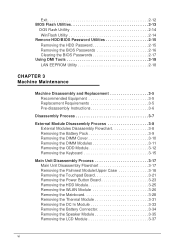
... Disassembly Flowchart 3-17 Removing the Palmrest Module/Upper Case 3-18 Removing the Touchpad Board 3-21 Removing the Power Button Board 3-23 Removing the HDD Module 3-25 Removing the WLAN Module 3-26 Removing the Mainboard 3-28 Removing the Thermal Module 3-31 Removing the DC In Module 3-33 Removing the Battery Connector 3-34 Removing the Speaker Module 3-35 Removing the LCD Module...
Acer V5-471 Notebook Service Guide - Page 7
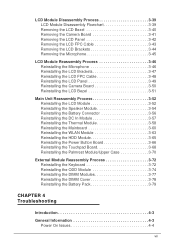
... Flowchart 3-39 Removing the LCD Bezel 3-40 Removing the Camera Board 3-41 Removing the LCD Panel 3-42 Removing the LCD FPC Cable 3-43 Removing the LCD Brackets 3-44 Removing the Microphone 3-45... 3-52 Reinstalling the LCD Module 3-52 Reinstalling the Speaker Module 3-54 Reinstalling the Battery Connector 3-56 Reinstalling the DC In Module 3-57 Reinstalling the Thermal Module 3-58...
Acer V5-471 Notebook Service Guide - Page 12
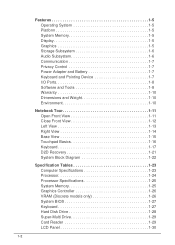
... Graphics 1-5 Storage Subsystem 1-6 Audio Subsystem 1-6 Communication 1-7 Privacy Control 1-7 Power Adapter and Battery 1-7 Keyboard and Pointing Device 1-7 I/O Ports 1-8 Software and Tools 1-8 Warranty 1-10 Dimensions ...Specifications 1-25 System Memory 1-25 Graphics Controller 1-26 VRAM (Discrete models only 1-26 System BIOS 1-27 Keyboard 1-27 Hard Disk Drive 1-28 Super-Multi Drive ...
Acer V5-471 Notebook Service Guide - Page 17
...0
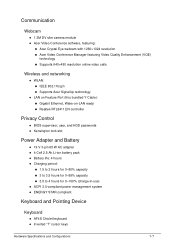
WLAN:
IEEE 802.11b/g/n
Supports Acer SignalUp technology
LAN on Feature Port (thru bundled Y Cable):
...;Kensington lock slot
Power Adapter and Battery 0
19 V 3-pin 65 W AC adapter 4-Cell 2.8 Ah Li-ion battery pack Battery life: 4 hours Charging period...
Acer V5-471 Notebook Service Guide - Page 20
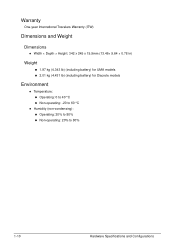
...; Height: 342 x 245 x 19.9mm (13.46× 9.64 × 0.78 in)
Weight
0
1.97 kg (4.343 lb) (including battery) for UMA models
2.01 kg (4.431 lb) (including battery) for Discrete models
Environment 0
Temperature: Operating: 0 to 40 °C Non-operating: -20 to 60 °C
...
Acer V5-471 Notebook Service Guide - Page 25
Icon
Item
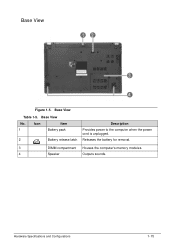
1
Battery pack
2
Battery release latch
Description
Provides power to the computer when the power cord is unplugged. Hardware Specifications and Configurations
1-15 Base View
Table 1-5.
Releases the battery for removal.
3
DIMM compartment Houses the computer's memory modules.
4
Speaker
Outputs sounds. Base View 0
Figure 1-5.
Base View
No.
Acer V5-471 Notebook Service Guide - Page 33

... in
Depth
24.5 cm
9.64 in
Height
1.99 cm
0.78 in
Weight (equipped with 6-cell 1.97 kg for UMA battery pack, HDD, and ODD) 2.01 kg for Discrete
4.343 lb for UMA 4.431 lb for Discrete
Input power
Operating voltage
19 V, 65 W
Operating current (max)
3.42 A
Temperature
Operating (not writing to optical...
Acer V5-471 Notebook Service Guide - Page 38

Hard Disk Drive
Item
Specification
Vendor and models
HGST HTS545032A7E384, SEAGATE ST320LT020/ 9YG142-188, WD WD3200LPVT-22G33T0
HGST HTS545050A7E380, SEAGATE 9WS142-188 ST500LT012, WD WD5000LPVT-22G33T0,
Product series
Hitachi Eagle/Jaguar Seagate Yarra Western Digital Scorpio Blue
Configuration
Interface
SATA, Third Generation
Capacity (GB)
250
320
500
...
Acer V5-471 Notebook Service Guide - Page 44
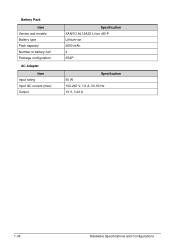
Battery Pack
Item Vendor and models Battery type Pack capacity Number of battery cell Package configuration
AC Adapter
Item Input rating Input AC current (max) Output
Specification SANYO AL12A32 Li-Ion 4S1P Lithium-ion 2600 mAh 4 3S2P
Specification 65 W 100-240 V, 1.6 A, 50-60 Hz 19 V, 3.42 A
1-34
Hardware Specifications and Configurations
Acer V5-471 Notebook Service Guide - Page 77
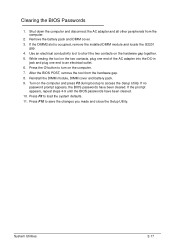
... tool to save the changes you made and close the Setup Utility. Reinstall the DIMM module, DIMM cover and battery pack. 9. Turn on the computer. 7. If no
password prompt appears, the BIOS passwords have been cleared. 10... other peripherals from the hardware gap. 8. After the BIOS POST, remove the tool from the computer.
2. System Utilities
2-17 Remove the battery pack and DIMM cover. 3.
Acer V5-471 Notebook Service Guide - Page 80
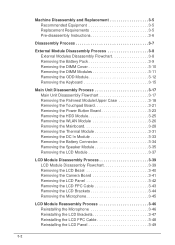
... the Palmrest Module/Upper Case 3-18 Removing the Touchpad Board 3-21 Removing the Power Button Board 3-23 Removing the HDD Module 3-25 Removing the WLAN Module 3-26 Removing the Mainboard 3-28 Removing the Thermal Module 3-31 Removing the DC In Module 3-33 Removing the Battery Connector 3-34 Removing the Speaker Module 3-35 Removing the LCD Module 3-37
LCD Module Disassembly Process...
Acer V5-471 Notebook Service Guide - Page 83
...The product previews seen in the disassembly procedures may not represent the actual model.
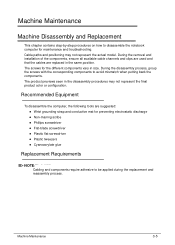
Machine Maintenance
Machine Disassembly and Replacement 0
This chapter contains step-by-...0
To disassemble the computer, the following tools are replaced in the same position. During the removal and installation of the components, ensure all available cable channels and clips are used and that the...
Acer V5-471 Notebook Service Guide - Page 85
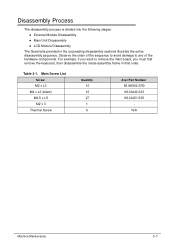
For example, if you must first remove the keyboard, then disassemble the inside assembly frame in the succeeding disassembly sections illustrate the entire ...Screw List Screw M2 x L3
M2 x L3 (black) M2.5 x L5 M2 x 3
Thermal Screw
Quantity 10 10 27 1 5
Acer Part Number 86.9A552.3R0 86.00J40.323 86.00J51.535 N/A
Machine Maintenance
3-7 Observe the order of the sequence to avoid damage to...
Acer V5-471 Notebook Service Guide - Page 87
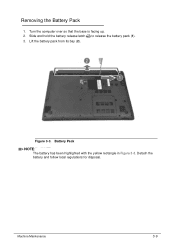
... over so that the base is facing up. 2. Slide and hold the battery release latch to release the battery pack (1). 3. Machine Maintenance
3-9 Figure 3-3. Battery Pack
NOTE: NOTE:
The battery has been highlighted with the yellow rectangle in Figure 3-3. Lift the battery pack from its bay (2).
Removing the Battery Pack 0
1. Detach the battery and follow local regulations for disposal.
Acer V5-471 Notebook Service Guide - Page 88
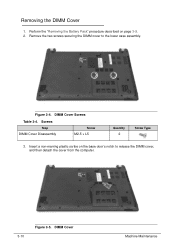
DIMM Cover
Machine Maintenance DIMM Cover Screws
Table 3-4.
Removing the DIMM Cover 0
1. Figure 3-4. Perform the "Removing the Battery Pack" procedure described on the base door's notch to the lower case assembly. Remove the two screws securing the DIMM cover to release the DIMM cover, and then detach the cover from the computer.
3-10
Figure 3-5. Screws...
Acer V5-471 Notebook Service Guide - Page 90
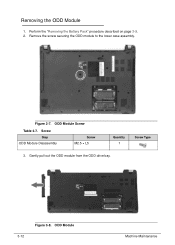
Perform the "Removing the Battery Pack" procedure described on page 3-9. 2.
ODD Module
Machine Maintenance Figure 3-7. ODD Module Screw
Table 3-7. Gently pull out the ODD module from the ODD drive bay.
3-12
Figure 3-8. Removing the ODD Module 0
1. Remove the screw securing the ODD module to the lower case assembly. Screw Step
ODD Module Disassembly
Screw M2...
Acer V5-471 Notebook Service Guide - Page 93

Upper Case Screw - Turn the computer over and open the LCD panel. Take care not to the lower case. Remove the screw securing the keyboard to use excessive force when removing. 1. Figure 3-12.
Perform the "Removing the Battery Pack" procedure described on page 3-12. 3. Screw Step
Keyboard Disassembly
Screw M2.5 × L5
Quantity 1
Screw Type...
Acer V5-471 Notebook Service Guide - Page 95
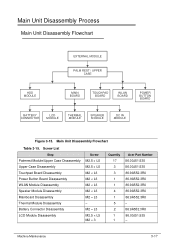
...MODULE
PALM REST / UPPER CASE
HDD MODULE
MAIN BOARD
TOUCHPAD BOARD
WLAN BOARD
POWER BUTTON BOARD
BATTERY CONNECTOR
LCD MODULE
THERMAL MODULE
SPEAKER MODULE
DC IN MODULE
Figure 3-15.
Main Unit Disassembly Flowchart...; L3 M2.5 × L5 M2 × 3
Quantity 17 3 3 1 1 4 1 5 2 1 1
Acer Part Number 86.00J51.535 86.00J51.535 86.9A552.3R0 86.9A552.3R0 86.9A552.3R0 86.9A552.3R0 86.9A552...
Acer V5-471 Notebook Service Guide - Page 177
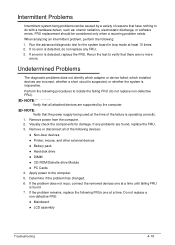
... the following devices:
Non-Acer devices Printer, mouse, and other external devices Battery pack Hard disk drive ...the following procedures to the computer. 5. Remove power from the computer. 2. Run the advanced diagnostic test for damage. Perform the following : 1. Remove or disconnect all attached devices are found...
Similar Questions


How To Remove Battery Acer Aspire Laptop V5-571-6726
(Posted by vmnic 10 years ago)

How To Disassemble Acer Aspire V5-431 Series Laptop
(Posted by terraym 10 years ago)
