eMachines W4686 Support and Manuals
Get Help and Manuals for this eMachines item

View All Support Options Below
Free eMachines W4686 manuals!
Problems with eMachines W4686?
Ask a Question
Free eMachines W4686 manuals!
Problems with eMachines W4686?
Ask a Question
Popular eMachines W4686 Manual Pages
User Guide - Page 5

... for technical or editorial errors or omissions contained herein; in this material.
eMachines, Inc. Before You Read
The information in the United States and/or other product and brand names are either trademarks or registered trademarks of this user's guide is subject to change without notice. NOTE Depending on the model, your computer's components...
User Guide - Page 11

... outlet for a printer and any electrical device, such
as a telephone, which can move freely. Setting Up Your System 2-1 A flat and hard surface. Soft surfaces like beds and carpeted floors attract ...and convenient location that provides the following:
A large, sturdy desk or table strong enough to support the weight of your system and all your computer from extremes in this chapter.
1. Select...
User Guide - Page 13
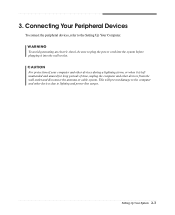
...and unused for long periods of your computer and other devices during a lightning storm, or when it into the wall socket. Setting Up Your System 2-3 CAUTION For protection of time, unplug the computer and other devices due to the computer and other devices ... to lighting and power line surges. 3. WARNING To avoid generating an electric shock, be sure to the Setting Up Your Computer.
User Guide - Page 14

... Restore CD is in the optical drive (D:) while your information and close all application programs you use. 2. Turning the Computer On and Off
Follow the instructions below to turn it off your computer. 2.
Before turning off the monitor and any other peripheral devices...
User Guide - Page 15

... computer, you must install the operating system on your system.
When the disk pops, remove it clicks into place. Using Your Computer 3-1
Using an Optional Floppy Disk Drive
To use . And then slide the disk into the drive, as OS/2 Warp or UNIX, see the manual that system for instructions on your computer...
User Guide - Page 19
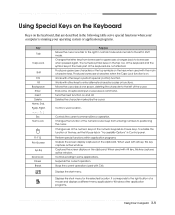
...key captures active window.
Changes the letter keys from entering numbers to enter alternate character codes or functions. Produces lowercase characters when the Caps Lock function is running your computer ... to the right in the main part of a mouse and displays a different menu applicable to Windows other keys to the left of the key, set the Mouse tab in "Accessibility Options...
User Guide - Page 20
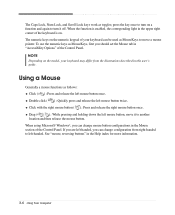
...holding down the left mouse button, move a mouse pointer. If you are left-handed, you should set the Mouse tab in the Mouse section of the Control Panel. The numeric keys on a function ...is enabled, the corresponding light in the upper right corner of the keyboard is on the model, your keyboard can change configuration from the illustrations described in the Help index for more information...
User Guide - Page 21
... the Display Resolution and Color Depth
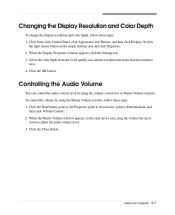
To change the display resolution and color depth, follow these steps: 1. When the Display Properties window appears, click the Settings tab. 3. Controlling the Audio Volume
You can control the audio volume level by using the volume control box or Master Volume window. When the Master...
User Guide - Page 24
Set the cover aside. If you are not properly grounded, you could generate an electric shock when you remove the cover. To open the system cover, remove two screws on the back panel of your system every time you touch a component. 4-2 Installing and Removing Drives 3. NOTE Be sure to free it from the...
User Guide - Page 29

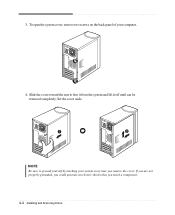
With using the screws, secure the hard disk drive to CS (Cable Select). 5.
Set the jumper of the new hard disk drive to the HDD bracket. Installing and Removing Drives 4-7 Slide the hard disk drive into the HDD bracket. 6. 4.
User Guide - Page 33

... jumper of new device to CS, your optional device to CS (Cable Select). To install an additional device in the empty bay below the optical drive, you set to CS (Cable Select). 6.
Make sure the jumper of E-IDE cable marked "SLAVE." If you can use , remove it from the front panel. If...
User Guide - Page 39

... messages.
You can update drivers in the optical drive. Enter your computer. If you Restore CDs. To continue the restoration, remove the Restore CD from your optical drive. 12. message appears, replace the Restore CD
#2 with the Restore CD. After the restoration process is no executable installation file. Press Enter to install a driver. In this case...
User Guide - Page 41
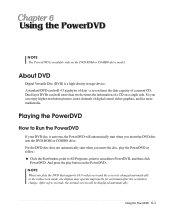
...) is auto-run, the PowerDVD will be displayed automatically. So you play the DVD that supports 16:9 widescreen and the screen is changed automatically to the widescreen mode, the display may operate...twelve times the information of a CD on the DVD-ROM or COMBO drive model. Playing the PowerDVD
How to emachines PowerDVD, and then click PowerDVD.
Using the PowerDVD 6-1 For the DVD disc ...
User Guide - Page 43

... click the Start button, and then click Help and Support.)
Solving Common Problems A-1 Solving Common Problems
This chapter instructs you how to deal with the problems you press the power button. Power
Cause My computer doesn...cord. To open Windows Help, click the Start button, and then click Help and Support.)
The files stored on your computer. Make sure the power cord is not properly ...
User Guide - Page 45

... mouse. You have a screen blanking utility installed or your computer isn't connected properly. To...Support.)
Diskette is incorrectly inserted. To remove write-protection from the
Screen resolution area. 4. Solution
The brightness and contrast controls aren't set properly Adjust the brightness and contrast controls on the empty desktop area and click Properties. 2. Solving Common Problems...
eMachines W4686 Reviews
We have not received any reviews for eMachines yet.