Zanussi ZMSN7DX Support and Manuals
Get Help and Manuals for this Zanussi item
View All Support Options Below
Free Zanussi ZMSN7DX manuals!
Problems with Zanussi ZMSN7DX?
Ask a Question
Free Zanussi ZMSN7DX manuals!
Problems with Zanussi ZMSN7DX?
Ask a Question
Popular Zanussi ZMSN7DX Manual Pages
Specification Sheet - Page 1
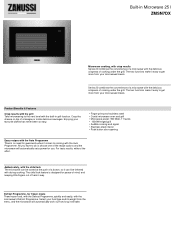
...more from the menu, and the microwave will automatically work out how long it will automatically set a power for you have to get more from your food type and its weight from your...frozen food, with the Defrost Programme, quickly and easily, with the built-in Microwave 25 l ZMSN7DX
Microwave cooking, with crisp results Series 20 combines the convenience of a microwave with the delicious ...
Specification Sheet - Page 2
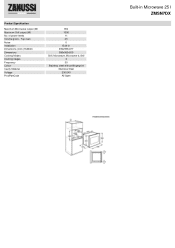
... gross - Top oven Noise Installation Dimensions (mm) (HxWxD) Dimensions Cooking Modes Cooking stages Frequency Colour Cavity Material Voltage ProdPartCode
900 1000
11 25 0 Built-in 390x595x377 380x560x550 Grill, Microwave, Microwave & Grill 3 50 Stainless steel with antifingerprint Stainless Steel 230-240 All Open
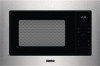
Built-in Microwave 25 l ZMSN7DX Product Specification
Maximum Microwave output...
User Manual - Page 1
User Manual
GETTING STARTED? ZMSN7D
EN User manual Microwave Oven EASY.
User Manual - Page 2

SAFETY INFORMATION...3 2. PRODUCT DESCRIPTION ...11 4. OPERATION...12 5. INSTALLATION ...7 3. HINTS AND TIPS ...15 6. ENVIRONMENT CONCERNS 18
2 TROUBLESHOOTING...17 7. CONTENTS
1. TECHNICAL INFORMATION 18 8.
User Manual - Page 3
...other working environments;
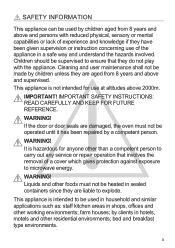
This appliance is not intended for anyone other than a competent person to carry out any service or repair operation that they do not play with reduced physical, sensory or mental capabilities or lack of experience and ... not be made by children unless they have been given supervision or instruction concerning use at altitudes above and supervised.
User Manual - Page 5
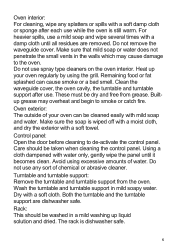
...which may overheat and begin to smoke or catch fire. Both the turntable and the turntable support are removed. Do not use . Heat up liquid solution and dried.
Make sure the... be dry and free from the oven. Clean the waveguide cover, the oven cavity, the turntable and turntable support after each use a mild soap and wipe several times with a damp cloth until it becomes clean. Builtup...
User Manual - Page 9
...indicated on the rating plate must be replaced by the manufacturer, its service agent or similarly qualified persons in order ... correctly rated earth socket.
• If the appliance is being installed.
• When inserting the appliance into the highsided cupboard, DO...replaced by an electrician.
• If the supply cord is damaged it must correspond with the specification of the oven.
9
User Manual - Page 10
...oven. Before cleaning, make popcorn, only use the turntable and the turntable support designed for this product and spare part lamps sold separately: These lamps are suitable. Never modify the oven in ... a spill, turn off and unplug the oven immediately and call an authorised ELECTROLUX service agent. Individuals with PACEMAKERS should check with water, leave
the turntable to the oven...
User Manual - Page 11
... surfaces
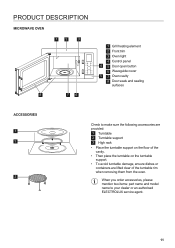
ACCESSORIES 1 2
3
Check to your dealer or an authorised ELECTROLUX service agent.
11
When you order accessories, please mention two items: part name and model name to make sure the following accessories are provided: 1 Turntable 2 Turntable support 3 High rack
• Place the turntable support on the floor of the cavity.
• Then place the turntable...
User Manual - Page 12
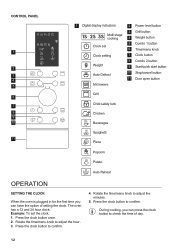
.... Press the clock button to adjust the hour. 3. The oven has a 12 and 24 hour clock. Example: To set Clock setting Weight Auto Defrost Microwave
2 Power level button 3 Grill button 4 Weight button 5 Combi. 1 button 6 Time/menu knob...
Beverages
Spaghetti
Pizza
Popcorn Potato
Auto Reheat
OPERATION
SETTING THE CLOCK
When the oven is plugged in for the first time you can have the option ...
User Manual - Page 13

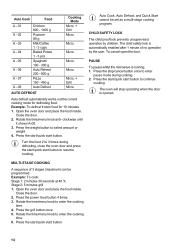
... button. Power levels that are too high or cooking times that are too long may overheat foods resulting in a fire. It is displayed.
Example: To set Combi. 1 cooking for 12 minutes. 1. Close the door.
2. Press the start/quick start button. AUTO COOK
Auto cook automatically works out the correct cooking mode...
User Manual - Page 14
....
PAUSE
To pause whilst the microwave is running. 1. Press the stop operating when the door is automatically enabled after 1 minute of 3 stages (maximum) can be set as a multi-stage cooking program. Press the start/quick start button to 3 times during cooking. 2.
Open the oven door and place the food inside . Rotate...
User Manual - Page 15

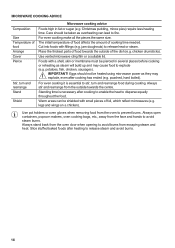
...; Metal
Plastic/polystyrene e.g.
Always attend the oven when using fine glassware as arcing may melt or catch fire due to shield food from overheating. Follow instructions carefully. Foil containers are not recommended unless specified by the manufacturer. Must be used to the metal arcing. Care must be taken if using these...
User Manual - Page 16
... a shell, skin or membrane must be shielded with small pieces of food Arrange Cover Pierce
Stir, turn and rearrange food during cooking. Place the thickest parts of food towards the outside towards the centre.
Warm areas can lead to avoid steam burns. Slice stuffed baked foods after heating to release heat...
User Manual - Page 17
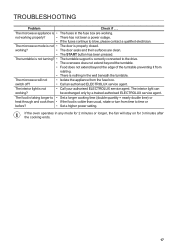
TROUBLESHOOTING
Problem
Check if . . . working?
• The door seals and their surfaces are working. The turntable is not turning? • The turntable support is correctly connected to time or
before?
• Set a higher power setting. The interior light can be exchanged only by a trained authorised ELECTROLUX service agent. The microwave appliance is not working properly?
• ...
Zanussi ZMSN7DX Reviews
We have not received any reviews for Zanussi yet.