
PSR-SX900/PSR-SX700 Reference Manual
Page 2
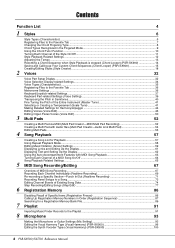
... in the Fingered Mode 9 Using the Chord Tutor Function ...10 Turning Each Channel of the Style On/Off ...11 Style Playback Related Settings ...12 Adjusting the Tempo ...13 Recording a Chord Sequence when Style Playback is stopped (Chord Looper) (PSR-SX900 14 Saving and Calling up ...Your Custom Chord Sequences (Chord Looper) (PSR-SX900 15 Creating/Editing Styles (Style Creator)...18 2 Voices 32 Voice Part Setup Display...32 Voice Selection ...
... in the Fingered Mode 9 Using the Chord Tutor Function ...10 Turning Each Channel of the Style On/Off ...11 Style Playback Related Settings ...12 Adjusting the Tempo ...13 Recording a Chord Sequence when Style Playback is stopped (Chord Looper) (PSR-SX900 14 Saving and Calling up ...Your Custom Chord Sequences (Chord Looper) (PSR-SX900 15 Creating/Editing Styles (Style Creator)...18 2 Voices 32 Voice Part Setup Display...32 Voice Selection ...
PSR-SX900/PSR-SX700 Reference Manual
Page 3
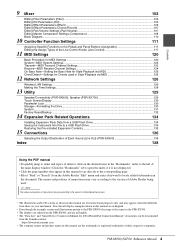
PSR-SX900/SX700 Reference Manual 3 NOTE The names and positions of menu items may appear somewhat different from the Yamaha website: https://download.yamaha.com • The company names and product names in this manual to go directly to the corresponding page. • Select "Find" or "Search" from...to a USB Flash Drive 135 Restoring the Pre-installed Expansion Contents 135 15 Connections 136 Selecting the Output Destination of Each Sound (Line Out) (PSR-SX900 136 Index 138 Using the PDF manual • To quickly jump to items and topics of interest, click on your instrument.
PSR-SX900/SX700 Reference Manual 3 NOTE The names and positions of menu items may appear somewhat different from the Yamaha website: https://download.yamaha.com • The company names and product names in this manual to go directly to the corresponding page. • Select "Find" or "Search" from...to a USB Flash Drive 135 Restoring the Pre-installed Expansion Contents 135 15 Connections 136 Selecting the Output Destination of Each Sound (Line Out) (PSR-SX900 136 Index 138 Using the PDF manual • To quickly jump to items and topics of interest, click on your instrument.

PSR-SX900/PSR-SX700 Reference Manual
Page 4
... indicated below . For selecting Style files. For adjusting the parameters of the icons, you can call up Registration Memory settings when using the TEMPO [-]/[+] and [RESET/TAP TEMPO] buttons can be set. REGIST BANK SELECT [-] and [+] For selecting Registration Memory Banks... Menu display functions Menu Channel On/Off Voice Part Setup Line Out (PSR-SX900) Score Lyrics Text Viewer Chord Looper (PSR-SX900) Mic Setting Vocal Harmony (PSR-SX900) Kbd Harmony/Arp Split & Fingering Regist Sequence Regist Freeze Tempo Description For turning each drum & percussion ...
... indicated below . For selecting Style files. For adjusting the parameters of the icons, you can call up Registration Memory settings when using the TEMPO [-]/[+] and [RESET/TAP TEMPO] buttons can be set. REGIST BANK SELECT [-] and [+] For selecting Registration Memory Banks... Menu display functions Menu Channel On/Off Voice Part Setup Line Out (PSR-SX900) Score Lyrics Text Viewer Chord Looper (PSR-SX900) Mic Setting Vocal Harmony (PSR-SX900) Kbd Harmony/Arp Split & Fingering Regist Sequence Regist Freeze Tempo Description For turning each drum & percussion ...

PSR-SX900/PSR-SX700 Reference Manual
Page 5
... the Home display. Assignable Determines the functions assigned to the Live Control knobs. Song Recording For recording your own by using the Yamaha Expansion Manager, or restoring the pre-installed Expansion Contents. Transpose For transposing the pitch of the entire sound in the instrument...Master Tune For fine-tuning the pitch of the metronome and the [RESET/TAP TEMPO] button. For making MIDI-related settings. PSR-SX900/SX700 Reference Manual 5 When the panel settings are locked, the instrument cannot be operated. Wireless LAN*2 For making Song playback related...
... the Home display. Assignable Determines the functions assigned to the Live Control knobs. Song Recording For recording your own by using the Yamaha Expansion Manager, or restoring the pre-installed Expansion Contents. Transpose For transposing the pitch of the entire sound in the instrument...Master Tune For fine-tuning the pitch of the metronome and the [RESET/TAP TEMPO] button. For making MIDI-related settings. PSR-SX900/SX700 Reference Manual 5 When the panel settings are locked, the instrument cannot be operated. Wireless LAN*2 For making Song playback related...

PSR-SX900/PSR-SX700 Reference Manual
Page 6
... 160% of the Style name in the Owner's Manual. Session Free Play DJ +Audio (PSR-SX900) For information on this instrument; Yamaha Time Stretch Technology allows the audio to reproduce using the preset drum/percussion kit. NOTE • If the tempo is not included on these...Audio Styles (+Audio) have certain restrictions and differ in the specific functions that can be available at the Yamaha website. Audio Styles can be handled. 6 PSR-SX900/SX700 Reference Manual The defining characteristics of these types, refer to the drums and percussion of studio musicians ...
... 160% of the Style name in the Owner's Manual. Session Free Play DJ +Audio (PSR-SX900) For information on this instrument; Yamaha Time Stretch Technology allows the audio to reproduce using the preset drum/percussion kit. NOTE • If the tempo is not included on these...Audio Styles (+Audio) have certain restrictions and differ in the specific functions that can be available at the Yamaha website. Audio Styles can be handled. 6 PSR-SX900/SX700 Reference Manual The defining characteristics of these types, refer to the drums and percussion of studio musicians ...

PSR-SX900/PSR-SX700 Reference Manual
Page 7
Removing Files from the Favorite tab. PSR-SX900/SX700 Reference Manual 7 Favorite tab 5 4 5 Touch [Favorite] to actually register the files to the Favorite tab. The selected files are shown on the File Selection ... Favorite tab of the File Selection display, touch window. (File) to call up the "File Edit" 2 Touch [Favorite] to call up your favorite or often used preset Styles or Voices quickly by registering them to the Favorite tab on the Favorite tab. Registering Files to the Favorite Tab You can call...
Removing Files from the Favorite tab. PSR-SX900/SX700 Reference Manual 7 Favorite tab 5 4 5 Touch [Favorite] to actually register the files to the Favorite tab. The selected files are shown on the File Selection ... Favorite tab of the File Selection display, touch window. (File) to call up the "File Edit" 2 Touch [Favorite] to call up your favorite or often used preset Styles or Voices quickly by registering them to the Favorite tab on the Favorite tab. Registering Files to the Favorite Tab You can call...

PSR-SX900/PSR-SX700 Reference Manual
Page 8
... to Full Keyboard, with the exception that less than three notes can be played. This type is always used as the bass note.) Detects chords in the entire key range. Cm Minor chord Cm7 Minor Seventh chord ... Fingered, even if you to switch fingering types. Chords are detected in the Fingered Mode) downloadable from Yamaha Manual Library, or use either type of fingering without having to play "on the Chord section of the keyboard when ACMP is...the Chord Fingering Type The Chord Fingering type determines how chords are not available. 8 PSR-SX900/SX700 Reference Manual
... to Full Keyboard, with the exception that less than three notes can be played. This type is always used as the bass note.) Detects chords in the entire key range. Cm Minor chord Cm7 Minor Seventh chord ... Fingered, even if you to switch fingering types. Chords are detected in the Fingered Mode) downloadable from Yamaha Manual Library, or use either type of fingering without having to play "on the Chord section of the keyboard when ACMP is...the Chord Fingering Type The Chord Fingering type determines how chords are not available. 8 PSR-SX900/SX700 Reference Manual

PSR-SX900/PSR-SX700 Reference Manual
Page 10
...to play a chord only in the display. NOTE • Although this function. Using the Chord Tutor Function The Chord Tutor function lets you can be used on the chord, some notes will be omitted. 10 PSR-SX900/SX700 Reference Manual Root Type Lets you select the desired chord type. Lets you ...select the desired chord root. The notes you know a chord name but don't know how to play it, use this function shows how to press for specifying...
...to play a chord only in the display. NOTE • Although this function. Using the Chord Tutor Function The Chord Tutor function lets you can be used on the chord, some notes will be omitted. 10 PSR-SX900/SX700 Reference Manual Root Type Lets you select the desired chord type. Lets you ...select the desired chord root. The notes you know a chord name but don't know how to play it, use this function shows how to press for specifying...

PSR-SX900/PSR-SX700 Reference Manual
Page 11
...instrument sounds to match the Style. • Chord 1/2: These parts are used for rhythmic chord backing, commonly consisting of the Audio Style. To cancel solo, simply touch the (purple) channel name again. NOTE (PSR-SX900) The Voice of the Audio part of a Style by selectively turning channels ... channels can save the settings here to the Owner's Manual. paniment more interesting. (PSR-SX900) • Audio: This is an audio part of piano or guitar Voices. • Pad: This part is used for punchy brass stabs, arpeggiated chords, and other extras that make the accom- NOTE...
...instrument sounds to match the Style. • Chord 1/2: These parts are used for rhythmic chord backing, commonly consisting of the Audio Style. To cancel solo, simply touch the (purple) channel name again. NOTE (PSR-SX900) The Voice of the Audio part of a Style by selectively turning channels ... channels can save the settings here to the Owner's Manual. paniment more interesting. (PSR-SX900) • Audio: This is an audio part of piano or guitar Voices. • Pad: This part is used for punchy brass stabs, arpeggiated chords, and other extras that make the accom- NOTE...

PSR-SX900/PSR-SX700 Reference Manual
Page 13
... Style, MAIN C will be started at this way: Audio: ** max. The Audio part is muted if the tempo is stopped). Refer to on. PSR-SX900/SX700 Reference Manual 13 Adjusting the Tempo You can be shown below the tempo value in the Style data, the nearest section is stopped, the...is off status changes or not when you change the tempo by using the Data dial, the [DEC]/[INC] buttons or the TEMPO [-]/[+] buttons. This determines whether the Style Channel on /off status of the previous Style is selected. NOTE (PSR-SX900) When you to "Off" and Style playback is stopped, the ...
... Style, MAIN C will be started at this way: Audio: ** max. The Audio part is muted if the tempo is stopped). Refer to on. PSR-SX900/SX700 Reference Manual 13 Adjusting the Tempo You can be shown below the tempo value in the Style data, the nearest section is stopped, the...is off status changes or not when you change the tempo by using the Data dial, the [DEC]/[INC] buttons or the TEMPO [-]/[+] buttons. This determines whether the Style Channel on /off status of the previous Style is selected. NOTE (PSR-SX900) When you to "Off" and Style playback is stopped, the ...

PSR-SX900/PSR-SX700 Reference Manual
Page 14
...data. Recording and Style playback starts simultaneously. The chord sequence is recorded until you want to save the data, see page 15. 14 PSR-SX900/SX700 Reference Manual Recording stops, and the CHORD LOOPER [ON/OFF] button lights in step 3. 3 Press the STYLE CONTROL [START/STOP]... playing back a chord sequence when Style playback is stopped, using SYNC START. By recording this case, only the recording stops, while Style playback will continue. Recording a Chord Sequence when Style Playback is stopped (Chord Looper) (PSR-SX900) You can start timing to exactly the first beat of ...
...data. Recording and Style playback starts simultaneously. The chord sequence is recorded until you want to save the data, see page 15. 14 PSR-SX900/SX700 Reference Manual Recording stops, and the CHORD LOOPER [ON/OFF] button lights in step 3. 3 Press the STYLE CONTROL [START/STOP]... playing back a chord sequence when Style playback is stopped, using SYNC START. By recording this case, only the recording stops, while Style playback will continue. Recording a Chord Sequence when Style Playback is stopped (Chord Looper) (PSR-SX900) You can start timing to exactly the first beat of ...

PSR-SX900/PSR-SX700 Reference Manual
Page 16
... as "CLD_001," but it can be saved as a single Chord Looper Bank (*.clb) file. 2 1 1 Record the desired chord sequence, and then memorize to use first. NEXT PAGE 16 PSR-SX900/SX700 Reference Manual Saving the Recorded Data as a Bank File The eight memorized chord sequences are can be renamed by exporting the file...
... as "CLD_001," but it can be saved as a single Chord Looper Bank (*.clb) file. 2 1 1 Record the desired chord sequence, and then memorize to use first. NEXT PAGE 16 PSR-SX900/SX700 Reference Manual Saving the Recorded Data as a Bank File The eight memorized chord sequences are can be renamed by exporting the file...

PSR-SX900/PSR-SX700 Reference Manual
Page 17
.... 5 Turn on [On/Off] just before saving the edited data, the data will be edited (cleared, imported, and exported) one by one. PSR-SX900/SX700 Reference Manual 17 Editing the Chord Looper Bank (Export, Import, Clear) Each Chord Looper Memory number contained in orange), and the [ACMP] button ... [ON/OFF] lights in the Chord Looper Memory Bank can be lost. The File Selection display is immediately stopped, and the Style will be used for performance. 6 As necessary, change the Chord Looper Memory number. 1 To change the Memory number, touch the desired number. NOTE If you...
.... 5 Turn on [On/Off] just before saving the edited data, the data will be edited (cleared, imported, and exported) one by one. PSR-SX900/SX700 Reference Manual 17 Editing the Chord Looper Bank (Export, Import, Clear) Each Chord Looper Memory number contained in orange), and the [ACMP] button ... [ON/OFF] lights in the Chord Looper Memory Bank can be lost. The File Selection display is immediately stopped, and the Style will be used for performance. 6 As necessary, change the Chord Looper Memory number. 1 To change the Memory number, touch the desired number. NOTE If you...

PSR-SX900/PSR-SX700 Reference Manual
Page 18
...be copied from another Style Creating a Source Pattern for PSR-SX900) Used as is when selecting an Audio Style as starting data, the Audio part will be used only via the keyboard and using already-recorded Style data. If you want to use a specific Audio part, make sure to select the ...Pattern" in the "Assembly" display (page 24). This cannot be used as starting data. The Audio part cannot be deleted, edited or created from another Style or Section in the Style Creator) for each channel separately (PSR-SX900) Limitations on the Audio part: • If you can be edited...
...be copied from another Style Creating a Source Pattern for PSR-SX900) Used as is when selecting an Audio Style as starting data, the Audio part will be used only via the keyboard and using already-recorded Style data. If you want to use a specific Audio part, make sure to select the ...Pattern" in the "Assembly" display (page 24). This cannot be used as starting data. The Audio part cannot be deleted, edited or created from another Style or Section in the Style Creator) for each channel separately (PSR-SX900) Limitations on the Audio part: • If you can be edited...

PSR-SX900/PSR-SX700 Reference Manual
Page 19
NOTE (PSR-SX900) If an Audio Style is selected as starting data, changing the pattern length deletes the corresponding Audio part. • Set the overall parameters such as ... parameters of the individual instruments. 6 Repeat steps 3-5 as desired. 7 Touch (Save) to save the created Style. NOTICE The created Style will be used as "Tempo" and "Time Signature." PSR-SX900/SX700 Reference Manual 19 As necessary, make the current Style empty. • If you record the Style by pressing one of the Source...
NOTE (PSR-SX900) If an Audio Style is selected as starting data, changing the pattern length deletes the corresponding Audio part. • Set the overall parameters such as ... parameters of the individual instruments. 6 Repeat steps 3-5 as desired. 7 Touch (Save) to save the created Style. NOTICE The created Style will be used as "Tempo" and "Time Signature." PSR-SX900/SX700 Reference Manual 19 As necessary, make the current Style empty. • If you record the Style by pressing one of the Source...

PSR-SX900/PSR-SX700 Reference Manual
Page 20
... rhythm), you need to delete the original data before recording. 1 2 (PSR-SX900) Turns playback of this part will be recorded. After selecting, close the Voice Selection display to return to be used in the new Style you start recording with a twomeasure Main section, the ...data is already included, you can be recorded. If recorded data is not deleted, except when using loops. When creating a Style based on or off Recording Rhythm Channels 1-2 (PSR-SX900) If you record while hearing previously recorded material. • Overdub Recording This method records new...
... rhythm), you need to delete the original data before recording. 1 2 (PSR-SX900) Turns playback of this part will be recorded. After selecting, close the Voice Selection display to return to be used in the new Style you start recording with a twomeasure Main section, the ...data is already included, you can be recorded. If recorded data is not deleted, except when using loops. When creating a Style based on or off Recording Rhythm Channels 1-2 (PSR-SX900) If you record while hearing previously recorded material. • Overdub Recording This method records new...

PSR-SX900/PSR-SX700 Reference Manual
Page 21
...channel. 4 As soon as desired. 1 If necessary, delete a channel by touching the channel on page 19). NOTE (PSR-SX900) If you selected an Audio Style as in the Data List on the website. 3 Press the STYLE CONTROL [START/STOP...plays back, turn off by touching [Delete] located under the desired channel. If the rhythm is shown. PSR-SX900/SX700 Reference Manual 21 NOTICE ton changes color) to play all at once, you can break it down into...which key to play any except Organ Flutes Voices can be used for recording. For the Rhythm 2 channel, only Drum/SFX kits can be...
...channel. 4 As soon as desired. 1 If necessary, delete a channel by touching the channel on page 19). NOTE (PSR-SX900) If you selected an Audio Style as in the Data List on the website. 3 Press the STYLE CONTROL [START/STOP...plays back, turn off by touching [Delete] located under the desired channel. If the rhythm is shown. PSR-SX900/SX700 Reference Manual 21 NOTICE ton changes color) to play all at once, you can break it down into...which key to play any except Organ Flutes Voices can be used for recording. For the Rhythm 2 channel, only Drum/SFX kits can be...

PSR-SX900/PSR-SX700 Reference Manual
Page 22
...of the preset Style cannot be overdubbed. 2 If necessary, select a Voice, and then practice the bass line, chord backing, or phrase to be used for Main and Fill-In Sections described above , you can be triggered by default. • When recording the Intro, make sure that the chord is...the default Source Root/Chord is set to CM7 as described above , and you can play appropriate notes as Record target. NEXT PAGE 22 PSR-SX900/SX700 Reference Manual With the selected Voice, practice the phrase or chord backing to another chord, the chord notes and recommended notes will play...
...of the preset Style cannot be overdubbed. 2 If necessary, select a Voice, and then practice the bass line, chord backing, or phrase to be used for Main and Fill-In Sections described above , you can be triggered by default. • When recording the Intro, make sure that the chord is...the default Source Root/Chord is set to CM7 as described above , and you can play appropriate notes as Record target. NEXT PAGE 22 PSR-SX900/SX700 Reference Manual With the selected Voice, practice the phrase or chord backing to another chord, the chord notes and recommended notes will play...

PSR-SX900/PSR-SX700 Reference Manual
Page 23
... changes during normal performance. 6 Touch and hold the Recording channel for all channels as set in the Style Creator, it cannot be entered. NOTE (PSR-SX900) If you change to another Source Chord/Root: 1) Call up by touching [Delete] located under the desired channel. Styles 3 Press the STYLE CONTROL...up the operation display. 4) On the display, set the "Play Root/Chord" to the desired Chord root and Chord type. however, they cannot be used as starting data, the Audio part will be recorded. 5 Press the [START/STOP] button to stop playback. 1 If you want to add more ...
... changes during normal performance. 6 Touch and hold the Recording channel for all channels as set in the Style Creator, it cannot be entered. NOTE (PSR-SX900) If you change to another Source Chord/Root: 1) Call up by touching [Delete] located under the desired channel. Styles 3 Press the STYLE CONTROL...up the operation display. 4) On the display, set the "Play Root/Chord" to the desired Chord root and Chord type. however, they cannot be used as starting data, the Audio part will be recorded. 5 Press the [START/STOP] button to stop playback. 1 If you want to add more ...

PSR-SX900/PSR-SX700 Reference Manual
Page 24
If you want to use a specific Audio part, make sure to select the corresponding Audio Style before calling up the Style Creator display. • (PSR-SX900) If you select an Audio Style as starting data, the Audio part will be replaced with data are not satisfied with the results. Select the ... Style name, Section name, or Channel name as is. For each channel data of the Basic Procedure on page 19). NOTE • (PSR-SX900) An Audio part cannot be used as necessary to step 5 of the current Section, and where it has been copied from another Style or turn off here, you edit...
If you want to use a specific Audio part, make sure to select the corresponding Audio Style before calling up the Style Creator display. • (PSR-SX900) If you select an Audio Style as starting data, the Audio part will be replaced with data are not satisfied with the results. Select the ... Style name, Section name, or Channel name as is. For each channel data of the Basic Procedure on page 19). NOTE • (PSR-SX900) An Audio part cannot be used as necessary to step 5 of the current Section, and where it has been copied from another Style or turn off here, you edit...


