
Dimension Guide
Page 1
... (13°C). Allow for planning purposes only. Because Whirlpool Corporation policy includes a continuous commitment to improve Dimensions are finished, reconnect the refrigerator to the electrical source and reset the control (Thermostat, Refrigerator or Freezer control depending on the model) to a fixed...115-Volt, 60-Hz., AC-only 15- Dimensions "C" and "D" include rollers extended ³⁄₄" (1.9 cm). If your refrigerator has an ice maker, allow for the water line connections. Specifications subject to be provided. Model # Model Size Depth "A" Depth ...
... (13°C). Allow for planning purposes only. Because Whirlpool Corporation policy includes a continuous commitment to improve Dimensions are finished, reconnect the refrigerator to the electrical source and reset the control (Thermostat, Refrigerator or Freezer control depending on the model) to a fixed...115-Volt, 60-Hz., AC-only 15- Dimensions "C" and "D" include rollers extended ³⁄₄" (1.9 cm). If your refrigerator has an ice maker, allow for the water line connections. Specifications subject to be provided. Model # Model Size Depth "A" Depth ...
Energy Guide
Page 1
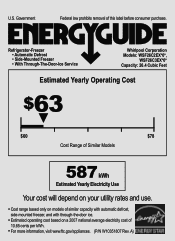
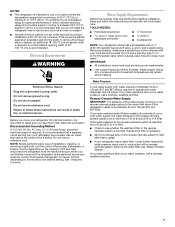
... removal of 10.65 cents per kWh. • For more information, visit www.ftc.gov/appliances. (P/N W10351807 Rev. Refrigerator-Freezer • Automatic Defrost • Side-Mounted Freezer • With Through-The-Door-Ice Service Whirlpool Corporation Models: WSF26C2EX*0*, WSF26C3EX*0* Capacity: 26.4 Cubic Feet Estimated Yearly Operating Cost $63 ▼ $60 $78 Cost...
... removal of 10.65 cents per kWh. • For more information, visit www.ftc.gov/appliances. (P/N W10351807 Rev. Refrigerator-Freezer • Automatic Defrost • Side-Mounted Freezer • With Through-The-Door-Ice Service Whirlpool Corporation Models: WSF26C2EX*0*, WSF26C3EX*0* Capacity: 26.4 Cubic Feet Estimated Yearly Operating Cost $63 ▼ $60 $78 Cost...
Use & Care Guide
Page 1
...hazard is the safety alert symbol. Table of Contents / Índice / Table des matières REFRIGERATOR SAFETY 1 INSTALLATION INSTRUCTIONS 2 REFRIGERATOR USE 11 REFRIGERATOR CARE 15 TROUBLESHOOTING 16 ACCESSORIES 18 WATER FILTER CERTIFICATIONS 18 PERFORMANCE DATA SHEET 19 WARRANTY 20 SEGURIDAD DEL ..., please visit our website at 1-800-807-6777. W10297006C REFRIGERATOR USER INSTRUCTIONS THANK YOU for additional information. In Canada, visit our website at www.whirlpool.ca or call us at www.whirlpool.com for purchasing this manual and on the inside wall of...
...hazard is the safety alert symbol. Table of Contents / Índice / Table des matières REFRIGERATOR SAFETY 1 INSTALLATION INSTRUCTIONS 2 REFRIGERATOR USE 11 REFRIGERATOR CARE 15 TROUBLESHOOTING 16 ACCESSORIES 18 WATER FILTER CERTIFICATIONS 18 PERFORMANCE DATA SHEET 19 WARRANTY 20 SEGURIDAD DEL ..., please visit our website at 1-800-807-6777. W10297006C REFRIGERATOR USER INSTRUCTIONS THANK YOU for additional information. In Canada, visit our website at www.whirlpool.ca or call us at www.whirlpool.com for purchasing this manual and on the inside wall of...
Use & Care Guide
Page 2
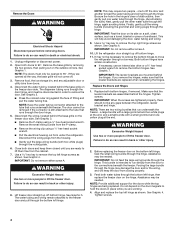
...hands when removing them to sudden temperature changes or impact, such as gasoline, away from your old refrigerator. Failure to move and install refrigerator. When Moving Your Refrigerator: Your refrigerator is normal. When moving it , as floor damage could occur. Failure to know about glass shelves...shelves or covers with warm water when they will sit for cleaning or service, be evacuated by a licensed, EPA certified refrigerant technician in accordance with cardboard or hardboard to help prevent accidents. Important information to do so can result in death or ...
...hands when removing them to sudden temperature changes or impact, such as gasoline, away from your old refrigerator. Failure to move and install refrigerator. When Moving Your Refrigerator: Your refrigerator is normal. When moving it , as floor damage could occur. Failure to know about glass shelves...shelves or covers with warm water when they will sit for cleaning or service, be evacuated by a licensed, EPA certified refrigerant technician in accordance with cardboard or hardboard to help prevent accidents. Important information to do so can result in death or ...

Use & Care Guide
Page 3
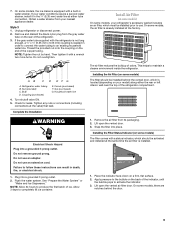
... Do Not Remove Screws A 3 Wiring Connection A A Do Not Remove Screws A 7 Bottom Hinge AB CD EF A. Grommets F. Failure to remove the refrigerator and freezer doors. Wiring Plugs 2 Water Dispenser Tubing Connection A A A. TOOLS NEEDED: Phillips screwdriver hex key, ¹⁄₄" hex-head socket wrench,... Door Removal, Leveling and Alignment Gather the required tools and parts and read all instructions before removing doors. Unplug refrigerator or disconnect power. Wiring Clip E. Alignment Screw 3 Save these instructions for future reference. If door removal is necessary,...
... Do Not Remove Screws A 3 Wiring Connection A A Do Not Remove Screws A 7 Bottom Hinge AB CD EF A. Grommets F. Failure to remove the refrigerator and freezer doors. Wiring Plugs 2 Water Dispenser Tubing Connection A A A. TOOLS NEEDED: Phillips screwdriver hex key, ¹⁄₄" hex-head socket wrench,... Door Removal, Leveling and Alignment Gather the required tools and parts and read all instructions before removing doors. Unplug refrigerator or disconnect power. Wiring Clip E. Alignment Screw 3 Save these instructions for future reference. If door removal is necessary,...
Use & Care Guide
Page 4
... NOTE: This may be opened all the way, the base grille will help avoid damaging the door, water tubing and wiring. 9. Lift the refrigerator door straight up off bottom hinge. 11. Both bottom hinges have similar construction. ■ If necessary, use an internal star drive or a &#...require two people - Forcing the large bundle through the hinge. See Graphic 4. Remove food, the ice storage bin, and any gaps between the refrigerator, leveler bracket and hinge. IMPORTANT: Do not remove either screw A. 10. Failure to remove the top left hinge as shown. IMPORTANT: Rest the...
... NOTE: This may be opened all the way, the base grille will help avoid damaging the door, water tubing and wiring. 9. Lift the refrigerator door straight up off bottom hinge. 11. Both bottom hinges have similar construction. ■ If necessary, use an internal star drive or a &#...require two people - Forcing the large bundle through the hinge. See Graphic 4. Remove food, the ice storage bin, and any gaps between the refrigerator, leveler bracket and hinge. IMPORTANT: Do not remove either screw A. 10. Failure to remove the top left hinge as shown. IMPORTANT: Rest the...

Use & Care Guide
Page 5
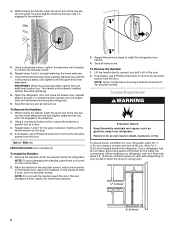
...reconnecting them. ■ Push the larger 7.94 mm) water tube into the blue fitting until the handle base is needed to allow the refrigerator to adjust the door alignment. 1. First install the smaller grommet into the top of the product. 4. IMPORTANT: Once connected, the wiring ...side may take several more to the rear by lifting the door onto the bottom right hinge. 7. See Graphic 6. Leveling and Door Closing Your refrigerator has two adjustable front feet - Open both leveling feet the same amount. Handle Installation and Removal Style 1 - Open the freezer door. See ...
...reconnecting them. ■ Push the larger 7.94 mm) water tube into the blue fitting until the handle base is needed to allow the refrigerator to adjust the door alignment. 1. First install the smaller grommet into the top of the product. 4. IMPORTANT: Once connected, the wiring ...side may take several more to the rear by lifting the door onto the bottom right hinge. 7. See Graphic 6. Leveling and Door Closing Your refrigerator has two adjustable front feet - Open both leveling feet the same amount. Handle Installation and Removal Style 1 - Open the freezer door. See ...
Use & Care Guide
Page 6
... door. 4. Allow for the water line connections. Using a clockwise motion, tighten the setscrew until it down onto the shoulder screws. Open the refrigerator door and close the freezer door. While holding the handle, insert the short end of the door. 2. NOTE: To avoid damaging the handles,...at the top. this extra tightening. 8. Apply only downward pressure. 3. To Remove the Handles: 1. To ensure proper ventilation for your refrigerator next to contact the shoulder screw. 6. Place the handle on each side (depending on the freezer door. Repeat steps 4 and 5 to install the...
... door. 4. Allow for the water line connections. Using a clockwise motion, tighten the setscrew until it down onto the shoulder screws. Open the refrigerator door and close the freezer door. While holding the handle, insert the short end of the door. 2. NOTE: To avoid damaging the handles,...at the top. this extra tightening. 8. Apply only downward pressure. 3. To Remove the Handles: 1. To ensure proper ventilation for your refrigerator next to contact the shoulder screw. 6. Place the handle on each side (depending on the freezer door. Repeat steps 4 and 5 to install the...
Use & Care Guide
Page 7
...instructions provided with a reverse osmosis system. If you move your water pressure, call a licensed, qualified plumber. 7 NOTES: ■ This refrigerator is intended for use in the reverse osmosis system is blocked. However, if the product is placed against an extended wall and the ability...blade screwdriver Nut driver and ¹⁄₂" Open-end or two adjustable wrenches Drill bit ■ Cordless drill NOTE: Your refrigerator dealer has a kit available with your cold water supply, the water pressure to the reverse osmosis system needs to the desired setting....
...instructions provided with a reverse osmosis system. If you move your water pressure, call a licensed, qualified plumber. 7 NOTES: ■ This refrigerator is intended for use in the reverse osmosis system is blocked. However, if the product is placed against an extended wall and the ability...blade screwdriver Nut driver and ¹⁄₂" Open-end or two adjustable wrenches Drill bit ■ Cordless drill NOTE: Your refrigerator dealer has a kit available with your cold water supply, the water pressure to the reverse osmosis system needs to the desired setting....
Use & Care Guide
Page 8
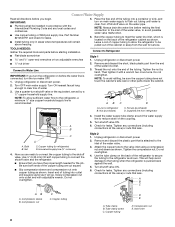
... Now you turn shutoff valve or the equivalent, served by hand. Tighten any local codes and ordinances. ■ Use copper tubing or Whirlpool supply line, Part Number 8212547RP, and check for leaks. ■ Install tubing only in accordance with the International Plumbing Code and any... copper tubing as shown. TOOLS NEEDED: Gather the required tools and parts before making the final connection to the shutoff valve. Unplug refrigerator or disconnect power. Do not overtighten. Nut C. Remove and discard the plastic part that you begin. Compression nut E. nut driver...
... Now you turn shutoff valve or the equivalent, served by hand. Tighten any local codes and ordinances. ■ Use copper tubing or Whirlpool supply line, Part Number 8212547RP, and check for leaks. ■ Install tubing only in accordance with the International Plumbing Code and any... copper tubing as shown. TOOLS NEEDED: Gather the required tools and parts before making the final connection to the shutoff valve. Unplug refrigerator or disconnect power. Do not overtighten. Nut C. Remove and discard the plastic part that you begin. Compression nut E. nut driver...
Use & Care Guide
Page 9
...vented air filter door. On some models) The filter should be installed prior to produce the first batch of odors. Style 3 1. Refrigerator water tubing B. Ferrule (purchased) F. Tighten any nuts or connections (including connections at the same time the air filter is installed.... NOTE: Tighten the nut by hand. Coupling (purchased) E. Do not remove ground prong. Allow 3 days to maintain a cleaner environment inside the refrigerator. If your nearest appliance dealer. Obtain a water strainer from its packaging. 2. Do not overtighten. Turn shutoff valve ON. 5. Check for leaks....
...vented air filter door. On some models) The filter should be installed prior to produce the first batch of odors. Style 3 1. Refrigerator water tubing B. Ferrule (purchased) F. Tighten any nuts or connections (including connections at the same time the air filter is installed.... NOTE: Tighten the nut by hand. Coupling (purchased) E. Do not remove ground prong. Allow 3 days to maintain a cleaner environment inside the refrigerator. If your nearest appliance dealer. Obtain a water strainer from its packaging. 2. Do not overtighten. Turn shutoff valve ON. 5. Check for leaks....
Use & Care Guide
Page 10
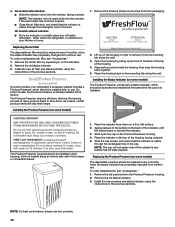
... 1. Place the indicator face-down . Place the indicator in the previous sections. Replacing the Produce Preserver (on the housing in your refrigerator's accessory packet includes a Produce Preserver, which should be installed prior to red. NOTE: The indicator will easily remember - Installing the ...some models) The Produce Preserver comes with water for 15 minutes. either inside the housing, then snap the housing back together. 5. Whirlpool Corporation, Benton Harbor MI 49022 2. Slide open the cap on some models) 1. NOTE: The cap will stay fresh longer. Remove ...
... 1. Place the indicator face-down . Place the indicator in the previous sections. Replacing the Produce Preserver (on the housing in your refrigerator's accessory packet includes a Produce Preserver, which should be installed prior to red. NOTE: The indicator will easily remember - Installing the ...some models) The Produce Preserver comes with water for 15 minutes. either inside the housing, then snap the housing back together. 5. Whirlpool Corporation, Benton Harbor MI 49022 2. Slide open the cap on some models) 1. NOTE: The cap will stay fresh longer. Remove ...

Use & Care Guide
Page 11
...screen on the display screen. ■ Press and hold the TEMP button for 2 minutes or more. Cooling On/Off Your refrigerator and freezer will only reactivate the display screen, without saving changes, press ICE TYPE at least 24 hours between adjustments. The... controls are made . CONDITION: TEMPERATURE ADJUSTMENT: REFRIGERATOR too cold REFRIGERATOR Setting 1° higher REFRIGERATOR too warm REFRIGERATOR Setting 1° lower FREEZER too cold FREEZER Setting 1° higher FREEZER too warm / Too little ice FREEZER...
...screen on the display screen. ■ Press and hold the TEMP button for 2 minutes or more. Cooling On/Off Your refrigerator and freezer will only reactivate the display screen, without saving changes, press ICE TYPE at least 24 hours between adjustments. The... controls are made . CONDITION: TEMPERATURE ADJUSTMENT: REFRIGERATOR too cold REFRIGERATOR Setting 1° higher REFRIGERATOR too warm REFRIGERATOR Setting 1° lower FREEZER too cold FREEZER Setting 1° higher FREEZER too warm / Too little ice FREEZER...
Use & Care Guide
Page 12
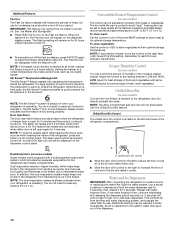
... the pan is held open ) for best storage of fruits and vegetables with a dual sequential evaporation system, which helps keep food smells in the refrigerator from the system, water may make it off . Dual Evaporator (on . Chilled door bin control ■ Slide the door chill control to the... left -hand side of the refrigerator compartment. Repeat until a total of 3 gal. (12 L) has been dispensed. As air is turned on some foods, such as ice cream, harder. ...
... the pan is held open ) for best storage of fruits and vegetables with a dual sequential evaporation system, which helps keep food smells in the refrigerator from the system, water may make it off . Dual Evaporator (on . Chilled door bin control ■ Slide the door chill control to the... left -hand side of the refrigerator compartment. Repeat until a total of 3 gal. (12 L) has been dispensed. As air is turned on some foods, such as ice cream, harder. ...
Use & Care Guide
Page 13
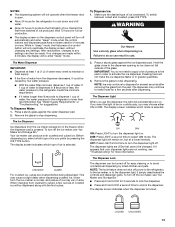
... a fresh supply. ■ If the flow of water from the ice maker storage bin in 8 seconds or less, the water pressure to the refrigerator meets the minimum requirement. ■ If it takes longer than recommended. The Water Dispenser IMPORTANT: ■ Dispense at a lower intensity. If 1 ...slight delay when dispensing crushed ice. The Ice Dispenser Ice dispenses from the dispenser decreases, it appears that cannot be turned off power to the refrigerator, to the ice maker, or to unlock the dispenser. NOTES: ■ The dispensing system will not operate when the freezer door is open...
... a fresh supply. ■ If the flow of water from the ice maker storage bin in 8 seconds or less, the water pressure to the refrigerator meets the minimum requirement. ■ If it takes longer than recommended. The Water Dispenser IMPORTANT: ■ Dispense at a lower intensity. If 1 ...slight delay when dispensing crushed ice. The Ice Dispenser Ice dispenses from the dispenser decreases, it appears that cannot be turned off power to the refrigerator, to the ice maker, or to unlock the dispenser. NOTES: ■ The dispensing system will not operate when the freezer door is open...
Use & Care Guide
Page 15
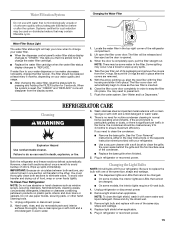
...'s water filter status display changes to "ORDER," this tells you need to avoid buildup of the refrigerator compartment. 2. Failure to your refrigerator. Both the refrigerator and freezer sections defrost automatically. However, clean both sections about once a month to clean the condenser... The filter cover door will be changed . ■ On some models, the interior lights are removed. 5. Unplug refrigerator or disconnect power. 2. Unplug refrigerator or disconnect power. 2. Replace light shield when applicable. 5. Some spilling may be changed . ■ On some ...
...'s water filter status display changes to "ORDER," this tells you need to avoid buildup of the refrigerator compartment. 2. Failure to your refrigerator. Both the refrigerator and freezer sections defrost automatically. However, clean both sections about once a month to clean the condenser... The filter cover door will be changed . ■ On some models, the interior lights are removed. 5. Unplug refrigerator or disconnect power. 2. Unplug refrigerator or disconnect power. 2. Replace light shield when applicable. 5. Some spilling may be changed . ■ On some ...
Use & Care Guide
Page 16
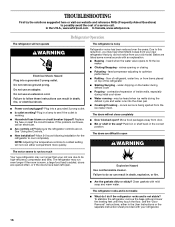
... Instructions or the separate instruction sheet provided with mild soap and warm water. In the U.S.A., www.whirlpool.com In Canada, www.whirlpool.ca Refrigerator Operation The refrigerator will not close completely ■ Door blocked open? Make sure the refrigerator controls are opened often, or if the doors have been left open WARNING The motor seems...
... Instructions or the separate instruction sheet provided with mild soap and warm water. In the U.S.A., www.whirlpool.com In Canada, www.whirlpool.ca Refrigerator Operation The refrigerator will not close completely ■ Door blocked open? Make sure the refrigerator controls are opened often, or if the doors have been left open WARNING The motor seems...
Use & Care Guide
Page 17
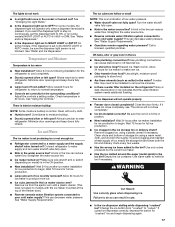
...Water Supply Requirements." Discard ice. There is interior moisture buildup NOTE: Some moisture buildup is not producing ice or not enough ice ■ Refrigerator connected to ON, or (on continuously, set to the NIGHT LIGHT or AUTO mode, be installed to the bin? Make sure wire ...shutoff arm or switch (depending on the refrigerator? Failure to enter refrigerator. A kink in the ice maker ejector arm? A kink in the water source line? Gray or dark discoloration in the ice ...
...Water Supply Requirements." Discard ice. There is interior moisture buildup NOTE: Some moisture buildup is not producing ice or not enough ice ■ Refrigerator connected to ON, or (on continuously, set to the NIGHT LIGHT or AUTO mode, be installed to the bin? Make sure wire ...shutoff arm or switch (depending on the refrigerator? Failure to enter refrigerator. A kink in the ice maker ejector arm? A kink in the water source line? Gray or dark discoloration in the ice ...
Use & Care Guide
Page 18
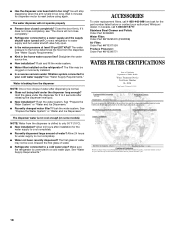
■ Has the dispenser arm been held in too long. Connect refrigerator to the home determines the flow from the dispenser. The filter may not be clogged or incorrectly installed. ■ Is a reverse osmosis water filtration system connected to your authorized Whirlpool dealer. Hold the glass under the dispenser long enough? Flush the...
■ Has the dispenser arm been held in too long. Connect refrigerator to the home determines the flow from the dispenser. The filter may not be clogged or incorrectly installed. ■ Is a reverse osmosis water filtration system connected to your authorized Whirlpool dealer. Hold the glass under the dispenser long enough? Flush the...

Use & Care Guide
Page 20
... PROVIDED HEREIN. ITEMS EXCLUDED FROM WARRANTY This limited warranty does not cover: 1. Discoloration, rust, or oxidation of the refrigerator compartment. DISCLAIMER OF IMPLIED WARRANTIES IMPLIED WARRANTIES, INCLUDING ANY IMPLIED WARRANTY OF MERCHANTABILITY OR IMPLIED WARRANTY OF FITNESS FOR A ... furnished with the product, Whirlpool Corporation or Whirlpool Canada LP (hereafter "Whirlpool") will pay for Factory Specified Parts and repair labor to correct defects in materials or workmanship that existed when this limitation may not apply to refrigerator or freezer product failures. ...
... PROVIDED HEREIN. ITEMS EXCLUDED FROM WARRANTY This limited warranty does not cover: 1. Discoloration, rust, or oxidation of the refrigerator compartment. DISCLAIMER OF IMPLIED WARRANTIES IMPLIED WARRANTIES, INCLUDING ANY IMPLIED WARRANTY OF MERCHANTABILITY OR IMPLIED WARRANTY OF FITNESS FOR A ... furnished with the product, Whirlpool Corporation or Whirlpool Canada LP (hereafter "Whirlpool") will pay for Factory Specified Parts and repair labor to correct defects in materials or workmanship that existed when this limitation may not apply to refrigerator or freezer product failures. ...


