

Dimension Guide
Page 1
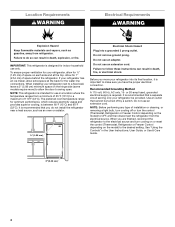
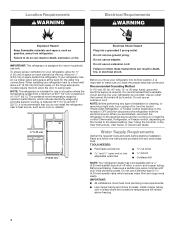
...the refrigerator near a heat source, such as an oven or radiator. 2" (5.08 cm) Because Whirlpool Corporation policy includes a continuous commitment to improve our products, we reserve the right to operate ice maker and water dispenser. handle D incl. Yes 65M⁄," (167.3 cm) WRT318FMD WRT519SZD WRT549SZD 19...ft. handle B 4 top of cabinet and the wall. LOCATION REQUIREMENTS PRODUCT DIMENSIONS G F cabinet E not incl. If your refrigerator has an ice maker, make sure you leave some extra space at least 1" (2.5 cm) between 30 and 120 psi (207 and 827 kPa) is recommended that ...
...the refrigerator near a heat source, such as an oven or radiator. 2" (5.08 cm) Because Whirlpool Corporation policy includes a continuous commitment to improve our products, we reserve the right to operate ice maker and water dispenser. handle D incl. Yes 65M⁄," (167.3 cm) WRT318FMD WRT519SZD WRT549SZD 19...ft. handle B 4 top of cabinet and the wall. LOCATION REQUIREMENTS PRODUCT DIMENSIONS G F cabinet E not incl. If your refrigerator has an ice maker, make sure you leave some extra space at least 1" (2.5 cm) between 30 and 120 psi (207 and 827 kPa) is recommended that ...
Installation Guide
Page 2
...'t follow instructions. This symbol alerts you to cause cancer. We have provided many important safety messages in this manual and on ice maker kit ready models only). IMPORTANT SAFETY INSTRUCTIONS WARNING:To reduce the risk of fire, electric shock, or injury to move and install... not remove ground prong. ■ Do not use an adapter. ■ Do not use an extension cord. ■ Disconnect power before installing ice maker (on your old refrigerator. ■ Use nonflammable cleaner. ■ Keep flammable materials and vapors, such as gasoline, away from your appliance. WARNING...
...'t follow instructions. This symbol alerts you to cause cancer. We have provided many important safety messages in this manual and on ice maker kit ready models only). IMPORTANT SAFETY INSTRUCTIONS WARNING:To reduce the risk of fire, electric shock, or injury to move and install... not remove ground prong. ■ Do not use an adapter. ■ Do not use an extension cord. ■ Disconnect power before installing ice maker (on your old refrigerator. ■ Use nonflammable cleaner. ■ Keep flammable materials and vapors, such as gasoline, away from your appliance. WARNING...
Installation Guide
Page 4
.... If your refrigerator next to a fixed wall, leave a 2" (5.08 cm) minimum space on the model) to the desired setting. When installing your refrigerator has an ice maker, allow the door to make sure you are finished, reconnect the refrigerator to the electrical source and turn the control (Thermostat, Refrigerator or Freezer Control...
.... If your refrigerator next to a fixed wall, leave a 2" (5.08 cm) minimum space on the model) to the desired setting. When installing your refrigerator has an ice maker, allow the door to make sure you are finished, reconnect the refrigerator to the electrical source and turn the control (Thermostat, Refrigerator or Freezer Control...
Installation Guide
Page 5
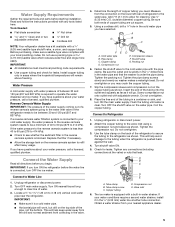
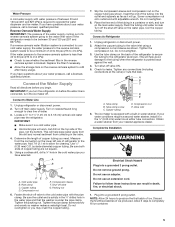
... sure it is solidly in the ¹⁄₄" drilled hole in the valve. 4. This will help avoid damage to operate the water dispenser and ice maker. Add 7 ft (2.1 m) to refill after heavy usage. A G B C FE A. Copper tubing D. Be sure the outlet end is a cold water pipe. &#... codes. Connect to 3.18 cm) vertical cold water pipe near the refrigerator. This will remain above freezing. Tube clamp B. Valve inlet 6. The ice maker is blocked. Do not use a piercing-type or 4.76 mm) saddle valve which reduces water flow and clogs more easily. Locate a ½"...
... sure it is solidly in the ¹⁄₄" drilled hole in the valve. 4. This will help avoid damage to operate the water dispenser and ice maker. Add 7 ft (2.1 m) to refill after heavy usage. A G B C FE A. Copper tubing D. Be sure the outlet end is a cold water pipe. &#... codes. Connect to 3.18 cm) vertical cold water pipe near the refrigerator. This will remain above freezing. Tube clamp B. Valve inlet 6. The ice maker is blocked. Do not use a piercing-type or 4.76 mm) saddle valve which reduces water flow and clogs more easily. Locate a ½"...
Owners Manual
Page 2
...you don't immediately follow instructions. I Do not use an extension cord. Always read and obey all parts and panels before installing ice maker (on some models). These words mean: DANGER You can be supervised to ensure that can kill or hurt you what the ...I Plug into a grounded 3 prong outlet. All safety messages will follow these basic precautions: I Do not hit the refrigerator glass doors (on ice maker kit ready models only). I Connect to potential hazards that they do not play with reduced physical, sensory or mental capabilities, or lack of experience...
...you don't immediately follow instructions. I Do not use an extension cord. Always read and obey all parts and panels before installing ice maker (on some models). These words mean: DANGER You can be supervised to ensure that can kill or hurt you what the ...I Plug into a grounded 3 prong outlet. All safety messages will follow these basic precautions: I Do not hit the refrigerator glass doors (on ice maker kit ready models only). I Connect to potential hazards that they do not play with reduced physical, sensory or mental capabilities, or lack of experience...
Owners Manual
Page 4
... radiator. 1/2" (1.25 cm) 2" (5.08 cm) Electrical Shock Hazard Plug into its final location, it is intended for use only. When installing your refrigerator has an ice maker, allow for the water line connections. It is recommended that you have the proper electrical connection. Before purchasing, make sure you do so can result...
... radiator. 1/2" (1.25 cm) 2" (5.08 cm) Electrical Shock Hazard Plug into its final location, it is intended for use only. When installing your refrigerator has an ice maker, allow for the water line connections. It is recommended that you have the proper electrical connection. Before purchasing, make sure you do so can result...
Owners Manual
Page 5
... pipe clamp. Allow the storage tank on the water pipe. Connect the Water Supply Read all directions before you turn the ice maker off valve to refill after heavy usage. Unplug refrigerator or disconnect power. 2. Turn off valve ON. 5. Locate a ½...shown. Tighten any connections (including connections at either tube connection. A B C D E A. Tube clamp screw C. Valve inlet 6. The ice maker is clear. If your nearest appliance dealer. Complete the Installation WARNING Electrical Shock Hazard Plug into a grounded 3 prong outlet. Do not remove ...
... pipe clamp. Allow the storage tank on the water pipe. Connect the Water Supply Read all directions before you turn the ice maker off valve to refill after heavy usage. Unplug refrigerator or disconnect power. 2. Turn off valve ON. 5. Locate a ½...shown. Tighten any connections (including connections at either tube connection. A B C D E A. Tube clamp screw C. Valve inlet 6. The ice maker is clear. If your nearest appliance dealer. Complete the Installation WARNING Electrical Shock Hazard Plug into a grounded 3 prong outlet. Do not remove ...
Owners Manual
Page 15
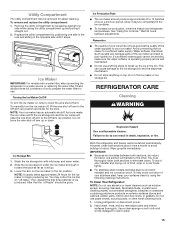
... push it straight out. 2. If so, discard the first three batches of food, wrap or cover foods tightly. Ice Production Rate The ice maker should be gone. Avoid connecting the ice maker to poor quality ice. If a softened water supply cannot be avoided, make sure the water softener is operating properly and is corrosionresistant and not...
... push it straight out. 2. If so, discard the first three batches of food, wrap or cover foods tightly. Ice Production Rate The ice maker should be gone. Avoid connecting the ice maker to poor quality ice. If a softened water supply cannot be avoided, make sure the water softener is operating properly and is corrosionresistant and not...
Owners Manual
Page 16
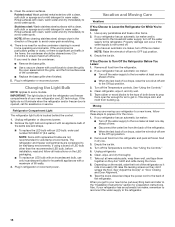
.... 2. Turn off the Temperature controls. Tape rubber or wood blocks to get to your refrigerator has an automatic ice maker, remember to reconnect the water supply to the ice maker at least one day ahead of time. This stops odor and mold from the back of LED bulb other items...bulbs are not recommended for the move . 8. When the last load of the same size and shape. If your refrigerator has an automatic ice maker: Turn off the water supply to the refrigerator. 16 Clean the exterior surfaces. Unplug refrigerator or disconnect power. 2. Remove the light bulb ...
.... 2. Turn off the Temperature controls. Tape rubber or wood blocks to get to your refrigerator has an automatic ice maker, remember to reconnect the water supply to the ice maker at least one day ahead of time. This stops odor and mold from the back of LED bulb other items...bulbs are not recommended for the move . 8. When the last load of the same size and shape. If your refrigerator has an automatic ice maker: Turn off the water supply to the refrigerator. 16 Clean the exterior surfaces. Unplug refrigerator or disconnect power. 2. Remove the light bulb ...
Owners Manual
Page 17
... device, or visit www.whirlpool.com/product_help. Power cord unplugged? Replace light bulb. The refrigerator seems noisy Refrigerator noise has been reduced over the years. Hissing/Rattling - flow of refrigerant, movement of water lines, or from the ice maker mold The doors will close...refrigerator control is being ejected from items placed on the supports. Allow 24 hours following installation for the refrigerator to fill the ice maker Pulsating - NOTE: Adjusting the temperature controls to coldest setting will not operate WARNING The motor seems to its high-efficiency ...
... device, or visit www.whirlpool.com/product_help. Power cord unplugged? Replace light bulb. The refrigerator seems noisy Refrigerator noise has been reduced over the years. Hissing/Rattling - flow of refrigerant, movement of water lines, or from the ice maker mold The doors will close...refrigerator control is being ejected from items placed on the supports. Allow 24 hours following installation for the refrigerator to fill the ice maker Pulsating - NOTE: Adjusting the temperature controls to coldest setting will not operate WARNING The motor seems to its high-efficiency ...

Owners Manual
Page 18
... keep door fully closed . New installation? Allow 24 hours for your refrigerator. See "Water Supply Requirements." The ice cubes are available for ice maker to normal temperature. Failure to a water supply and the supply shut-off arm or switch (depending on ? Large load...left open ? Ice and Water The ice maker is normal. A kink in the line can decrease water pressure. Remove ice from food? Straighten the water source line. This can reduce water flow. See "Water Supply Requirements." Wash ice bin. In the U.S.A., visit our webpage www.whirlpool.com/ accessories...
... keep door fully closed . New installation? Allow 24 hours for your refrigerator. See "Water Supply Requirements." The ice cubes are available for ice maker to normal temperature. Failure to a water supply and the supply shut-off arm or switch (depending on ? Large load...left open ? Ice and Water The ice maker is normal. A kink in the line can decrease water pressure. Remove ice from food? Straighten the water source line. This can reduce water flow. See "Water Supply Requirements." Wash ice bin. In the U.S.A., visit our webpage www.whirlpool.com/ accessories...


