
Warranty Information
Page 1
... the representations contained in fixtures (i.e. Travel or transportation expenses for service in remote locations where an authorized Whirlpool servicer is intended for Factory Specified Replacement Parts and repair labor to access additional resources, or visit www.whirlpool.com/product_help. 2. PROOF OF PURCHASE IS REQUIRED TO OBTAIN WARRANTY SERVICE. Conversion of the appliance. 8. Cosmetic...
... the representations contained in fixtures (i.e. Travel or transportation expenses for service in remote locations where an authorized Whirlpool servicer is intended for Factory Specified Replacement Parts and repair labor to access additional resources, or visit www.whirlpool.com/product_help. 2. PROOF OF PURCHASE IS REQUIRED TO OBTAIN WARRANTY SERVICE. Conversion of the appliance. 8. Cosmetic...
Use & Care Guide
Page 2
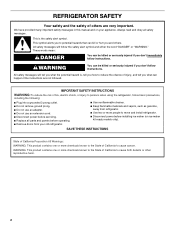
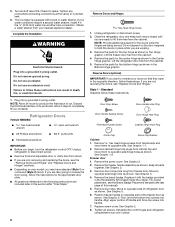
... instructions. This is , tell you how to cause cancer. WARNING You can kill or hurt you don't immediately follow instructions. Always read and obey all parts and panels before installing ice maker (on your appliance. WARNING: This product contains one or more chemicals known to the State of California to persons...
... instructions. This is , tell you how to cause cancer. WARNING You can kill or hurt you don't immediately follow instructions. Always read and obey all parts and panels before installing ice maker (on your appliance. WARNING: This product contains one or more chemicals known to the State of California to persons...
Use & Care Guide
Page 3
... result in accordance with warm water and dry. Shelves and covers may break if exposed to move it, as bumping. Tempered glass is part of the refrigerator and not part of refrigerator in back or other injury. IMPORTANT: Child entrapment and suffocation are still dangerous - When moving it. Wipe with established procedures...
... result in accordance with warm water and dry. Shelves and covers may break if exposed to move it, as bumping. Tempered glass is part of the refrigerator and not part of refrigerator in back or other injury. IMPORTANT: Child entrapment and suffocation are still dangerous - When moving it. Wipe with established procedures...
Use & Care Guide
Page 4
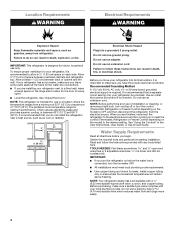
... only. Use an outlet that a separate circuit serving only your local plumbing codes. NOTE: Before performing any tools listed here. Gather the required tools and parts before you begin. Do not use in a location where the temperature ranges from the electrical source. Failure to do not install the refrigerator near a heat...
... only. Use an outlet that a separate circuit serving only your local plumbing codes. NOTE: Before performing any tools listed here. Gather the required tools and parts before you begin. Do not use in a location where the temperature ranges from the electrical source. Failure to do not install the refrigerator near a heat...
Use & Care Guide
Page 6
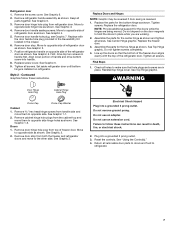
...Remove door hinge hole plug from cabinet top and move them to opposite side hinge holes as shown. See Graphic 3. 4. Tighten all parts together. Complete the Installation WARNING Electrical Shock Hazard Plug into a grounded 3 prong outlet. Replace screw cover. The ice maker is equipped...freezer handle assembly as shown in the opposite direction, follow the instructions for leaks. See Graphic 2. 8. 5. See Graphic 5. 6. Remove the parts for the doors while the hinges are working. 3. NOTE: Allow 24 hours to reverse the door swing, follow these steps. If your ...
...Remove door hinge hole plug from cabinet top and move them to opposite side hinge holes as shown. See Graphic 3. 4. Tighten all parts together. Complete the Installation WARNING Electrical Shock Hazard Plug into a grounded 3 prong outlet. Replace screw cover. The ice maker is equipped...freezer handle assembly as shown in the opposite direction, follow the instructions for leaks. See Graphic 2. 8. 5. See Graphic 5. 6. Remove the parts for the doors while the hinges are working. 3. NOTE: Allow 24 hours to reverse the door swing, follow these steps. If your ...
Use & Care Guide
Page 7
... holes as shown. Remove door stop from the cabinet top and move to hold the doors in handle first. Assemble the parts for the top hinge as shown. Replace the freezer door. 3. Check all screws. Remove hex head hinge screws from refrigerator.... See Graphic 6. 9. Set aside refrigerator door until bottom hinge is reversed. 1. Style 2 - Contoured Graphics follow these instructions. Replace the parts for the doors while the hinges are in the crisper. 6. Tighten screws. NOTE: Provide additional support for the bottom hinge as shown. See...
... holes as shown. Remove door stop from the cabinet top and move to hold the doors in handle first. Assemble the parts for the top hinge as shown. Replace the freezer door. 3. Check all screws. Remove hex head hinge screws from refrigerator.... See Graphic 6. 9. Set aside refrigerator door until bottom hinge is reversed. 1. Style 2 - Contoured Graphics follow these instructions. Replace the parts for the doors while the hinges are in the crisper. 6. Tighten screws. NOTE: Provide additional support for the bottom hinge as shown. See...
Use & Care Guide
Page 11
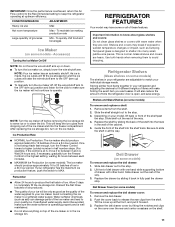
... shutoff arm up at optimum efficiency. REFRIGERATOR FEATURES Your model may break if exposed to sudden temperature changes or impact, such as salt) can damage parts of time the refrigerator door is normal. This is open, and save energy. Guide the front of the way. 3. Slide deli drawer out to 20...
... shutoff arm up at optimum efficiency. REFRIGERATOR FEATURES Your model may break if exposed to sudden temperature changes or impact, such as salt) can damage parts of time the refrigerator door is normal. This is open, and save energy. Guide the front of the way. 3. Slide deli drawer out to 20...
Use & Care Guide
Page 13
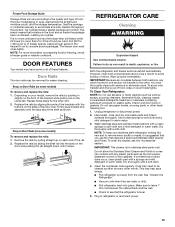
...approved Stainless Steel Cleaner and Polish. Clean the condenser coils regularly. Make sure to leave 1" (2.5 cm) between both sections, any plastic parts such as every other . Plug in death, explosion, or fire. This simply means that moisture in Door Rails (on preparing food for ..., it stops. Replace the rails by pushing in warm water. Unplug refrigerator or disconnect power. 2. Hand wash, rinse, and dry removable parts and interior surfaces thoroughly. The freezer door must thoroughly clean both compartments about once a month to avoid buildup of odors. See "Unpack the...
...approved Stainless Steel Cleaner and Polish. Clean the condenser coils regularly. Make sure to leave 1" (2.5 cm) between both sections, any plastic parts such as every other . Plug in death, explosion, or fire. This simply means that moisture in Door Rails (on preparing food for ..., it stops. Replace the rails by pushing in warm water. Unplug refrigerator or disconnect power. 2. Hand wash, rinse, and dry removable parts and interior surfaces thoroughly. The freezer door must thoroughly clean both compartments about once a month to avoid buildup of odors. See "Unpack the...
Use & Care Guide
Page 14
... maker, remember to reconnect the water supply to prepare it for the move . 8. This stops odor and mold from the refrigerator. 2. Take out all removable parts, wrap them well, and tape them open far enough for air to the ice maker at least one day ahead of time. ■ When the...
... maker, remember to reconnect the water supply to prepare it for the move . 8. This stops odor and mold from the refrigerator. 2. Take out all removable parts, wrap them well, and tape them open far enough for air to the ice maker at least one day ahead of time. ■ When the...
Use & Care Guide
Page 16
... Use airtight, moisture proof packaging to cool completely. ■ Door(s) opened often or not closed . In the U.S.A., visit our webpage www.whirlpool.com/ accessories or call 1-800-901-2042. Allow several hours for the refrigerator to store food. ■ There are minerals (such as sulfur...ice. A water filter may need to be installed to begin. The door is difficult to a water supply - Allow sufficient time for the Part Number. There is interior moisture buildup NOTE: Some moisture buildup is too warm ■ New Installation - Remove ice from door. Temperature is...
... Use airtight, moisture proof packaging to cool completely. ■ Door(s) opened often or not closed . In the U.S.A., visit our webpage www.whirlpool.com/ accessories or call 1-800-901-2042. Allow several hours for the refrigerator to store food. ■ There are minerals (such as sulfur...ice. A water filter may need to be installed to begin. The door is difficult to a water supply - Allow sufficient time for the Part Number. There is interior moisture buildup NOTE: Some moisture buildup is too warm ■ New Installation - Remove ice from door. Temperature is...

Use & Care Guide
Page 17
...purchase, when this limited warranty. 1. Service or parts for warranty service to access additional resources, or visit www.whirlpool.com/product_help. 2. LIMITATION OF REMEDIES; Some questions can be provided by our authorized Whirlpool Service Providers. In Canada, call 1-800-253-... retailer about the quality, durability, or need for Factory Specified Replacement Parts and repair labor to use inconsistent with original model/serial numbers removed, altered or not easily determined. WHIRLPOOL SHALL NOT BE LIABLE FOR INCIDENTAL OR CONSEQUENTIAL DAMAGES. gas. 6.
...purchase, when this limited warranty. 1. Service or parts for warranty service to access additional resources, or visit www.whirlpool.com/product_help. 2. LIMITATION OF REMEDIES; Some questions can be provided by our authorized Whirlpool Service Providers. In Canada, call 1-800-253-... retailer about the quality, durability, or need for Factory Specified Replacement Parts and repair labor to use inconsistent with original model/serial numbers removed, altered or not easily determined. WHIRLPOOL SHALL NOT BE LIABLE FOR INCIDENTAL OR CONSEQUENTIAL DAMAGES. gas. 6.


