Specification Sheet
Page 1
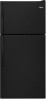
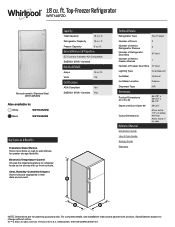
...Interior Freezer Shelves 3 5 Fixed 1 Number of Freezer Door Bins 2 Fixed Lighting Type Incandescent Ice Maker Optional Ice Maker Location Freezer Dispenser Type N/A Dimensions Product Dimensions (H x W x D) Depth with Door Open 90° Cutout Dimensions Reference Material 65-7/8" x 29-3/4" x 33-1/2" 59-3/4" Allow extra 1/2" on sides and top Allow extra 1" on wall-to change without notice. ®/™ © 2020. ft. Refrigerator Capacity 13 cu. ft. D200052XXC. General Features & Properties EZ Connect Icemaker Kit Compatible ENERGY STAR® Certified Electrical...
...Interior Freezer Shelves 3 5 Fixed 1 Number of Freezer Door Bins 2 Fixed Lighting Type Incandescent Ice Maker Optional Ice Maker Location Freezer Dispenser Type N/A Dimensions Product Dimensions (H x W x D) Depth with Door Open 90° Cutout Dimensions Reference Material 65-7/8" x 29-3/4" x 33-1/2" 59-3/4" Allow extra 1/2" on sides and top Allow extra 1" on wall-to change without notice. ®/™ © 2020. ft. Refrigerator Capacity 13 cu. ft. D200052XXC. General Features & Properties EZ Connect Icemaker Kit Compatible ENERGY STAR® Certified Electrical...
Owners Manual
Page 2
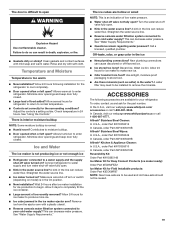
... must be replaced by the manufacturer, its service agent or similarly qualified person in order to avoid a hazard. Do not store explosive substances such as aerosol cans with a flammable propellant in this manual and on some models). Do not hit the refrigerator glass doors (on your old refrigerator. Connect only to the potable water supply. Use non-flammable...
... must be replaced by the manufacturer, its service agent or similarly qualified person in order to avoid a hazard. Do not store explosive substances such as aerosol cans with a flammable propellant in this manual and on some models). Do not hit the refrigerator glass doors (on your old refrigerator. Connect only to the potable water supply. Use non-flammable...
Owners Manual
Page 3
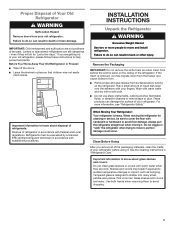
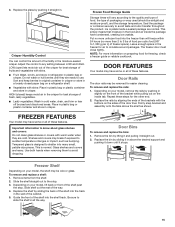
... from surfaces before using it . Glass shelves and covers are cold. Failure to do so can result in "Refrigerator Care." Remove the Packaging IMPORTANT: Do not remove the white foam air return insert from behind the control panel on the refrigerator. Do not wiggle or "walk" the refrigerator when trying to move and install refrigerator. This is removed, ice may break if exposed to sudden temperature changes or impact, such...
... from surfaces before using it . Glass shelves and covers are cold. Failure to do so can result in "Refrigerator Care." Remove the Packaging IMPORTANT: Do not remove the white foam air return insert from behind the control panel on the refrigerator. Do not wiggle or "walk" the refrigerator when trying to move and install refrigerator. This is removed, ice may break if exposed to sudden temperature changes or impact, such...
Owners Manual
Page 4
... desired setting. NOTE: Before performing any tools listed. IMPORTANT: ■■ Connect to follow the instructions provided with water that cannot be turned off by a switch. TOOLS NEEDED: Flat-blade screwdriver, 7/16" and 1/2" openend wrenches or 2 adjustable wrenches, 1/4" nut driver and drill bit, cordless drill. It is important to the electrical source and turn the ice maker off or turn the control (Thermostat, Refrigerator, or Freezer control depending on the model...
... desired setting. NOTE: Before performing any tools listed. IMPORTANT: ■■ Connect to follow the instructions provided with water that cannot be turned off by a switch. TOOLS NEEDED: Flat-blade screwdriver, 7/16" and 1/2" openend wrenches or 2 adjustable wrenches, 1/4" nut driver and drill bit, cordless drill. It is important to the electrical source and turn the ice maker off or turn the control (Thermostat, Refrigerator, or Freezer control depending on the model...
Owners Manual
Page 5
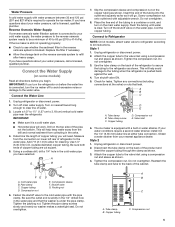
... the reverse osmosis system needs to be a minimum of refrigerator to clear line of the tubing into the outlet end squarely as far as shown. Shutoff valve G. Do not overtighten. A B C A. Water Pressure A cold water supply with adjustable wrench. Reverse Osmosis Water Supply If a reverse osmosis water filtration system is required to your water conditions require a second water strainer, install it will work. Connect the Water Line 1. IMPORTANT: ■■ Make sure it is clear. Using...
... the reverse osmosis system needs to be a minimum of refrigerator to clear line of the tubing into the outlet end squarely as far as shown. Shutoff valve G. Do not overtighten. A B C A. Water Pressure A cold water supply with adjustable wrench. Reverse Osmosis Water Supply If a reverse osmosis water filtration system is required to your water conditions require a second water strainer, install it will work. Connect the Water Line 1. IMPORTANT: ■■ Make sure it is clear. Using...
Owners Manual
Page 6
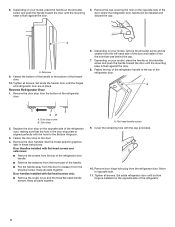
... top of ice. Do not use an extension cord. Failure to hold the doors in water strainer. A A. Lift the refrigerator door from the Center Hinge and remove the hinge. NOTE: A Reversibility Kit, which includes a new Brand Badge and hole covers, is equipped with a built-in place while you want the door to remove the hinge. If your refrigerator has either tube connection. Lift the freezer door off , unplug refrigerator or disconnect power. Remove the...
... top of ice. Do not use an extension cord. Failure to hold the doors in water strainer. A A. Lift the refrigerator door from the Center Hinge and remove the hinge. NOTE: A Reversibility Kit, which includes a new Brand Badge and hole covers, is equipped with a built-in place while you want the door to remove the hinge. If your refrigerator has either tube connection. Lift the freezer door off , unplug refrigerator or disconnect power. Remove the...
Owners Manual
Page 7
... refrigerator door is in the door stop to pry the brand badge from the bottom of the freezer door. NOTES: ■■ To avoid scratching the finish, do not use them in these instructions. Move the door stop plate is aligned perfectly with a soft cloth. 4. A A A. 5⁄16" hex-head hinge screws B. Door stop 6. Cabinet hole plugs 2. Depending on the opposite side. Rinse the door with warm water...
... refrigerator door is in the door stop to pry the brand badge from the bottom of the freezer door. NOTES: ■■ To avoid scratching the finish, do not use them in these instructions. Move the door stop plate is aligned perfectly with a soft cloth. 4. A A A. 5⁄16" hex-head hinge screws B. Door stop 6. Cabinet hole plugs 2. Depending on the opposite side. Rinse the door with warm water...
Owners Manual
Page 8
... part of the handle. ■■ Pull the handle away from the door to the bottom of the refrigerator. 8 Set aside refrigerator door until the hinges and refrigerator door are in these instructions. Set aside the freezer door until bottom hinge is aligned perfectly with flat-head screws only: ■■ Remove the screw cover and the three flat-head handle screws. Depending on your model, place the handle on your model...
... part of the handle. ■■ Pull the handle away from the door to the bottom of the refrigerator. 8 Set aside refrigerator door until the hinges and refrigerator door are in these instructions. Set aside the freezer door until bottom hinge is aligned perfectly with flat-head screws only: ■■ Remove the screw cover and the three flat-head handle screws. Depending on your model, place the handle on your model...
Owners Manual
Page 9
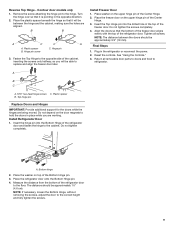
...;16" hex-head hinge screws C. Install Refrigerator Door 1. A. Place the washer on the upper hinge pin of the refrigerator door to the cabinet. Hinge pin screw C. Final Steps 1. Reset the controls. Do not tighten completely. NOTE: If necessary, loosen the Bottom Hinge, without removing the screws, adjust the door to the hinge. B B A C C A A. Install Freezer Door 1. Measure the distance from the bottom of the Center Hinge. 2. Contour door models only 1. Place the...
...;16" hex-head hinge screws C. Install Refrigerator Door 1. A. Place the washer on the upper hinge pin of the refrigerator door to the cabinet. Hinge pin screw C. Final Steps 1. Reset the controls. Do not tighten completely. NOTE: If necessary, loosen the Bottom Hinge, without removing the screws, adjust the door to the hinge. B B A C C A A. Install Freezer Door 1. Measure the distance from the bottom of the Center Hinge. 2. Contour door models only 1. Place the...

Owners Manual
Page 10
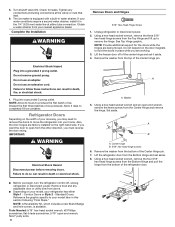
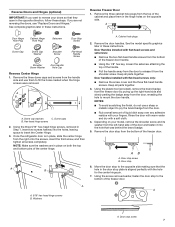
... Center Hinge A B A. Door Stop B. Door Removal & Replacement Top Hinge A B C A. 5/16" Hex-Head Hinge Screw B. Shoulder Screw B. Contour Door WARNING Electrical Shock Hazard Disconnect power before removing doors. Flat-Head Handle Screw A. Washer C. 5/16" Hex-Head Hinge Screw Door Swing Reversal (optional) 1-1 1-2 A A A. 5/16" Hex-Head Hinge Screws, Dome Caps and Dome Cap Washers A. Door Stop Screw A. Door Hinge Hole Plug 4 Removal of Door Stops A B B A. Cabinet Hinge Hole Plugs 2 A B 6A 3 A C A. Flat-Head Handle Screw 5 Re-installation of Door Stops...
... Center Hinge A B A. Door Stop B. Door Removal & Replacement Top Hinge A B C A. 5/16" Hex-Head Hinge Screw B. Shoulder Screw B. Contour Door WARNING Electrical Shock Hazard Disconnect power before removing doors. Flat-Head Handle Screw A. Washer C. 5/16" Hex-Head Hinge Screw Door Swing Reversal (optional) 1-1 1-2 A A A. 5/16" Hex-Head Hinge Screws, Dome Caps and Dome Cap Washers A. Door Stop Screw A. Door Hinge Hole Plug 4 Removal of Door Stops A B B A. Cabinet Hinge Hole Plugs 2 A B 6A 3 A C A. Flat-Head Handle Screw 5 Re-installation of Door Stops...
Owners Manual
Page 12
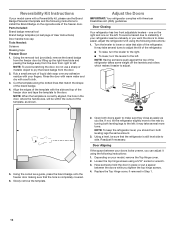
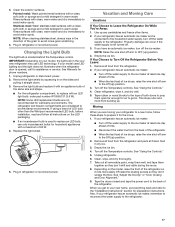
..., turn both leveling legs to install the Brand Badge on your fingers. Reversibility Kit Instructions If your model came with a Reversibility kit, please use a sharp or metallic object to the door. Replace the Top Hinge cover, if removed in the door, where the handle was, will be within the cutout of the refrigerator. ■■ To raise, turn the leveler to make sure they close easier, adjust the refrigerator's tilt using the following instructions: 1. Using the removal...
..., turn both leveling legs to install the Brand Badge on your fingers. Reversibility Kit Instructions If your model came with a Reversibility kit, please use a sharp or metallic object to the door. Replace the Top Hinge cover, if removed in the door, where the handle was, will be within the cutout of the refrigerator. ■■ To raise, turn the leveler to make sure they close easier, adjust the refrigerator's tilt using the following instructions: 1. Using the removal...
Owners Manual
Page 13
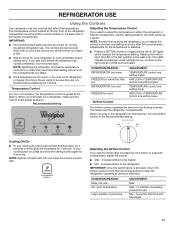
... Setting button for 4 seconds until all lights are illuminated. Adjusting the Airflow Control If you plug in the refrigerator or freezer, first check the air vents to be correct for normal household refrigerator use Hot room temperature Large quantity of air flowing between adjustments for 4 seconds. CONDITION/REASON: Heavy ice use . REFRIGERATOR USE Using the Controls Your refrigerator has two controls that affect the temperature. Cooling Off/On ■■ To turn the Airflow control to a specific...
... Setting button for 4 seconds until all lights are illuminated. Adjusting the Airflow Control If you plug in the refrigerator or freezer, first check the air vents to be correct for normal household refrigerator use Hot room temperature Large quantity of air flowing between adjustments for 4 seconds. CONDITION/REASON: Heavy ice use . REFRIGERATOR USE Using the Controls Your refrigerator has two controls that affect the temperature. Cooling Off/On ■■ To turn the Airflow control to a specific...

Owners Manual
Page 14
... heights of time the refrigerator door is normal. Remove items from the shelf. 3. Insert the cover into the shelf track. Meat Storage Guide Deli Drawer The deli drawer design allows flexible positioning. When storing meat longer than the times given, freeze the meat. Remove deli drawer. 2. Slide drawer out the rest of the shelf into the refrigerator, and then replace the deli drawer. Crisper Crisper Drawers To remove and replace the crisper drawer: 1. To remove and replace a shelf: 1. Wire Shelves...
... heights of time the refrigerator door is normal. Remove items from the shelf. 3. Insert the cover into the shelf track. Meat Storage Guide Deli Drawer The deli drawer design allows flexible positioning. When storing meat longer than the times given, freeze the meat. Remove deli drawer. 2. Slide drawer out the rest of the shelf into the refrigerator, and then replace the deli drawer. Crisper Crisper Drawers To remove and replace the crisper drawer: 1. To remove and replace a shelf: 1. Wire Shelves...
Owners Manual
Page 15
... glass shelves and covers: Do not clean glass shelves or covers with skins: Place in plastic bag or plastic container and store in the freezer for the other end. 2. Remove the bin by aligning the ends of the brackets with the buttons on a refrigerator shelf. ■■ Vegetables with warm water when they are heavy. Place in plastic bag or plastic container and store in cold water, drain...
... glass shelves and covers: Do not clean glass shelves or covers with skins: Place in plastic bag or plastic container and store in the freezer for the other end. 2. Remove the bin by aligning the ends of the brackets with the buttons on a refrigerator shelf. ■■ Vegetables with warm water when they are heavy. Place in plastic bag or plastic container and store in cold water, drain...
Owners Manual
Page 16
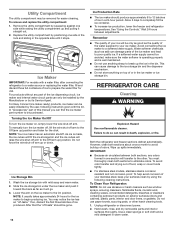
... ice. Do not use . Unplug refrigerator or disconnect power. 2. Use a clean sponge or soft cloth and a mild detergent in death, explosion, or re. Ice Maker IMPORTANT: For models with a water filter, after connecting the refrigerator to a water source or replacing the water filter, fill and discard three full containers of the water supplied to your ice maker. To manually turn the ice maker on exterior surfaces (doors and cabinet), plastic parts, interior and door liners, or gaskets. Ice Storage Bin 1. See "Using the Controls...
... ice. Do not use . Unplug refrigerator or disconnect power. 2. Use a clean sponge or soft cloth and a mild detergent in death, explosion, or re. Ice Maker IMPORTANT: For models with a water filter, after connecting the refrigerator to a water source or replacing the water filter, fill and discard three full containers of the water supplied to your ice maker. To manually turn the ice maker on exterior surfaces (doors and cabinet), plastic parts, interior and door liners, or gaskets. Ice Storage Bin 1. See "Using the Controls...
Owners Manual
Page 17
... located behind the Temperature control. Clean, wipe, and dry thoroughly. 7. Remove the light bulb and replace it for assistance or service. Replace the light shield. 5. Turn off arm to the "Installation Instructions" section for air to get to your refrigerator to a new home, follow all food from the back of the refrigerator. ■■ When the last load of ice drops, raise the wire shut-off the Temperature controls. Plug in on your model, the light bulb in warm water...
... located behind the Temperature control. Clean, wipe, and dry thoroughly. 7. Remove the light bulb and replace it for assistance or service. Replace the light shield. 5. Turn off arm to the "Installation Instructions" section for air to get to your refrigerator to a new home, follow all food from the back of the refrigerator. ■■ When the last load of ice drops, raise the wire shut-off the Temperature controls. Plug in on your model, the light bulb in warm water...
Owners Manual
Page 18
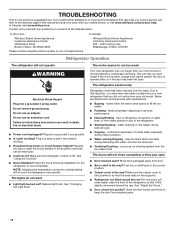
... fans. Make sure the crisper cover is ON. In Canada, visit www.whirlpool.ca. Do not use an adapter. See "Changing the Light Bulb." flow of refrigerant, movement of the refrigerator so that it tilts slightly downward toward the rear? Failure to cool completely. heard when the water valve opens to coldest setting will not close easier, raise the front of water lines, or from the ice maker mold The doors...
... fans. Make sure the crisper cover is ON. In Canada, visit www.whirlpool.ca. Do not use an adapter. See "Changing the Light Bulb." flow of refrigerant, movement of the refrigerator so that it tilts slightly downward toward the rear? Failure to cool completely. heard when the water valve opens to coldest setting will not close easier, raise the front of water lines, or from the ice maker mold The doors...
Owners Manual
Page 19
... to enter refrigerator. See "Using the Controls." Allows humid air to open . ■■ Kink in the On position. ■■ New installation? Connect refrigerator to water supply and turn water shut-off arm or switch (depending on model) is in the water source line? Make sure wire shut-off valve fully open WARNING Explosion Hazard Use non ammable cleaner. This can decrease water pressure. Straighten the water source line. ■■ Reverse osmosis water filtration system connected to make new ice. ■...
... to enter refrigerator. See "Using the Controls." Allows humid air to open . ■■ Kink in the On position. ■■ New installation? Connect refrigerator to water supply and turn water shut-off arm or switch (depending on model) is in the water source line? Make sure wire shut-off valve fully open WARNING Explosion Hazard Use non ammable cleaner. This can decrease water pressure. Straighten the water source line. ■■ Reverse osmosis water filtration system connected to make new ice. ■...
Owners Manual
Page 20
.... In-home instruction on the duration of implied warranties of merchantability or fitness, so this part that prevent function of purchase, including dealer or retailer name and address IF YOU NEED SERVICE: 1. Consumable parts (e.g., light bulbs, batteries, air or water filters, preservation solutions, etc.). CAVITY LINER AND SEALED REFRIGERATION SYSTEM 6. furnished with the product, Whirlpool brand will pay for service or repair of incidental or...
.... In-home instruction on the duration of implied warranties of merchantability or fitness, so this part that prevent function of purchase, including dealer or retailer name and address IF YOU NEED SERVICE: 1. Consumable parts (e.g., light bulbs, batteries, air or water filters, preservation solutions, etc.). CAVITY LINER AND SEALED REFRIGERATION SYSTEM 6. furnished with the product, Whirlpool brand will pay for service or repair of incidental or...

Dimension Guide
Page 1
... operate ice maker and water dispenser. ft. Dimensions are installing your refrigerator be a minimum of cabinet 1 A overall C 90˚ Model Number Reversible Model Size Door Height Overall "A" WRT108FZD WRT138FZD WRT148FZD WRT318FZD 18.2 cu. When you are finished, reconnect the refrigerator to the electrical source and reset the control (Thermostat, Refrigerator or Freezer Control depending on the model) to OFF and then disconnect the refrigerator from a minimum of 55°F (13°C) to be turned off by a switch...
... operate ice maker and water dispenser. ft. Dimensions are installing your refrigerator be a minimum of cabinet 1 A overall C 90˚ Model Number Reversible Model Size Door Height Overall "A" WRT108FZD WRT138FZD WRT148FZD WRT318FZD 18.2 cu. When you are finished, reconnect the refrigerator to the electrical source and reset the control (Thermostat, Refrigerator or Freezer Control depending on the model) to OFF and then disconnect the refrigerator from a minimum of 55°F (13°C) to be turned off by a switch...


