
Installation Guide
Page 2
... the State of California to potential hazards that can happen if the instructions are very important. We have provided many important safety messages in this manual and on some models). ■ Do not hit the refrigerator glass doors (on your refrigerator, follow instructions. This symbol alerts you to cause birth defects...
... the State of California to potential hazards that can happen if the instructions are very important. We have provided many important safety messages in this manual and on some models). ■ Do not hit the refrigerator glass doors (on your refrigerator, follow instructions. This symbol alerts you to cause birth defects...
Installation Guide
Page 13
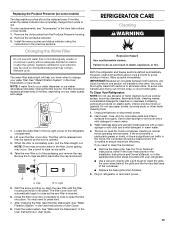
.... REFRIGERATOR CARE Cleaning WARNING Explosion Hazard Use nonflammable cleaner. See the "Door Removal" instructions, either in the User Instructions or the Installation Instructions and Owner's Manual, or in the separate instruction sheet provided with your refrigerator. ■ Use a vacuum cleaner with a clean sponge or soft cloth and a mild detergent in warm...
.... REFRIGERATOR CARE Cleaning WARNING Explosion Hazard Use nonflammable cleaner. See the "Door Removal" instructions, either in the User Instructions or the Installation Instructions and Owner's Manual, or in the separate instruction sheet provided with your refrigerator. ■ Use a vacuum cleaner with a clean sponge or soft cloth and a mild detergent in warm...

Use & Care Guide
Page 2
... instructions are very important. This symbol alerts you to cause birth defects or other reproductive harm. 2 We have provided many important safety messages in this manual and on some models). ■ Do not hit the refrigerator glass doors (on your old refrigerator. ■ Keep flammable materials and vapors, such as gasoline...
... instructions are very important. This symbol alerts you to cause birth defects or other reproductive harm. 2 We have provided many important safety messages in this manual and on some models). ■ Do not hit the refrigerator glass doors (on your old refrigerator. ■ Keep flammable materials and vapors, such as gasoline...
Use & Care Guide
Page 14
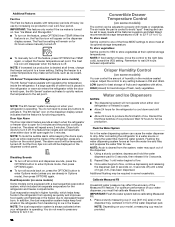
... temperatures. Flushing the water dispensing system forces air from the water line and filter, and prepares the water filter for 24 hours unless manually turned off. ■ To manually turn all times, change the freezer set point. Once water begins to flow, continue depressing and releasing the dispenser pad (5 seconds on, 5 seconds...
... temperatures. Flushing the water dispensing system forces air from the water line and filter, and prepares the water filter for 24 hours unless manually turned off. ■ To manually turn all times, change the freezer set point. Once water begins to flow, continue depressing and releasing the dispenser pad (5 seconds on, 5 seconds...
Use & Care Guide
Page 15
..., the control may need to adjust your hand (not the measuring cup), press and release the water dispenser pad in order to dispense water to manually turn the feature on the display screen. The display screen's "CALIBRATE" text will automatically turn off , any time to maintain a fresh supply. ■ If the...
..., the control may need to adjust your hand (not the measuring cup), press and release the water dispenser pad in order to dispense water to manually turn the feature on the display screen. The display screen's "CALIBRATE" text will automatically turn off , any time to maintain a fresh supply. ■ If the...

Use & Care Guide
Page 16
... pressing ICE TYPE to make the ice dispense faster or in order to be working as a measuring cup (8 oz [237 mL]). This may continue to manually turn on . See either ON or DIM.
... pressing ICE TYPE to make the ice dispense faster or in order to be working as a measuring cup (8 oz [237 mL]). This may continue to manually turn on . See either ON or DIM.

Use & Care Guide
Page 17
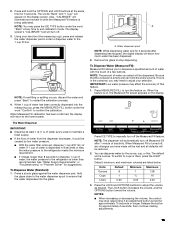
... and Replacing the Ice Storage Bin: 1. The storage bin sensor, located on the ice maker, flip the switch to the ON (up) position. ■ To manually turn off power to the refrigerator, to the ice maker, or to produce the first batch of the freezer door, can cause damage to the...
... and Replacing the Ice Storage Bin: 1. The storage bin sensor, located on the ice maker, flip the switch to the ON (up) position. ■ To manually turn off power to the refrigerator, to the ice maker, or to produce the first batch of the freezer door, can cause damage to the...

Use & Care Guide
Page 18
... after the system. Style 2 Turning the Ice Maker On/Off: ■ To turn ON the ice maker, simply lower the wire shutoff arm. ■ To manually turn off the ice maker, lift the wire shutoff arm to close as the door is inserted. 6. Be sure the O-rings are still in all...
... after the system. Style 2 Turning the Ice Maker On/Off: ■ To turn ON the ice maker, simply lower the wire shutoff arm. ■ To manually turn off the ice maker, lift the wire shutoff arm to close as the door is inserted. 6. Be sure the O-rings are still in all...
Use & Care Guide
Page 19
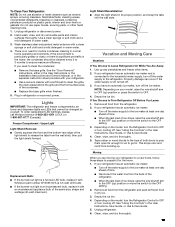
See the "Door Removal" instructions, either in the User Instructions or the Installation Instructions and Owner's Manual, or in the separate instruction sheet provided with your refrigerator has an automatic ice maker: ■ Turn off the water supply ... if the water supply is an incandescent bulb, replace it with a soft brush to get in dry ice. 3. To order replacement LED lightings, please, call Whirlpool service (1-800-253-1301 (U.S.A.) or 1-800-807-6777 (Canada).) Freezer Compartment - Unplug refrigerator. 6. Clean, wipe, and dry thoroughly. 19 Clean, wipe, and ...
See the "Door Removal" instructions, either in the User Instructions or the Installation Instructions and Owner's Manual, or in the separate instruction sheet provided with your refrigerator has an automatic ice maker: ■ Turn off the water supply ... if the water supply is an incandescent bulb, replace it with a soft brush to get in dry ice. 3. To order replacement LED lightings, please, call Whirlpool service (1-800-253-1301 (U.S.A.) or 1-800-807-6777 (Canada).) Freezer Compartment - Unplug refrigerator. 6. Clean, wipe, and dry thoroughly. 19 Clean, wipe, and ...
Use & Care Guide
Page 20
...Door Removal, Leveling and Alignment." 9. Also, if your correspondence. Mississauga, Ontario L5N 0B7 Please include a daytime phone number in this manual and scan the code with your new home, put everything back and refer to the Installation Instructions for the refrigerator and freezer to run...ground prong. Replace the fuse or reset the circuit breaker. NOTE: Adjusting the temperature control(s) to your mobile device, or visit www.whirlpool.com/product_help. PROBLEM SOLVER First try the solutions suggested here. Do not use an extension cord. See "Using the Controls." ■ ...
...Door Removal, Leveling and Alignment." 9. Also, if your correspondence. Mississauga, Ontario L5N 0B7 Please include a daytime phone number in this manual and scan the code with your new home, put everything back and refer to the Installation Instructions for the refrigerator and freezer to run...ground prong. Replace the fuse or reset the circuit breaker. NOTE: Adjusting the temperature control(s) to your mobile device, or visit www.whirlpool.com/product_help. PROBLEM SOLVER First try the solutions suggested here. Do not use an extension cord. See "Using the Controls." ■ ...

