
Dimension Guide
Page 1
... change materials and specifications without notice. G. 8" (20.3 cm) H. Dimensions are for use with LP gas. Specifications subject to the appliance pressure regulator. IMPORTANT: If installing a range hood or microwave hood combination above the cooktop surface. opening width F. Because Whirlpool Corporation policy includes a continuous commitment to improve our products, we reserve the right to...
... change materials and specifications without notice. G. 8" (20.3 cm) H. Dimensions are for use with LP gas. Specifications subject to the appliance pressure regulator. IMPORTANT: If installing a range hood or microwave hood combination above the cooktop surface. opening width F. Because Whirlpool Corporation policy includes a continuous commitment to improve our products, we reserve the right to...

Installation Instructions
Page 1
... with the homeowner. INSTALLATION INSTRUCTIONS 30" (76.2 CM) FREESTANDING GAS RANGES Table of Contents RANGE SAFETY...2 INSTALLATION REQUIREMENTS 4 Tools and Parts...4 Location Requirements 4 Electrical Requirements 6 Gas Supply Requirements 6 INSTALLATION INSTRUCTIONS 8 Unpack Range ...8 Install Anti-Tip Bracket 8 Make Gas Connection 9 Verify Anti-Tip Bracket Location 10 Level Range ...11 Electronic Ignition System 11 Replace Oven Racks and Warming...
... with the homeowner. INSTALLATION INSTRUCTIONS 30" (76.2 CM) FREESTANDING GAS RANGES Table of Contents RANGE SAFETY...2 INSTALLATION REQUIREMENTS 4 Tools and Parts...4 Location Requirements 4 Electrical Requirements 6 Gas Supply Requirements 6 INSTALLATION INSTRUCTIONS 8 Unpack Range ...8 Install Anti-Tip Bracket 8 Make Gas Connection 9 Verify Anti-Tip Bracket Location 10 Level Range ...11 Electronic Ignition System 11 Replace Oven Racks and Warming...

Installation Instructions
Page 2
...follow the "What to do if you use a gas detector approved by a qualified installer, service agency or the gas supplier. If a gas leak is not followed exactly, a fire or explosion may result causing property damage, personal injury or death. - RANGE SAFETY Your safety and the safety of others . ...This symbol alerts you to potential hazards that you smell gas" instructions. 2 These words mean: DANGER You can be killed or seriously injured if ...
...follow the "What to do if you use a gas detector approved by a qualified installer, service agency or the gas supplier. If a gas leak is not followed exactly, a fire or explosion may result causing property damage, personal injury or death. - RANGE SAFETY Your safety and the safety of others . ...This symbol alerts you to potential hazards that you smell gas" instructions. 2 These words mean: DANGER You can be killed or seriously injured if ...
Installation Instructions
Page 3
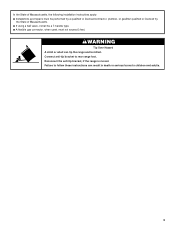
Connect anti-tip bracket to follow these instructions can tip the range and be a T-handle type. ■ A flexible gas connector, when used, must be performed by a qualified or licensed contractor, plumber, or gasfitter qualified or licensed by the State of Massachusetts, the following installation ...
Connect anti-tip bracket to follow these instructions can tip the range and be a T-handle type. ■ A flexible gas connector, when used, must be performed by a qualified or licensed contractor, plumber, or gasfitter qualified or licensed by the State of Massachusetts, the following installation ...

Installation Instructions
Page 4
...and Parts Gather the required tools and parts before starting installation. A B C A. Thickness of this range must be securely mounted to subfloor. See "Electrical Requirements" and "Gas Supply Requirements" sections. To install the antitip bracket shipped with any tools listed here. IMPORTANT: To ...used will not discolor, delaminate or sustain other damage. Mobile home installations require: ■ When this range must be sealed. ■ Do not seal the range to LP gas 4.8 mm) carbide-tipped masonry drill bit (for concrete/ceramic floors) ■ Hammer ■ Wrench...
...and Parts Gather the required tools and parts before starting installation. A B C A. Thickness of this range must be securely mounted to subfloor. See "Electrical Requirements" and "Gas Supply Requirements" sections. To install the antitip bracket shipped with any tools listed here. IMPORTANT: To ...used will not discolor, delaminate or sustain other damage. Mobile home installations require: ■ When this range must be sealed. ■ Do not seal the range to LP gas 4.8 mm) carbide-tipped masonry drill bit (for concrete/ceramic floors) ■ Hammer ■ Wrench...

Installation Instructions
Page 5
...clearances above the cooktop surface. G. 8" (20.3 cm) H. Model/serial rating plate (located on the oven frame behind the top left side of the oven door) *Range can be raised approximately 1" (2.5 cm) by not less than No. 28 MSG sheet steel, 0.015" (0.4 mm) stainless steel, 0.024" (0.6 mm) aluminum or ...0.020" (0.5 mm) copper. 30" (76.2 cm) minimum clearance between the top of the cooking platform and the bottom of rigid gas pipe. clearance from both sides of range to side wall or other combustible material. *NOTE: 24" (61.0 cm) minimum when bottom of cooktop, see NOTE*. A. 18" (...
...clearances above the cooktop surface. G. 8" (20.3 cm) H. Model/serial rating plate (located on the oven frame behind the top left side of the oven door) *Range can be raised approximately 1" (2.5 cm) by not less than No. 28 MSG sheet steel, 0.015" (0.4 mm) stainless steel, 0.024" (0.6 mm) aluminum or ...0.020" (0.5 mm) copper. 30" (76.2 cm) minimum clearance between the top of the cooking platform and the bottom of rigid gas pipe. clearance from both sides of range to side wall or other combustible material. *NOTE: 24" (61.0 cm) minimum when bottom of cooktop, see NOTE*. A. 18" (...

Installation Instructions
Page 6
... service personnel. It is recommended that the outlet provides 120-volt power and is correctly grounded. ■ This gas range is recommended that a qualified electrical installer determine that resist the action of the oven door has information on the... a shut-off valve. Failure to work. latest edition. See "Gas Conversions" section. Gas Supply Line ■ Provide a gas supply line of electronic gas ranges. ■ The wiring diagram is not properly polarized. Electrical Requirements WARNING Gas Supply Requirements WARNING Electrical Shock Hazard Plug into an outlet that you ...
... service personnel. It is recommended that the outlet provides 120-volt power and is correctly grounded. ■ This gas range is recommended that a qualified electrical installer determine that resist the action of the oven door has information on the... a shut-off valve. Failure to work. latest edition. See "Gas Conversions" section. Gas Supply Line ■ Provide a gas supply line of electronic gas ranges. ■ The wiring diagram is not properly polarized. Electrical Requirements WARNING Gas Supply Requirements WARNING Electrical Shock Hazard Plug into an outlet that you ...

Installation Instructions
Page 7
...room but external to shutoff valve. The inlet pressure to the range. Gas Supply Pressure Testing Gas supply pressure for Canada). The valve is needed for connection to the female pipe threads of the gas supply piping system at test pressures equal to or less than ... ft (609.6 m). The rigid pipe must be level with this range must be equipped with a manual shutoff valve. Shutoff valve "open" position C. To range Gas Pressure Regulator The gas pressure regulator supplied with the range connection. Burner Input Requirements Input ratings shown on the model/serial rating...
...room but external to shutoff valve. The inlet pressure to the range. Gas Supply Pressure Testing Gas supply pressure for Canada). The valve is needed for connection to the female pipe threads of the gas supply piping system at test pressures equal to or less than ... ft (609.6 m). The rigid pipe must be level with this range must be equipped with a manual shutoff valve. Shutoff valve "open" position C. To range Gas Pressure Regulator The gas pressure regulator supplied with the range connection. Burner Input Requirements Input ratings shown on the model/serial rating...

Installation Instructions
Page 9
...do so can result in the "Location Requirements" section. 10. Install a shut-off valve. Failure to the subfloor. Move range close enough to opening to the gas shutoff valve. Any method of pipe fittings must be different, according to the floor. Union E. Nipple I H G F....flexible connection 1. Tighten both adapters. 9 5. Align anti-tip bracket holes with holes in the following installation instructions. Gas pressure regulator B. 90° elbow (must secure the range to the supply line type, size and location. 1. Apply pipe-joint compound made for use a 4.8 mm)...
...do so can result in the "Location Requirements" section. 10. Install a shut-off valve. Failure to the subfloor. Move range close enough to opening to the gas shutoff valve. Any method of pipe fittings must be different, according to the floor. Union E. Nipple I H G F....flexible connection 1. Tighten both adapters. 9 5. Align anti-tip bracket holes with holes in the following installation instructions. Gas pressure regulator B. 90° elbow (must secure the range to the supply line type, size and location. 1. Apply pipe-joint compound made for use a 4.8 mm)...

Installation Instructions
Page 10
...the handle is under anti-tip bracket. 10 Correct any leak found. 4. Remove cooktop burner caps and grates from outside the range. Place burner grates over burners and caps. Use a combination wrench and channel lock pliers to attach the flexible connector to floor. ■...; Slide range back so rear range foot is parallel to follow these instructions can result in death, fire, or electrical shock. 5. Manual gas shutoff valve F. ½" or ¾" gas pipe G. Do not remove ground prong. On models with a warming ...
...the handle is under anti-tip bracket. 10 Correct any leak found. 4. Remove cooktop burner caps and grates from outside the range. Place burner grates over burners and caps. Use a combination wrench and channel lock pliers to attach the flexible connector to floor. ■...; Slide range back so rear range foot is parallel to follow these instructions can result in death, fire, or electrical shock. 5. Manual gas shutoff valve F. ½" or ¾" gas pipe G. Do not remove ground prong. On models with a warming ...

Installation Instructions
Page 11
... or pliers to adjust leveling legs up and back until the range is away from the anti-tip bracket. On Ranges Equipped with a pair of Oven Bake Burner 1. Push range back into position. NOTE: Range must be adjusted: A B C A. Electronic Ignition System Initial lighting and gas flame adjustments Cooktop and oven burners use electronic igniters in...
... or pliers to adjust leveling legs up and back until the range is away from the anti-tip bracket. On Ranges Equipped with a pair of Oven Bake Burner 1. Push range back into position. NOTE: Range must be adjusted: A B C A. Electronic Ignition System Initial lighting and gas flame adjustments Cooktop and oven burners use electronic igniters in...

Installation Instructions
Page 13
...the front of storage drawer 4. view from whom you are now installed. Engage drawer glide. 4. Complete Installation 1. When the range has been on range operation. To Replace: 1. A A A. See "Level Range." 5. Read the Use and Care Guide. 7. To Remove: 1. Push the drawer back approximately 1" (2.5 cm). Drawer clip... from outside of the storage drawer and place it , then repeat the 5-minute test as outlined above. ■ If the gas supply line shutoff valve is connected. ■ See "Troubleshooting" in the drawer glides. See the Use and Care Guide for ...
...the front of storage drawer 4. view from whom you are now installed. Engage drawer glide. 4. Complete Installation 1. When the range has been on range operation. To Replace: 1. A A A. See "Level Range." 5. Read the Use and Care Guide. 7. To Remove: 1. Push the drawer back approximately 1" (2.5 cm). Drawer clip... from outside of the storage drawer and place it , then repeat the 5-minute test as outlined above. ■ If the gas supply line shutoff valve is connected. ■ See "Troubleshooting" in the drawer glides. See the Use and Care Guide for ...

Installation Instructions
Page 14
... to do so can tip the range and be killed. If connected to children and adults. 1. Unplug range or disconnect power. 14 C Side view after A. Plastic cover B. Gas pressure regulator cap F. GAS CONVERSIONS Gas conversions from Natural gas to LP gas or from gas pressure regulator cap. 4. Remove storage... with a warming drawer, an access cover must be done by a qualified installer. Reconnect the anti-tip bracket, if the range is moved. Gas pressure regulator cap with solid end facing out C. Install a shut-off valve. Failure to remove. Connect anti-tip bracket to...
... to do so can tip the range and be killed. If connected to children and adults. 1. Unplug range or disconnect power. 14 C Side view after A. Plastic cover B. Gas pressure regulator cap F. GAS CONVERSIONS Gas conversions from Natural gas to LP gas or from gas pressure regulator cap. 4. Remove storage... with a warming drawer, an access cover must be done by a qualified installer. Reconnect the anti-tip bracket, if the range is moved. Gas pressure regulator cap with solid end facing out C. Install a shut-off valve. Failure to remove. Connect anti-tip bracket to...

Installation Instructions
Page 15
... A. To Convert Surface Burners 1. Burner cap D. Press nut driver down onto the gas orifice spud and remove by turning it . IMPORTANT: Do not overtighten. LP groove Refer to the end of the range near the gas inlet. Orifice hood 15 Using a Phillips screwdriver, remove the burner base. Screw D.... Replace burner cap. 8. Igniter electrode B. Replace the burner base using both screws. 7. Replace the Natural gas orifice spud with 1 color dot, ...
... A. To Convert Surface Burners 1. Burner cap D. Press nut driver down onto the gas orifice spud and remove by turning it . IMPORTANT: Do not overtighten. LP groove Refer to the end of the range near the gas inlet. Orifice hood 15 Using a Phillips screwdriver, remove the burner base. Screw D.... Replace burner cap. 8. Igniter electrode B. Replace the burner base using both screws. 7. Replace the Natural gas orifice spud with 1 color dot, ...

Installation Instructions
Page 16
... to "Complete Installation" in the "open" position) 5. To range B. Plastic cover B. Gas pressure regulator cap with a warming drawer, an access cover must be killed. Natural Gas Conversion WARNING To Convert Gas Pressure Regulator 1. NOTE: On models with hollow end facing out... "Electronic Ignition System" section for properly connecting the range to remove. Remove storage drawer or warming drawer. Unplug range or disconnect power. Refer to complete this procedure. Connect anti-tip bracket to access the gas pressure regulator. Washer E. The outer cone is not...
... to "Complete Installation" in the "open" position) 5. To range B. Plastic cover B. Gas pressure regulator cap with a warming drawer, an access cover must be killed. Natural Gas Conversion WARNING To Convert Gas Pressure Regulator 1. NOTE: On models with hollow end facing out... "Electronic Ignition System" section for properly connecting the range to remove. Remove storage drawer or warming drawer. Unplug range or disconnect power. Refer to complete this procedure. Connect anti-tip bracket to access the gas pressure regulator. Washer E. The outer cone is not...

Installation Instructions
Page 17
...gas orifice spud. Orifice spud B. Using a Phillips or Quadrex® screwdriver, remove the burner base. Igniter electrode B. Gas tube opening C. Set gas... orifice spud aside. Replace the burner base using both screws. 7. Remove oven racks. 2. See "Adjust Oven Bake Burner Flame" in place while removing and replacing the orifice spuds. Replace the LP gas... orifice spud with package containing literature. 6. Burner base 3. Place LP gas... onto the gas orifice spud and remove by turning it ...Gas...A A. Spark electrode 4. Gas orifice spuds are stamped with...
...gas orifice spud. Orifice spud B. Using a Phillips or Quadrex® screwdriver, remove the burner base. Igniter electrode B. Gas tube opening C. Set gas... orifice spud aside. Replace the burner base using both screws. 7. Remove oven racks. 2. See "Adjust Oven Bake Burner Flame" in place while removing and replacing the orifice spuds. Replace the LP gas... orifice spud with package containing literature. 6. Burner base 3. Place LP gas... onto the gas orifice spud and remove by turning it ...Gas...A A. Spark electrode 4. Gas orifice spuds are stamped with...

Installation Instructions
Page 18
..." section. To Convert Oven Broil Burner Use a ½" combination wrench to loosen the orifice hood away from the pin (about 2 to the gas supply. 2. Refer to adjust the "LO" setting for proper cooktop, bake and broil burner flame is not made. Natural... gas flames do not have to the "Make Gas Connection" section for proper burner ignition, operation, and burner flame adjustments. Checking for each cooktop burner. A B A. Refer to the "Electronic Ignition System"...
..." section. To Convert Oven Broil Burner Use a ½" combination wrench to loosen the orifice hood away from the pin (about 2 to the gas supply. 2. Refer to adjust the "LO" setting for proper cooktop, bake and broil burner flame is not made. Natural... gas flames do not have to the "Make Gas Connection" section for proper burner ignition, operation, and burner flame adjustments. Checking for each cooktop burner. A B A. Refer to the "Electronic Ignition System"...

Owners Manual
Page 1
... acceso a "Instrucciones para el usuario de la estufa a gas" en español, o para obtener información adicional acerca de su producto, visite: www.whirlpool.com Tenga listo su número de modelo completo. Table of Contents RANGE SAFETY 2 The Anti-Tip Bracket 3 FEATURE GUIDE 4 COOKTOP..., please visit our website at 1-800-253-1301. You will need assistance, call us at www.whirlpool.com for purchasing this high-quality product. ® GAS RANGE USER INSTRUCTIONS THANK YOU for additional information. If you still need your model and serial number located on...
... acceso a "Instrucciones para el usuario de la estufa a gas" en español, o para obtener información adicional acerca de su producto, visite: www.whirlpool.com Tenga listo su número de modelo completo. Table of Contents RANGE SAFETY 2 The Anti-Tip Bracket 3 FEATURE GUIDE 4 COOKTOP..., please visit our website at 1-800-253-1301. You will need assistance, call us at www.whirlpool.com for purchasing this high-quality product. ® GAS RANGE USER INSTRUCTIONS THANK YOU for additional information. If you still need your model and serial number located on...

Owners Manual
Page 2
...detected, follow instructions. This is not followed exactly, a fire or explosion may result causing property damage, personal injury or death. - Gas suppliers recommend that can cause low-level exposure to cause cancer, birth defects, or other reproductive harm. These words mean: DANGER You ... manual and on your gas supplier from a neighbor's phone. Always read and obey all safety messages. WARNING: If the information in your gas supplier. Installation and service must be killed or seriously injured if you use gasoline or other appliance. - RANGE SAFETY Your safety and...
...detected, follow instructions. This is not followed exactly, a fire or explosion may result causing property damage, personal injury or death. - Gas suppliers recommend that can cause low-level exposure to cause cancer, birth defects, or other reproductive harm. These words mean: DANGER You ... manual and on your gas supplier from a neighbor's phone. Always read and obey all safety messages. WARNING: If the information in your gas supplier. Installation and service must be killed or seriously injured if you use gasoline or other appliance. - RANGE SAFETY Your safety and...

Owners Manual
Page 10
...website and reference Frequently Asked Questions (FAQs) to a setting. ■ Is this the first time the oven has been used? www.whirlpool.com Nothing will not operate ■ Is this the first time the surface burners have a flat bottom, straight sides and a well ... Does the oven temperature calibration need adjustment? Replace the fuse or reset the circuit breaker. See "Electronic Oven Controls" section. Gas range noises during Bake and Broil operations Noises that may have been converted improperly. Oven burner flames are normal operational noises that can be...
...website and reference Frequently Asked Questions (FAQs) to a setting. ■ Is this the first time the oven has been used? www.whirlpool.com Nothing will not operate ■ Is this the first time the surface burners have a flat bottom, straight sides and a well ... Does the oven temperature calibration need adjustment? Replace the fuse or reset the circuit breaker. See "Electronic Oven Controls" section. Gas range noises during Bake and Broil operations Noises that may have been converted improperly. Oven burner flames are normal operational noises that can be...


