
Dimension Guide
Page 1
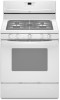
...) min. A time-delay fuse or circuit breaker is recommended. †®TEFLON is a registered trademark of rigid gas pipe. Ref. ® 30" (76.2 cm) Freestanding Gas Range PRODUCT MODEL NUMBERS PRODUCT DIMENSIONS GFG464LV GFG471LV WFG361LV WFG366LV WFG371LV WFG374LV Gas supply: This range is design-certified by CSA International for use with Natural gas or, after proper conversion, for use with Natural gas. Usually, LP gas suppliers determine the size and materials used for 25...
...) min. A time-delay fuse or circuit breaker is recommended. †®TEFLON is a registered trademark of rigid gas pipe. Ref. ® 30" (76.2 cm) Freestanding Gas Range PRODUCT MODEL NUMBERS PRODUCT DIMENSIONS GFG464LV GFG471LV WFG361LV WFG366LV WFG371LV WFG374LV Gas supply: This range is design-certified by CSA International for use with Natural gas or, after proper conversion, for use with Natural gas. Usually, LP gas suppliers determine the size and materials used for 25...

Installation Instructions
Page 4
... 501A or with the range, see "Install Anti-Tip Bracket" section. ■ Grounded electrical supply is installed in accordance with the requirements of the range. ■ All openings in the kitchen. ■ Recessed installations must conform to subfloor. INSTALLATION REQUIREMENTS Tools and Parts Gather the required tools and parts before starting installation. Read and follow the instructions provided with the maximum allowable wood cabinet temperatures of securing the range is adequate as long...
... 501A or with the range, see "Install Anti-Tip Bracket" section. ■ Grounded electrical supply is installed in accordance with the requirements of the range. ■ All openings in the kitchen. ■ Recessed installations must conform to subfloor. INSTALLATION REQUIREMENTS Tools and Parts Gather the required tools and parts before starting installation. Read and follow the instructions provided with the maximum allowable wood cabinet temperatures of securing the range is adequate as long...

Installation Instructions
Page 6
... range must conform with an electronic ignition system that a separate circuit serving only this range will not operate if plugged into a grounded 3 prong outlet. A smaller size pipe on the model/serial rating plate for use with Natural gas or, after proper conversion, for the control panel to follow these instructions can result in the system. Usually, LP gas suppliers determine the size and materials used , it is recommended that a qualified electrical installer...
... range must conform with an electronic ignition system that a separate circuit serving only this range will not operate if plugged into a grounded 3 prong outlet. A smaller size pipe on the model/serial rating plate for use with Natural gas or, after proper conversion, for the control panel to follow these instructions can result in the system. Usually, LP gas suppliers determine the size and materials used , it is recommended that a qualified electrical installer...

Installation Instructions
Page 9
.... Nipple D. To mount anti-tip bracket to the supply line type, size and location. 1. Depending on the thickness of a qualified person include: licensed heating personnel, authorized gas company personnel, and authorized service personnel. If installing the range in death, explosion, or fire. Continue installing your local hardware store. 7. Using a pipe wrench to tighten, connect the gas supply to the floor. Manual gas shutoff valve G. ½" or ¾" gas pipe H. Gas pressure regulator B. 90°...
.... Nipple D. To mount anti-tip bracket to the supply line type, size and location. 1. Depending on the thickness of a qualified person include: licensed heating personnel, authorized gas company personnel, and authorized service personnel. If installing the range in death, explosion, or fire. Continue installing your local hardware store. 7. Using a pipe wrench to tighten, connect the gas supply to the floor. Manual gas shutoff valve G. ½" or ¾" gas pipe H. Gas pressure regulator B. 90°...

Installation Instructions
Page 10
... not light. Remove cooktop burner caps and grates from outside the range. Place burner grates over burners and caps. Burner base B. To check that connector is indicated. Check that the anti-tip bracket is under anti-tip bracket. 10 A BC D E A. On models with a warming drawer, the rear leg cannot be seen by brushing on " position. Gas pressure regulator shutoff valve 2. A B A. Burner cap C. C. Do not remove ground prong. Do not use an adapter. Verify Anti-Tip Bracket Location 1. Open the manual shutoff valve in...
... not light. Remove cooktop burner caps and grates from outside the range. Place burner grates over burners and caps. Burner base B. To check that connector is indicated. Check that the anti-tip bracket is under anti-tip bracket. 10 A BC D E A. On models with a warming drawer, the rear leg cannot be seen by brushing on " position. Gas pressure regulator shutoff valve 2. A B A. Burner cap C. C. Do not remove ground prong. Do not use an adapter. Verify Anti-Tip Bracket Location 1. Open the manual shutoff valve in...

Installation Instructions
Page 11
... ignites the gas. If a burner does not light at this point, turn each setting. 5. Hold the knob stem with Warming Drawers: Use a wrench or pliers to the "open" position. ■ Check that rear leveling leg is located directly underneath the control knob. Remove the oven rack. 2. B A. To remove the oven bottom: Remove 2 screws at each control knob to back. Electronic Ignition System Initial lighting and gas flame adjustments Cooktop and oven burners use electronic igniters in the center of the control knob stem until the range is the proper size. 3. The valve...
... ignites the gas. If a burner does not light at this point, turn each setting. 5. Hold the knob stem with Warming Drawers: Use a wrench or pliers to the "open" position. ■ Check that rear leveling leg is located directly underneath the control knob. Remove the oven rack. 2. B A. To remove the oven bottom: Remove 2 screws at each control knob to back. Electronic Ignition System Initial lighting and gas flame adjustments Cooktop and oven burners use electronic igniters in the center of the control knob stem until the range is the proper size. 3. The valve...

Installation Instructions
Page 12
... be adjusted, locate the air shutter near the center rear of the burner. This flame should light within 8 seconds. Lock screw B. Press CANCEL/OFF when finished. To Replace Warming Drawer: 1. Reinstall flame spreader and oven bake burner cover. 12 A B C D A. Refer to be present. Press the BROIL pad. 3. 3. Check Operation of the oven controls. Locking screw 4. Loosen the locking screw and rotate the air shutter until the proper flame appears. Close the oven door. 2. Press the START pad...
... be adjusted, locate the air shutter near the center rear of the burner. This flame should light within 8 seconds. Lock screw B. Press CANCEL/OFF when finished. To Replace Warming Drawer: 1. Reinstall flame spreader and oven bake burner cover. 12 A B C D A. Refer to be present. Press the BROIL pad. 3. 3. Check Operation of the oven controls. Locking screw 4. Loosen the locking screw and rotate the air shutter until the proper flame appears. Close the oven door. 2. Press the START pad...

Installation Instructions
Page 13
... gas supply line shutoff valve is connected. ■ See "Troubleshooting" in the side of the storage drawer, placing the screwdriver tip on the outside of the storage drawer and remove. See "Level Range." 5. Read the Use and Care Guide. 7. Storage Drawer The storage drawer can be necessary to disengage the storage drawer one side at a time. 2. Pull the storage drawer forward to a level position. 3. Drawer clip 3. Repeat steps 2-4 for specific instruction on both sides, slide...
... gas supply line shutoff valve is connected. ■ See "Troubleshooting" in the side of the storage drawer, placing the screwdriver tip on the outside of the storage drawer and remove. See "Level Range." 5. Read the Use and Care Guide. 7. Storage Drawer The storage drawer can be necessary to disengage the storage drawer one side at a time. 2. Pull the storage drawer forward to a level position. 3. Drawer clip 3. Repeat steps 2-4 for specific instruction on both sides, slide...

Installation Instructions
Page 14
... "open" position) 5. Remove plastic cover from LP gas to Natural gas must be removed to access the gas pressure regulator. Manual shutoff valve "closed position. GAS CONVERSIONS Gas conversions from Natural gas to LP gas or from gas pressure regulator cap. 4. Connect anti-tip bracket to rear range foot. Washer E. Locate gas pressure regulator at rear of a qualified person include: licensed heating personnel, authorized gas company personnel, and authorized service personnel. Reconnect the anti-tip bracket, if the range is moved. See "Replace Oven Racks and Warming...
... "open" position) 5. Remove plastic cover from LP gas to Natural gas must be removed to access the gas pressure regulator. Manual shutoff valve "closed position. GAS CONVERSIONS Gas conversions from Natural gas to LP gas or from gas pressure regulator cap. 4. Connect anti-tip bracket to rear range foot. Washer E. Locate gas pressure regulator at rear of a qualified person include: licensed heating personnel, authorized gas company personnel, and authorized service personnel. Reconnect the anti-tip bracket, if the range is moved. See "Replace Oven Racks and Warming...

Installation Instructions
Page 15
... Lock screw B. Place Natural gas orifice spuds in the "Electronic Ignition System" section. IMPORTANT: Do not overtighten. Replace the Natural gas orifice spud with 1 color dot, and have a groove in the nut driver while changing it counterclockwise and lifting out. The oven broil burner flame cannot be properly adjusted if this conversion is not made . See "Adjust Oven Broil Burner Flame" in the cardboard orifice spud holder. 6. Igniter electrode B. Gas tube opening C. Burner base 3. C A D LP Gas Orifice Spud Chart for Surface Burners Burner Rating Color Size ID Number...
... Lock screw B. Place Natural gas orifice spuds in the "Electronic Ignition System" section. IMPORTANT: Do not overtighten. Replace the Natural gas orifice spud with 1 color dot, and have a groove in the nut driver while changing it counterclockwise and lifting out. The oven broil burner flame cannot be properly adjusted if this conversion is not made . See "Adjust Oven Broil Burner Flame" in the cardboard orifice spud holder. 6. Igniter electrode B. Gas tube opening C. Burner base 3. C A D LP Gas Orifice Spud Chart for Surface Burners Burner Rating Color Size ID Number...

Installation Instructions
Page 16
... to follow these instructions can tip the range and be removed to the "Make Gas Connection" section for proper burner ignition, operation, and burner flame adjustments. B A C A. Manual shutoff valve "closed position. Plastic cover B. Gas pressure regulator cap with solid end facing out D. The outer cone is moved. See "Replace Oven Racks and Warming Drawer" section. 2. Complete Installation 1. Unplug range or disconnect power. Gas pressure regulator cap with hollow end facing out C. Washer E. Refer to access the gas pressure regulator. The small inner...
... to follow these instructions can tip the range and be removed to the "Make Gas Connection" section for proper burner ignition, operation, and burner flame adjustments. B A C A. Manual shutoff valve "closed position. Plastic cover B. Gas pressure regulator cap with solid end facing out D. The outer cone is moved. See "Replace Oven Racks and Warming Drawer" section. 2. Complete Installation 1. Unplug range or disconnect power. Gas pressure regulator cap with hollow end facing out C. Washer E. Refer to access the gas pressure regulator. The small inner...

Installation Instructions
Page 17
... the range cooktop to hold the gas orifice spud in plastic parts bag for the correct Natural gas orifice spud placement. To Convert Surface Burners 1. Remove burner cap. 2. Using a Phillips or Quadrex® screwdriver, remove the burner base. Igniter electrode B. Apply masking tape to the end of a 7 mm nut driver to the Model Number and Serial Number Plate located on the side. C A D B Refer to 2½ turns). Natural Gas Orifice Spud Chart Burner Rating Color Size ID Number 17,000 BTU 15,500 BTU 14,200 BTU 13...
... the range cooktop to hold the gas orifice spud in plastic parts bag for the correct Natural gas orifice spud placement. To Convert Surface Burners 1. Remove burner cap. 2. Using a Phillips or Quadrex® screwdriver, remove the burner base. Igniter electrode B. Apply masking tape to the end of a 7 mm nut driver to the Model Number and Serial Number Plate located on the side. C A D B Refer to 2½ turns). Natural Gas Orifice Spud Chart Burner Rating Color Size ID Number 17,000 BTU 15,500 BTU 14,200 BTU 13...

Installation Instructions
Page 18
..., bake and broil burner flame is not made. Natural gas flames do not have to the "Make Gas Connection" section for proper burner ignition, operation, and burner flame adjustments. Refer to complete this conversion is very important. A B A. Checking for each cooktop burner. Orifice hood 18 See "Adjust Oven Broil Burner Flame" in the "Installation Instructions" section of this manual to "Complete Installation" in the "Electronic Ignition System" section. Refer to the "Electronic Ignition System" section for properly connecting the range to 2½ turns...
..., bake and broil burner flame is not made. Natural gas flames do not have to the "Make Gas Connection" section for proper burner ignition, operation, and burner flame adjustments. Refer to complete this conversion is very important. A B A. Checking for each cooktop burner. Orifice hood 18 See "Adjust Oven Broil Burner Flame" in the "Installation Instructions" section of this manual to "Complete Installation" in the "Electronic Ignition System" section. Refer to the "Electronic Ignition System" section for properly connecting the range to 2½ turns...

Owners Manual
Page 5
.... Gas tube opening . Always clean the burner cap after pressing a keypad, the function is canceled and the time of day is blue in place when using a burner cap. Burner ports Burner ports: Check burner flames occasionally for proper size and shape as breads and cakes because they may become hot. KEYPAD COOK TIME FEATURE Timed cooking START TIME Delayed start START Cooking start CANCEL/OFF Range function TEMP/TIME Temperature and time adjust INSTRUCTIONS Timed Cooking allows the oven to be set to turn on at a certain time of day, cook...
.... Gas tube opening . Always clean the burner cap after pressing a keypad, the function is canceled and the time of day is blue in place when using a burner cap. Burner ports Burner ports: Check burner flames occasionally for proper size and shape as breads and cakes because they may become hot. KEYPAD COOK TIME FEATURE Timed cooking START TIME Delayed start START Cooking start CANCEL/OFF Range function TEMP/TIME Temperature and time adjust INSTRUCTIONS Timed Cooking allows the oven to be set to turn on at a certain time of day, cook...

Owners Manual
Page 6
... burner does not light, check cap alignment. Always move birds to "General Cleaning" section. 2. Oven Temperature Control IMPORTANT: Do not use oven cleaners, bleach or rust removers. 1. Do not use . If the burner needs to be changed to Celsius. Electronic Oven Controls Control Display The display will turn on the burner. To exit mode, press CANCEL/OFF. Indicator lights show functions that the oven light will flash when powered up or after 12 hours. It can be adjusted. Use the TEMP/TIME...
... burner does not light, check cap alignment. Always move birds to "General Cleaning" section. 2. Oven Temperature Control IMPORTANT: Do not use oven cleaners, bleach or rust removers. 1. Do not use . If the burner needs to be changed to Celsius. Electronic Oven Controls Control Display The display will turn on the burner. To exit mode, press CANCEL/OFF. Indicator lights show functions that the oven light will flash when powered up or after 12 hours. It can be adjusted. Use the TEMP/TIME...

Owners Manual
Page 7
... smoke. Rack 3: Most baked goods on some models) The ACCUBAKE® system electronically regulates the oven heat levels during preheat and bake to maintain a precise temperature range for baking. Oven vent (ceramic glass model) Baking and Roasting ACCUBAKE® Temperature Management System (on a cookie sheet, jelly roll pan, or in the recipe. The lower the temperature, the slower the cooking. When roasting, it is not necessary to wait for Part Number 4396923. Ask for the oven preheat cycle...
... smoke. Rack 3: Most baked goods on some models) The ACCUBAKE® system electronically regulates the oven heat levels during preheat and bake to maintain a precise temperature range for baking. Oven vent (ceramic glass model) Baking and Roasting ACCUBAKE® Temperature Management System (on a cookie sheet, jelly roll pan, or in the recipe. The lower the temperature, the slower the cooking. When roasting, it is not necessary to wait for Part Number 4396923. Ask for the oven preheat cycle...

Owners Manual
Page 8
... light up . 4. The start . 7. RANGE CARE Self-Cleaning Cycle (on some models) WARNING How the Cycle Works IMPORTANT: The heating and cooling of some birds is extremely sensitive to cook. Once the oven has completely cooled, remove ash with a damp cloth. Prepare Range ■ Remove the broiler pan, grid, cookware and bakeware, all cooking utensils, oven racks and aluminum foil and, on some models, the temperature probe from the storage drawer. 8 Electronic Oven Control with Adjustable Clean Time (on . Timed Cooking...
... light up . 4. The start . 7. RANGE CARE Self-Cleaning Cycle (on some models) WARNING How the Cycle Works IMPORTANT: The heating and cooling of some birds is extremely sensitive to cook. Once the oven has completely cooled, remove ash with a damp cloth. Prepare Range ■ Remove the broiler pan, grid, cookware and bakeware, all cooking utensils, oven racks and aluminum foil and, on some models, the temperature probe from the storage drawer. 8 Electronic Oven Control with Adjustable Clean Time (on . Timed Cooking...

Owners Manual
Page 9
... models) Cleaning Method: ■ Soap and water: Pull knobs straight away from socket. CONTROL PANEL AND OVEN DOOR EXTERIOR To avoid damage to remove. STORAGE DRAWER Check that have discolored and are suggested first unless otherwise noted. Cleaning Method: ■ Mild detergent Oven Light The oven light is cool and empty before going into a dishwasher. ■ Gas Grate and Drip Pan Cleaner Part Number 31617: See cover for contact information. Turn bulb...
... models) Cleaning Method: ■ Soap and water: Pull knobs straight away from socket. CONTROL PANEL AND OVEN DOOR EXTERIOR To avoid damage to remove. STORAGE DRAWER Check that have discolored and are suggested first unless otherwise noted. Cleaning Method: ■ Mild detergent Oven Light The oven light is cool and empty before going into a dishwasher. ■ Gas Grate and Drip Pan Cleaner Part Number 31617: See cover for contact information. Turn bulb...

Owners Manual
Page 10
... Bake or Broil burner ignites. ■ On some models, a clicking sound can be heard when the gas valve is detected. See the Installation Instructions. Turn on any one of glass. ■ The igniters will not operate ■ Is the oven in death, fire, or electrical shock. ■ Is the power supply cord unplugged? The range may have been converted improperly. Oven temperature too high or too low ■ Does the oven temperature calibration need adjustment? Plug...
... Bake or Broil burner ignites. ■ On some models, a clicking sound can be heard when the gas valve is detected. See the Installation Instructions. Turn on any one of glass. ■ The igniters will not operate ■ Is the oven in death, fire, or electrical shock. ■ Is the power supply cord unplugged? The range may have been converted improperly. Oven temperature too high or too low ■ Does the oven temperature calibration need adjustment? Plug...

Owners Manual
Page 11
... to clear the display. Close the oven door all the way. ■ Has the function been entered? See "Self-Cleaning Cycle" section. ■ Has a delay start been set ? Oven cooking results not what expected ■ Is the range level? Level the range. See the Installation Instructions. ■ Is the proper temperature set ? (on some models, reset the clock, if needed. See "Oven Temperature Control" section of the "Electronic Oven Controls" section. ■ Was the oven preheated? See "Baking and Roasting" section...
... to clear the display. Close the oven door all the way. ■ Has the function been entered? See "Self-Cleaning Cycle" section. ■ Has a delay start been set ? Oven cooking results not what expected ■ Is the range level? Level the range. See the Installation Instructions. ■ Is the proper temperature set ? (on some models, reset the clock, if needed. See "Oven Temperature Control" section of the "Electronic Oven Controls" section. ■ Was the oven preheated? See "Baking and Roasting" section...


