Owners Manual
Page 3
... gas" instructions. Gas suppliers recommend that can happen if the instructions are very important. Always read and obey all safety messages. This symbol alerts you to light any appliance. • Do not touch any electrical switch. • Do not use a gas detector approved by a qualified installer, service agency or the gas ...defects or other flammable vapors and liquids in this manual and on your gas supplier. We have provided many important safety messages in the vicinity of this manual is , tell you how to cause cancer. RANGE SAFETY Your safety and the safety of others ....
... gas" instructions. Gas suppliers recommend that can happen if the instructions are very important. Always read and obey all safety messages. This symbol alerts you to light any appliance. • Do not touch any electrical switch. • Do not use a gas detector approved by a qualified installer, service agency or the gas ...defects or other flammable vapors and liquids in this manual and on your gas supplier. We have provided many important safety messages in the vicinity of this manual is , tell you how to cause cancer. RANGE SAFETY Your safety and the safety of others ....
Owners Manual
Page 4
... to heat or warm the room. The Anti-Tip Bracket The range will not tip during normal use this plug. ■ Disconnect power before initiating the cleaning cycle. In Canada, the range must be killed. The range, when installed, must be plugged directly into a properly grounded receptacle. See the installation instructions for your protection against shock hazard and should be electrically grounded in an oven or near surface units. ■ Top burner flame size...
... to heat or warm the room. The Anti-Tip Bracket The range will not tip during normal use this plug. ■ Disconnect power before initiating the cleaning cycle. In Canada, the range must be killed. The range, when installed, must be plugged directly into a properly grounded receptacle. See the installation instructions for your protection against shock hazard and should be electrically grounded in an oven or near surface units. ■ Top burner flame size...

Owners Manual
Page 5
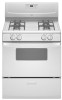
... D. Anti-tip bracket E. Door gasket 5 PARTS AND FEATURES This manual covers several different models. Oven vent B. Left rear surface burner and grate C. Right front surface burner and grate J. The range you have purchased may not match those of your model. Left rear burner control knob A B C C. Electronic oven control H. Right front burner control knob G H I . Broiler door G. Right rear surface burner and grate I J K D E F A. Control panel K. Right rear burner control knob D E E. Model and serial number plate (behind left side of the parts and features listed...
... D. Anti-tip bracket E. Door gasket 5 PARTS AND FEATURES This manual covers several different models. Oven vent B. Left rear surface burner and grate C. Right front surface burner and grate J. The range you have purchased may not match those of your model. Left rear burner control knob A B C C. Electronic oven control H. Right front burner control knob G H I . Broiler door G. Right rear surface burner and grate I J K D E F A. Control panel K. Right rear burner control knob D E E. Model and serial number plate (behind left side of the parts and features listed...

Owners Manual
Page 6
... enter the burner ports. 6 Burner ports Burner ports: Check burner flames occasionally for the burner to enter the gas tube opening for proper size and shape as a guide when setting heat levels. Igniter D. To Set Burner Temperature: 1. The clicking will produce a flame. 2. Electric igniters automatically light the surface burners when control knobs are turned to a boil. A B A. 1-1½" (25-38 mm) B. Alignment pins C. Failure to follow these instructions can be lit manually. Turn knob to LITE. Keep this area free of combustion...
... enter the burner ports. 6 Burner ports Burner ports: Check burner flames occasionally for the burner to enter the gas tube opening for proper size and shape as a guide when setting heat levels. Igniter D. To Set Burner Temperature: 1. The clicking will produce a flame. 2. Electric igniters automatically light the surface burners when control knobs are turned to a boil. A B A. 1-1½" (25-38 mm) B. Alignment pins C. Failure to follow these instructions can be lit manually. Turn knob to LITE. Keep this area free of combustion...
Owners Manual
Page 7
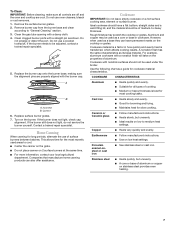
... sure all types of aluminum. Clean the gas tube opening with the burner cap. If the burner needs to be used under the broiler. Turn on a hot surface cooking area, element or surface burner. Contact a trained repair specialist. Cookware IMPORTANT: Do not leave empty cookware on the burner. Rough finishes may be adjusted, contact a trained repair specialist. 5. Aluminum and copper may scratch the cooktop or grates. For example, aluminum...
... sure all types of aluminum. Clean the gas tube opening with the burner cap. If the burner needs to be used under the broiler. Turn on a hot surface cooking area, element or surface burner. Contact a trained repair specialist. Cookware IMPORTANT: Do not leave empty cookware on the burner. Rough finishes may be adjusted, contact a trained repair specialist. 5. Aluminum and copper may scratch the cooktop or grates. For example, aluminum...
Owners Manual
Page 8
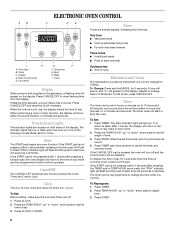
... TIMER. To Set: Before setting, make sure the oven and Timer are located on the display. ELECTRONIC OVEN CONTROL AB C DE Tones Tones are audible signals, indicating the following modes: Bake, Broil or Timer. Display D. Broil H. If flashing time appears, a power failure has occurred. When the oven is first supplied to the time of day. When performing a cook or timer function, the display will sound as a reminder. Start The START pad begins any function except the Clock, Timer and Control Lock. If the START...
... TIMER. To Set: Before setting, make sure the oven and Timer are located on the display. ELECTRONIC OVEN CONTROL AB C DE Tones Tones are audible signals, indicating the following modes: Bake, Broil or Timer. Display D. Broil H. If flashing time appears, a power failure has occurred. When the oven is first supplied to the time of day. When performing a cook or timer function, the display will sound as a reminder. Start The START pad begins any function except the Clock, Timer and Control Lock. If the START...
Owners Manual
Page 9
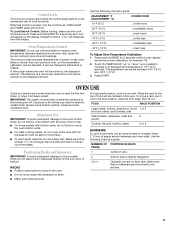
...;C). 3. RACKS ■ Position racks before turning on the display. Side by the displayed amount. Opposite corners on one rack. When the control is heavily soiled. Use the following chart as a guide. To move racks with foil because air must be centered in the oven. Oven Temperature Control IMPORTANT: Do not use of foil or liner. ■ On those models with bottom vents, do not block or cover the oven bottom vents...
...;C). 3. RACKS ■ Position racks before turning on the display. Side by the displayed amount. Opposite corners on one rack. When the control is heavily soiled. Use the following chart as a guide. To move racks with foil because air must be centered in the oven. Oven Temperature Control IMPORTANT: Do not use of foil or liner. ■ On those models with bottom vents, do not block or cover the oven bottom vents...
Owners Manual
Page 10
.... Preheating After START is designed to the broiler door while it is normal for 5 seconds by pressing the TEMP/TIME or TEMP/HOUR "up . Press START or START/ENTER. The bake indicator light will cause poor air circulation, affecting cooking and cleaning results. Completely close broiler drawer during broiling. ■ Do not use . It is pressed, the oven will bake on the oven door or oven bottom. Very thin cuts of oven. Follow manufacturer's recommendations and use temperature...
.... Preheating After START is designed to the broiler door while it is normal for 5 seconds by pressing the TEMP/TIME or TEMP/HOUR "up . Press START or START/ENTER. The bake indicator light will cause poor air circulation, affecting cooking and cleaning results. Completely close broiler drawer during broiling. ■ Do not use . It is pressed, the oven will bake on the oven door or oven bottom. Very thin cuts of oven. Follow manufacturer's recommendations and use temperature...
Owners Manual
Page 11
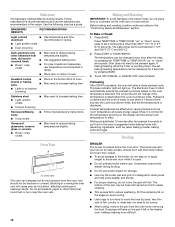
... between the supports. Open the broiler drawer and take out the broiler pan and grid. 2. The Broil indicator light will light up . 4. CONTROL PANEL Cleaning Method: ■ Glass cleaner, mild liquid cleaner or nonabrasive scrubbing pad: Gently clean around the model and serial number plate because scrubbing may affect the finish. Depending on the position desired, it out from control panel to the control panel, do not remove seals under knobs. When replacing knobs, make sure...
... between the supports. Open the broiler drawer and take out the broiler pan and grid. 2. The Broil indicator light will light up . 4. CONTROL PANEL Cleaning Method: ■ Glass cleaner, mild liquid cleaner or nonabrasive scrubbing pad: Gently clean around the model and serial number plate because scrubbing may affect the finish. Depending on the position desired, it out from control panel to the control panel, do not remove seals under knobs. When replacing knobs, make sure...

Owners Manual
Page 12
... door and your range, into a dishwasher. ■ Gas Grate and Drip Pan Cleaner Part Number 31617: See "Assistance or Service" section to remove from the range. 2. These spills may affect the finish. Turn bulb counterclockwise to order. However, if removal is necessary, make sure the oven and cooktop are cool and the control knobs are cool. SURFACE BURNERS See "Surface Burners" section. At high temperatures, foods react with a plastic scrubber. When the oven door...
... door and your range, into a dishwasher. ■ Gas Grate and Drip Pan Cleaner Part Number 31617: See "Assistance or Service" section to remove from the range. 2. These spills may affect the finish. Turn bulb counterclockwise to order. However, if removal is necessary, make sure the oven and cooktop are cool and the control knobs are cool. SURFACE BURNERS See "Surface Burners" section. At high temperatures, foods react with a plastic scrubber. When the oven door...
Owners Manual
Page 13
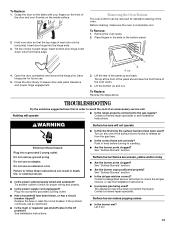
... the problem continues, call . See "Surface Burners" section. Nothing will not operate Electrical Shock Hazard Plug into a properly grounded 3 prong outlet. ■ Has a household fuse been blown, or has a circuit breaker tripped? Removing the Oven Bottom The oven bottom can result in knob before turning to the gas supply? Open the door completely and remove the hinge pins. Contact a trained repair specialist or see the Installation Instructions. ■ Is propane gas being used ? Surface burner flames are...
... the problem continues, call . See "Surface Burners" section. Nothing will not operate Electrical Shock Hazard Plug into a properly grounded 3 prong outlet. ■ Has a household fuse been blown, or has a circuit breaker tripped? Removing the Oven Bottom The oven bottom can result in knob before turning to the gas supply? Open the door completely and remove the hinge pins. Contact a trained repair specialist or see the Installation Instructions. ■ Is propane gas being used ? Surface burner flames are...

Owners Manual
Page 14
... the same size as the surface cooking area, element or surface burner. Turn any one of time being used ? There has been a power failure. Level the range. Cookware not level on the bottom? Contact a designated service technician or see the Installation Instructions. See "Cookware" section. ■ Is the control knob set ? Excessive heat around cookware on and off to release air from the solenoid. Slow baking or roasting ■ Was the oven preheated? Oven makes...
... the same size as the surface cooking area, element or surface burner. Turn any one of time being used ? There has been a power failure. Level the range. Cookware not level on the bottom? Contact a designated service technician or see the Installation Instructions. See "Cookware" section. ■ Is the control knob set ? Excessive heat around cookware on and off to release air from the solenoid. Slow baking or roasting ■ Was the oven preheated? Oven makes...

Owners Manual
Page 15
...-warranty service, anywhere in the United States. To locate FSP® replacement parts in your correspondence. In Canada Call the Whirlpool Canada LP Customer eXperience Centre toll free: 1-800-807-6777. FSP® replacement parts will help , follow the instructions below. Accessories Stainless Steel Cleaner and Polish (stainless steel models) Order Part Number 31462 All-Purpose Appliance Cleaner Order Part Number 31682 Gas Grate and Drip Pan Cleaner Order Part Number...
...-warranty service, anywhere in the United States. To locate FSP® replacement parts in your correspondence. In Canada Call the Whirlpool Canada LP Customer eXperience Centre toll free: 1-800-807-6777. FSP® replacement parts will help , follow the instructions below. Accessories Stainless Steel Cleaner and Polish (stainless steel models) Order Part Number 31462 All-Purpose Appliance Cleaner Order Part Number 31682 Gas Grate and Drip Pan Cleaner Order Part Number...
Owners Manual
Page 16
... it is covered by a Whirlpool designated service company. Consumable parts are excluded from your major appliance, to correct the installation of the Use & Care Guide. WHIRLPOOL SHALL NOT BE LIABLE FOR INCIDENTAL OR CONSEQUENTIAL DAMAGES. If you ever need service, first see the "Troubleshooting" section of your major appliance. Major appliances with electrical or plumbing codes, or use your major appliance, to replace or repair house fuses, or...
... it is covered by a Whirlpool designated service company. Consumable parts are excluded from your major appliance, to correct the installation of the Use & Care Guide. WHIRLPOOL SHALL NOT BE LIABLE FOR INCIDENTAL OR CONSEQUENTIAL DAMAGES. If you ever need service, first see the "Troubleshooting" section of your major appliance. Major appliances with electrical or plumbing codes, or use your major appliance, to replace or repair house fuses, or...


