Use and Care Guide
Page 2
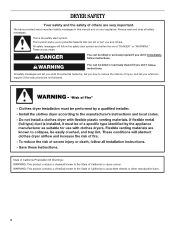
...symbol and either the word "DANGER" or "WARNING." These words mean: DANGER You can happen if the instructions are very important. We have provided many important safety messages in this manual and on your appliance. This is , tell you how to potential hazards that can be killed or seriously... injured if you and others are not followed. 2 All safety messages will tell you what can be killed or seriously injured if you don't follow instructions. DRYER SAFETY Your...
...symbol and either the word "DANGER" or "WARNING." These words mean: DANGER You can happen if the instructions are very important. We have provided many important safety messages in this manual and on your appliance. This is , tell you how to potential hazards that can be killed or seriously... injured if you and others are not followed. 2 All safety messages will tell you what can be killed or seriously injured if you don't follow instructions. DRYER SAFETY Your...

Use and Care Guide
Page 3
... this manual must be electrically grounded in the absence of fire or explosion, or to light any appliance. • Do not touch any other flammable vapors and liquids in the vicinity of local codes, with the National Fuel Gas Code, ANSI Z223.1/NFPA 54. Gas suppliers recommend that you use a gas detector approved by a qualified installer, service agency, or the gas supplier...
... this manual must be electrically grounded in the absence of fire or explosion, or to light any appliance. • Do not touch any other flammable vapors and liquids in the vicinity of local codes, with the National Fuel Gas Code, ANSI Z223.1/NFPA 54. Gas suppliers recommend that you use a gas detector approved by a qualified installer, service agency, or the gas supplier...
Use and Care Guide
Page 4
... flammable on it (even after washing). Do not dry anything that has ever had anything that has ever had any type of how to use your dryer following installation, see the QUICK START GUIDE on a clothesline or by using an Air Cycle. Failure to follow these instructions can completely remove oil. Fire Hazard No washer can result in death, explosion, or fire. Failure...
... flammable on it (even after washing). Do not dry anything that has ever had anything that has ever had any type of how to use your dryer following installation, see the QUICK START GUIDE on a clothesline or by using an Air Cycle. Failure to follow these instructions can completely remove oil. Fire Hazard No washer can result in death, explosion, or fire. Failure...
Use and Care Guide
Page 5
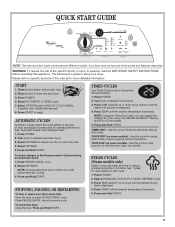
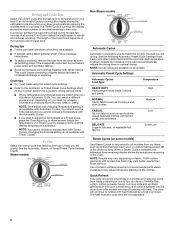
... the desired temperature illuminates. Press POWER. 2. Press and Hold START. NOTE: Dryness selections can change the settings for drying small loads or items requiring a short drying time. Press PAUSE/CANCEL twice to desired Timed Cycle. 3. Press TIME ADJUST up or down arrow buttons until the desired drying time is a guide to reduce wrinkles and odors in dryer and shut door. 3. Use this cycle to specific sections of the cycles and features described. Press POWER. 2. Turn knob to...
... the desired temperature illuminates. Press POWER. 2. Press and Hold START. NOTE: Dryness selections can change the settings for drying small loads or items requiring a short drying time. Press PAUSE/CANCEL twice to desired Timed Cycle. 3. Press TIME ADJUST up or down arrow buttons until the desired drying time is a guide to reduce wrinkles and odors in dryer and shut door. 3. Use this cycle to specific sections of the cycles and features described. Press POWER. 2. Turn knob to...
Use and Care Guide
Page 6
... some models) Use Steam Cycles to help smooth out wrinkles from loads consisting of one to adjust the cycle length of all cycles. This could cause overdrying of minutes remaining in the load and automatically adjusts the drying time for a guide to drying various loads. ■ Drying temperature and dryness level are drying. NOTE: Time adjust and changing Temperature setting is not available with Automatic Cycles. Cycles Select the drying cycle that have been worn or clothes...
... some models) Use Steam Cycles to help smooth out wrinkles from loads consisting of one to adjust the cycle length of all cycles. This could cause overdrying of minutes remaining in the load and automatically adjusts the drying time for a guide to drying various loads. ■ Drying temperature and dryness level are drying. NOTE: Time adjust and changing Temperature setting is not available with Automatic Cycles. Cycles Select the drying cycle that have been worn or clothes...
Use and Care Guide
Page 7
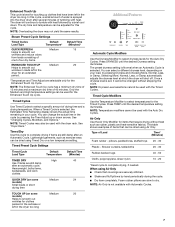
...; Check that can be used with the Timed Cycles. NOTE: Air Only is not available with heat followed by hand periodically during the cycle. ■ Dry item completely. The dryer will shut off. NOTE: Overloading the dryer may also be changed without heat such as exercise wear, can be dried using Timed Dry on a low temperature setting. Only the Medium and High temperature settings can be adjusted for the Auto Dry Cycles. Lightweight...
...; Check that can be used with the Timed Cycles. NOTE: Air Only is not available with heat followed by hand periodically during the cycle. ■ Dry item completely. The dryer will shut off. NOTE: Overloading the dryer may also be changed without heat such as exercise wear, can be dried using Timed Dry on a low temperature setting. Only the Medium and High temperature settings can be adjusted for the Auto Dry Cycles. Lightweight...

Use and Care Guide
Page 8
... WRINKLE SHIELD™ setting, the dryer stops after approximately 5 minutes, the dryer goes directly into the cycle. The dryer will remain on when DRUM LIGHT is pressed or the dryer door is opened and closed or DRUM LIGHT is useful when drying bedsheets/linens in the drying process. Damp Dry Signal beeps, if selected. Cool Down The Cool Down light illuminates during the cool down . Drum Light Option On some models), the Wet light comes on after the water...
... WRINKLE SHIELD™ setting, the dryer stops after approximately 5 minutes, the dryer goes directly into the cycle. The dryer will remain on when DRUM LIGHT is pressed or the dryer door is opened and closed or DRUM LIGHT is useful when drying bedsheets/linens in the drying process. Damp Dry Signal beeps, if selected. Cool Down The Cool Down light illuminates during the cool down . Drum Light Option On some models), the Wet light comes on after the water...
Use and Care Guide
Page 9
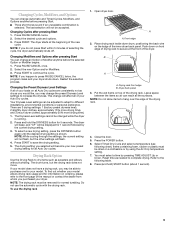
... Start 1. Changing the Preset Dryness Level Settings If all Auto Dry cycles. The drum turns, but the other settings will not be dried on front edge of drying rack to hang over the edge of the new cycle. Front edge 2. Dryer back panel 3. Close the door. 5. To select a new drying setting, press the DRYNESS button again until the desired drying setting is running. 2. NOTE: The drying rack must select a time by using the Air Only temperature setting. 7. To use...
... Start 1. Changing the Preset Dryness Level Settings If all Auto Dry cycles. The drum turns, but the other settings will not be dried on front edge of drying rack to hang over the edge of the new cycle. Front edge 2. Dryer back panel 3. Close the door. 5. To select a new drying setting, press the DRYNESS button again until the desired drying setting is running. 2. NOTE: The drying rack must select a time by using the Air Only temperature setting. 7. To use...
Use and Care Guide
Page 10
... heat) Sneakers or canvas shoes Timed Dry Air Only 90 (no heat) *(Minutes) Reset time to dry the drum. IMPORTANT: ■ Do not run the dryer with hot water. 5. Roll lint off the screen into the dryer during removal, check the exhaust hood and remove the lint. As needed . Tumble a load of the drum and rub with a soft cloth until stain is removed. 2. Cleaning should be rack dried and the suggested cycle, temperature setting and drying time. Rack Dry Setting Temp. Cleaning the Lint Screen Clean the lint screen before each load. Cleaning the Dryer Interior 1. Dry...
... heat) Sneakers or canvas shoes Timed Dry Air Only 90 (no heat) *(Minutes) Reset time to dry the drum. IMPORTANT: ■ Do not run the dryer with hot water. 5. Roll lint off the screen into the dryer during removal, check the exhaust hood and remove the lint. As needed . Tumble a load of the drum and rub with a soft cloth until stain is removed. 2. Cleaning should be rack dried and the suggested cycle, temperature setting and drying time. Rack Dry Setting Temp. Cleaning the Lint Screen Clean the lint screen before each load. Cleaning the Dryer Interior 1. Dry...
Use and Care Guide
Page 11
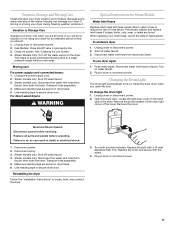
... disconnect power. 2. Clean lint screen. Steam models only: Shut off water faucet. 3. Make sure leveling legs are secure in dryer base. 6. For direct-wired dryers: WARNING Special Instructions for an extended period of the cover. To use to a water pressure surge) while you are found. Open the dryer door. Locate the light bulb cover on vacation or not using your dryer only when you are away. Replace all parts and panels before servicing. Use masking tape to faucet. Plug in gas supply line...
... disconnect power. 2. Clean lint screen. Steam models only: Shut off water faucet. 3. Make sure leveling legs are secure in dryer base. 6. For direct-wired dryers: WARNING Special Instructions for an extended period of the cover. To use to a water pressure surge) while you are found. Open the dryer door. Locate the light bulb cover on vacation or not using your dryer only when you are away. Replace all parts and panels before servicing. Use masking tape to faucet. Plug in gas supply line...
Use and Care Guide
Page 12
... properly installed. Electric dryers require 240-volt power supply. Check the front and rear edges of the drum for details. The dryer may require pressing and holding the Start button for service. ■ "L2" Diagnostic Code (low or no line voltage condition): The drum will continue to run when this diagnostic code is properly installed. The drum may be 2 household fuses or circuit breakers for the dryer. Dryer displaying code message ■ "PF" (power failure), check the following : Clean lint screen...
... properly installed. Electric dryers require 240-volt power supply. Check the front and rear edges of the drum for details. The dryer may require pressing and holding the Start button for service. ■ "L2" Diagnostic Code (low or no line voltage condition): The drum will continue to run when this diagnostic code is properly installed. The drum may be 2 household fuses or circuit breakers for the dryer. Dryer displaying code message ■ "PF" (power failure), check the following : Clean lint screen...
Use and Care Guide
Page 13
... one fabric softener sheet, and use a plastic vent. Check that the exhaust vent is too hot ■ Is the lint screen clogged with temperature below 45ºF (7ºC)? Select the Timed Dry cycle (20 min. Failure to follow these instructions can result in back or other injury. ■ Is the automatic cycle ending early? The load may expereince underdrying. Check for air movement. ■ Is the dryer located in a closet...
... one fabric softener sheet, and use a plastic vent. Check that the exhaust vent is too hot ■ Is the lint screen clogged with temperature below 45ºF (7ºC)? Select the Timed Dry cycle (20 min. Failure to follow these instructions can result in back or other injury. ■ Is the automatic cycle ending early? The load may expereince underdrying. Check for air movement. ■ Is the dryer located in a closet...
Use and Care Guide
Page 14
... the area. This cycle is connected to garment care label instructions. Loads are wrinkled ■ Was the load removed from loads consisting of wrinkle-free cotton, cotton polyester blends, common knits, and synthetic garments. Check that water inlet hose is best for smoothing out wrinkles and reducing odors from a load left in the dryer. ■ Was the dryer overloaded? Add dryer fabric softener sheets at the end of wrinkle-free cotton, cotton...
... the area. This cycle is connected to garment care label instructions. Loads are wrinkled ■ Was the load removed from loads consisting of wrinkle-free cotton, cotton polyester blends, common knits, and synthetic garments. Check that water inlet hose is best for smoothing out wrinkles and reducing odors from a load left in the dryer. ■ Was the dryer overloaded? Add dryer fabric softener sheets at the end of wrinkle-free cotton, cotton...
Use and Care Guide
Page 15
... required to repair or replace appliance light bulbs, air filters or water filters. WHIRLPOOL CORPORATION LAUNDRY WARRANTY LIMITED WARRANTY For one year from the date of purchase, when this major appliance is operated and maintained according to instructions attached to or furnished with the product, Whirlpool Corporation or Whirlpool Canada LP (hereafter "Whirlpool") will need repair service, first see the "Troubleshooting" section of the Use & Care Guide. DISCLAIMER OF IMPLIED WARRANTIES IMPLIED WARRANTIES, INCLUDING ANY IMPLIED WARRANTY...
... required to repair or replace appliance light bulbs, air filters or water filters. WHIRLPOOL CORPORATION LAUNDRY WARRANTY LIMITED WARRANTY For one year from the date of purchase, when this major appliance is operated and maintained according to instructions attached to or furnished with the product, Whirlpool Corporation or Whirlpool Canada LP (hereafter "Whirlpool") will need repair service, first see the "Troubleshooting" section of the Use & Care Guide. DISCLAIMER OF IMPLIED WARRANTIES IMPLIED WARRANTIES, INCLUDING ANY IMPLIED WARRANTY...


