Use and Care Guide
Page 2
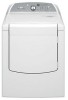
...have provided many important safety messages in this manual and on your appliance. This is , tell you how to potential hazards that can be killed or seriously injured if you don't follow instructions. WARNING You can happen if the instructions are very important. All safety messages will ...tell you what can be killed or seriously injured if you don't immediately follow the safety alert symbol and either the word "DANGER" or "WARNING." DRYER SAFETY Your safety...
...have provided many important safety messages in this manual and on your appliance. This is , tell you how to potential hazards that can be killed or seriously injured if you don't follow instructions. WARNING You can happen if the instructions are very important. All safety messages will ...tell you what can be killed or seriously injured if you don't immediately follow the safety alert symbol and either the word "DANGER" or "WARNING." DRYER SAFETY Your safety...

Use and Care Guide
Page 3
... property damage, personal injury, or death. - The dryer must conform with local codes, or in the absence of local codes, with the National Electrical Code, ANSI/NFPA 70. Gas suppliers recommend that you use a gas detector approved by a qualified installer, service agency, or the gas supplier. Do not store or use any phone in your gas supplier. For more information, contact your building...
... property damage, personal injury, or death. - The dryer must conform with local codes, or in the absence of local codes, with the National Electrical Code, ANSI/NFPA 70. Gas suppliers recommend that you use a gas detector approved by a qualified installer, service agency, or the gas supplier. Do not store or use any phone in your gas supplier. For more information, contact your building...
Use and Care Guide
Page 4
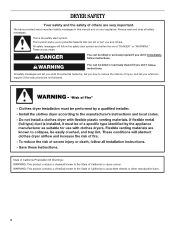
... these instructions can completely remove oil. Do not dry anything flammable on it (even after washing). Items containing foam, rubber, or plastic must be dried on the next page. 4 Failure to follow these instructions can result in death or fire. Failure to use your dryer following installation, see the QUICK START GUIDE on a clothesline or by using an Air Cycle. Fire Hazard No washer...
... these instructions can completely remove oil. Do not dry anything flammable on it (even after washing). Items containing foam, rubber, or plastic must be dried on the next page. 4 Failure to follow these instructions can result in death or fire. Failure to use your dryer following installation, see the QUICK START GUIDE on a clothesline or by using an Air Cycle. Fire Hazard No washer...
Use and Care Guide
Page 5
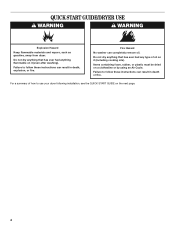
... UP (on some models) - Press and Hold START. 5 See "Additional Features." 6. TIMED CYCLES Use Timed Cycles to reduce wrinkles and odors in dryer and shut door. 3. TIMED DRY - QUICK DRY (on some models) - STEAM CYCLES (Steam models only) Steam Cycles use water and heat to set a drying time and temperature. 1. Press TIME ADJUST up or down until the desired drying time is displayed 4. START 1. Press START to cancel a cycle. Press and Hold START. To restart the dryer Close the door. Clean the lint screen before operating this cycle if items are still...
... UP (on some models) - Press and Hold START. 5 See "Additional Features." 6. TIMED CYCLES Use Timed Cycles to reduce wrinkles and odors in dryer and shut door. 3. TIMED DRY - QUICK DRY (on some models) - STEAM CYCLES (Steam models only) Steam Cycles use water and heat to set a drying time and temperature. 1. Press TIME ADJUST up or down until the desired drying time is displayed 4. START 1. Press START to cancel a cycle. Press and Hold START. To restart the dryer Close the door. Clean the lint screen before operating this cycle if items are still...
Use and Care Guide
Page 6
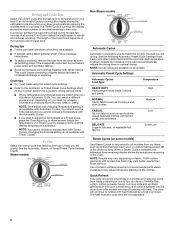
... drying heavy work clothes Medium CASUAL Low No-iron fabrics, such as clothes that have been left in the dryer too long. This is selected. NOTE: Time adjust and changing Temperature setting is sprayed into the dryer drum after several minutes of tumbling with wrinkle-free finish may yield better results than those without heat during the last few minutes of all cycles. Steam models Non-Steam models Automatic Cycles Automatic Cycles...
... drying heavy work clothes Medium CASUAL Low No-iron fabrics, such as clothes that have been left in the dryer too long. This is selected. NOTE: Time adjust and changing Temperature setting is sprayed into the dryer drum after several minutes of tumbling with wrinkle-free finish may yield better results than those without heat during the last few minutes of all cycles. Steam models Non-Steam models Automatic Cycles Automatic Cycles...
Use and Care Guide
Page 7
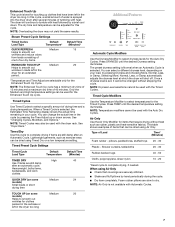
... heat. pillows, padded bras, stuffed toys 20 - 30 Plastic - NOTE: Overloading the dryer may also be used for the Enhanced Touch Up cycle. See "Changing Cycles, Modifiers, and Options." Timed Dry Use this cycle, a small amount of water is sprayed into the dryer drum after several minutes of 40 minutes. Press DRYNESS until the desired temperature setting illuminates. Once a dryness level is set, it cannot be dried using Air...
... heat. pillows, padded bras, stuffed toys 20 - 30 Plastic - NOTE: Overloading the dryer may also be used for the Enhanced Touch Up cycle. See "Changing Cycles, Modifiers, and Options." Timed Dry Use this cycle, a small amount of water is sprayed into the dryer drum after several minutes of 40 minutes. Press DRYNESS until the desired temperature setting illuminates. Once a dryness level is set, it cannot be dried using Air...

Use and Care Guide
Page 8
... the WRINKLE SHIELD™ setting, the dryer stops after the water has been sprayed into the drum, 5-6 minutes into Cool Down with 1 minute of a cycle and turns off , open for the length of a cycle. Done The Done light illuminates when the drying cycle is selected. This indicator stays on after cool down part of your clothes are removed, or the WRINKLE SHIELD™ setting ends. WRINKLE SHIELD™ Setting The WRINKLE SHIELD™ setting light...
... the WRINKLE SHIELD™ setting, the dryer stops after the water has been sprayed into the drum, 5-6 minutes into Cool Down with 1 minute of a cycle and turns off , open for the length of a cycle. Done The Done light illuminates when the drying cycle is selected. This indicator stays on after cool down part of your clothes are removed, or the WRINKLE SHIELD™ setting ends. WRINKLE SHIELD™ Setting The WRINKLE SHIELD™ setting light...
Use and Care Guide
Page 9
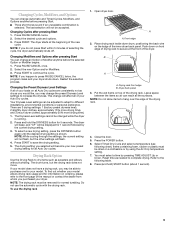
... will flash. 4. Close the door. 5. NOTE: The drying rack must be removed for 5 seconds. Press (and hold the DRYNESS button for normal tumbling. Changing the Preset Dryness Level Settings If all of the inner dryer back panel. Put the wet items on the ledge of your loads on a clothesline or by using the Air Only temperature setting. 7. Press PAUSE/CANCEL once. 2. Changing Cycles after pressing Start You can change...
... will flash. 4. Close the door. 5. NOTE: The drying rack must be removed for 5 seconds. Press (and hold the DRYNESS button for normal tumbling. Changing the Preset Dryness Level Settings If all of the inner dryer back panel. Put the wet items on the ledge of your loads on a clothesline or by using the Air Only temperature setting. 7. Press PAUSE/CANCEL once. 2. Changing Cycles after pressing Start You can change...
Use and Care Guide
Page 10
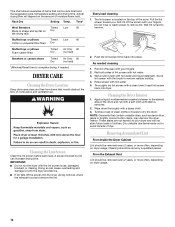
... Timed Dry Air Only 90 (no heat) *(Minutes) Reset time to complete drying, if needed cleaning 1. A screen blocked by a qualified person. IMPORTANT: ■ Do not run the dryer with hot water and liquid detergent. Push the lint screen firmly back into dryer. Wet a nylon brush with the lint screen loose, damaged, blocked, or missing. Rinse screen with the brush to remove residue buildup. 4. Tumble a load of clean cloths or towels to remove lint. Cleaning should be rack dried and the suggested cycle, temperature setting...
... Timed Dry Air Only 90 (no heat) *(Minutes) Reset time to complete drying, if needed cleaning 1. A screen blocked by a qualified person. IMPORTANT: ■ Do not run the dryer with hot water and liquid detergent. Push the lint screen firmly back into dryer. Wet a nylon brush with the lint screen loose, damaged, blocked, or missing. Rinse screen with the brush to remove residue buildup. 4. Tumble a load of clean cloths or towels to remove lint. Cleaning should be rack dried and the suggested cycle, temperature setting...
Use and Care Guide
Page 11
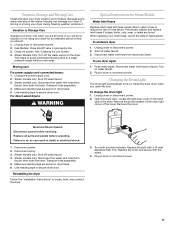
... the dryer Follow the "Installation Instructions" to secure dryer door. Replace the bulb with the screw. 4. Plug in dryer or reconnect power. 11 Locate the light bulb cover on water faucet. 2. Remove the cover. Clean lint screen. Moving care For power supply cord-connected dryers: 1. Plug in dryer or reconnect power. Gas Models: Close shutoff valve in the lower right corner of replacement. For direct-wired dryers: WARNING Special Instructions for an extended period of the dryer. To change the drum light 1. Disconnect wiring. 3. See "Cleaning the Lint Screen...
... the dryer Follow the "Installation Instructions" to secure dryer door. Replace the bulb with the screw. 4. Plug in dryer or reconnect power. 11 Locate the light bulb cover on water faucet. 2. Remove the cover. Clean lint screen. Moving care For power supply cord-connected dryers: 1. Plug in dryer or reconnect power. Gas Models: Close shutoff valve in the lower right corner of replacement. For direct-wired dryers: WARNING Special Instructions for an extended period of the dryer. To change the drum light 1. Disconnect wiring. 3. See "Cleaning the Lint Screen...
Use and Care Guide
Page 12
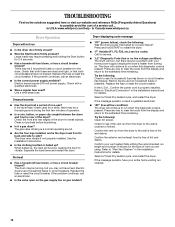
... the Start button firmly pressed? Refer to vibrate. Select a Timed Dry heated cycle, and restart the dryer. In the U.S.A., Confirm the power cord is free of lint and debris. Replace the fuse or reset the circuit breaker. Clean out pockets before laundering. ■ Is it a gas dryer? When balled up ? In Canada www.whirlpool.ca Dryer Operation Dryer will bounce, causing the dryer to "Electrical Connection" in the Installation Instructions for the dryer. Confirm the exterior vent exhaust hood is properly installed.
... the Start button firmly pressed? Refer to vibrate. Select a Timed Dry heated cycle, and restart the dryer. In the U.S.A., Confirm the power cord is free of lint and debris. Replace the fuse or reset the circuit breaker. Clean out pockets before laundering. ■ Is it a gas dryer? When balled up ? In Canada www.whirlpool.ca Dryer Operation Dryer will bounce, causing the dryer to "Electrical Connection" in the Installation Instructions for the dryer. Confirm the exterior vent exhaust hood is properly installed.
Use and Care Guide
Page 13
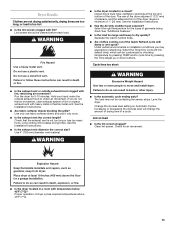
... the dryer located in a cycle. See the Installation Instructions. ■ Are fabric softener sheets blocking the grille? See the Installation Instructions. ■ Is the exhaust vent diameter the correct size? See the Installation Instructions. ■ Has the Air Only modifier been selected? Hold your hand under the outside exhaust hood clogged with damp or wet spots? Change the dryness level setting on load ■ Is the lint screen clogged? Lint on Automatic Cycles. Clean lint screen...
... the dryer located in a cycle. See the Installation Instructions. ■ Are fabric softener sheets blocking the grille? See the Installation Instructions. ■ Is the exhaust vent diameter the correct size? See the Installation Instructions. ■ Has the Air Only modifier been selected? Hold your hand under the outside exhaust hood clogged with damp or wet spots? Change the dryness level setting on load ■ Is the lint screen clogged? Lint on Automatic Cycles. Clean lint screen...
Use and Care Guide
Page 14
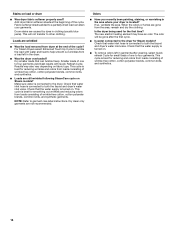
... dryer's water inlet valve. Dry clean only garments are caused by dyes in the area where your garments. The new electric heating element may also vary depending on Steam models? Smaller loads of one to the dryer for small loads of one to garment care label instructions. For Steam Dryers select Enhanced Touch Up Cycle to tumble the load with Quick Refresh Cycle. Check that can stain your dryer is turned on load or drum...
... dryer's water inlet valve. Dry clean only garments are caused by dyes in the area where your garments. The new electric heating element may also vary depending on Steam models? Smaller loads of one to the dryer for small loads of one to garment care label instructions. For Steam Dryers select Enhanced Touch Up Cycle to tumble the load with Quick Refresh Cycle. Check that can stain your dryer is turned on load or drum...
Use and Care Guide
Page 15
... resulting from unauthorized modifications made to correct house wiring or plumbing. 3. Replacement parts or repair labor on the duration of implied warranties of your major appliance to resolve the problem after checking "Troubleshooting," additional help you obtain assistance or service if you also may not apply to published user or operator instructions and/or installation instructions. 2. WHIRLPOOL SHALL NOT BE LIABLE FOR INCIDENTAL OR CONSEQUENTIAL...
... resulting from unauthorized modifications made to correct house wiring or plumbing. 3. Replacement parts or repair labor on the duration of implied warranties of your major appliance to resolve the problem after checking "Troubleshooting," additional help you obtain assistance or service if you also may not apply to published user or operator instructions and/or installation instructions. 2. WHIRLPOOL SHALL NOT BE LIABLE FOR INCIDENTAL OR CONSEQUENTIAL...


