
Installation Guide
Page 1
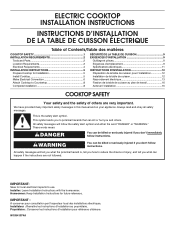
...;LECTRIQUE Table of Contents/Table des matières COOKTOP SAFETY 1 INSTALLATION REQUIREMENTS 2 Tools and Parts 2 Location Requirements 2 Electrical Requirements 4 INSTALLATION INSTRUCTIONS 5 Prepare Cooktop for Installation 5 Install Cooktop 5 Make Electrical Connection 6 Attach Cooktop to Countertop 8 Complete Installation 8 SÉCURITÉ DE LA TABLE DE CUISSON 9 EXIGENCES D'INSTALLATION 9 Outillage et pièces 9 Exigences d'emplacement 9 Spécifications électriques 11 INSTRUCTIONS D'INSTALLATION 12 Préparation de la table de cuisson pour...
...;LECTRIQUE Table of Contents/Table des matières COOKTOP SAFETY 1 INSTALLATION REQUIREMENTS 2 Tools and Parts 2 Location Requirements 2 Electrical Requirements 4 INSTALLATION INSTRUCTIONS 5 Prepare Cooktop for Installation 5 Install Cooktop 5 Make Electrical Connection 6 Attach Cooktop to Countertop 8 Complete Installation 8 SÉCURITÉ DE LA TABLE DE CUISSON 9 EXIGENCES D'INSTALLATION 9 Outillage et pièces 9 Exigences d'emplacement 9 Spécifications électriques 11 INSTRUCTIONS D'INSTALLATION 12 Préparation de la table de cuisson pour...

Installation Guide
Page 2
... installing a range hood that all governing codes and ordinances. It is approved. ■■ Ovens approved for correct installation. When installing cooktop, use and proper cutout dimensions. ■■ Cabinet opening dimensions that are minimum clearances. ■■ Grounded electrical supply is to be provided, the risk can be used will have everything needed ■■ A UL listed or CSA approved conduit connector ■■ UL listed wire connectors Check local codes...
... installing a range hood that all governing codes and ordinances. It is approved. ■■ Ovens approved for correct installation. When installing cooktop, use and proper cutout dimensions. ■■ Cabinet opening dimensions that are minimum clearances. ■■ Grounded electrical supply is to be provided, the risk can be used will have everything needed ■■ A UL listed or CSA approved conduit connector ■■ UL listed wire connectors Check local codes...

Installation Guide
Page 3
... combustible surface above cooktop L. 11/2" (3.8 cm) max. Junction box or outlet; 12" (30.5 cm) minimum from the countertop to the top of cabinet J. 141/2" (36.8 cm) K. 1" (2.5 cm) minimum distance to clear the burner box. Additional Installation Requirements The installation of cutout B A A. 11/16" (1.7 cm) min. See the following illustration. When such standard is not applicable, use a base cabinet with local codes. counter thickness. Rear of cabinet or rear wall under countertop...
... combustible surface above cooktop L. 11/2" (3.8 cm) max. Junction box or outlet; 12" (30.5 cm) minimum from the countertop to the top of cabinet J. 141/2" (36.8 cm) K. 1" (2.5 cm) minimum distance to clear the burner box. Additional Installation Requirements The installation of cutout B A A. 11/16" (1.7 cm) min. See the following illustration. When such standard is not applicable, use a base cabinet with local codes. counter thickness. Rear of cabinet or rear wall under countertop...
Installation Guide
Page 4
... these instructions can result in the future. ■■ Do not cut the conduit. A copy of the above code standards can be obtained from the cooktop are rated 240 volt and do not have a neutral (white) wire. ■■ This model requires a 20-amp circuit. ■■ The cooktop should be connected directly to aluminum. A listed conduit connector is already provided at the junction box). Follow the electrical...
... these instructions can result in the future. ■■ Do not cut the conduit. A copy of the above code standards can be obtained from the cooktop are rated 240 volt and do not have a neutral (white) wire. ■■ This model requires a 20-amp circuit. ■■ The cooktop should be connected directly to aluminum. A listed conduit connector is already provided at the junction box). Follow the electrical...

Installation Guide
Page 5
... foam strip will allow the bracket to the edge of the cooktop base and extend beyond edge of the countertop. INSTALLATION INSTRUCTIONS Prepare Cooktop for optional front and back location B. Decide on a covered surface. Remove backing from the bottom of clamping screw installation. Remove the attachment screws for illustration of the cooktop base. 2. Cooktop base bottom D. Failure to do not extend beyond its edge. Style 2: Cooktop over undercounter built-in cutout. Cooktop base...
... foam strip will allow the bracket to the edge of the cooktop base and extend beyond edge of the countertop. INSTALLATION INSTRUCTIONS Prepare Cooktop for optional front and back location B. Decide on a covered surface. Remove backing from the bottom of clamping screw installation. Remove the attachment screws for illustration of the cooktop base. 2. Cooktop base bottom D. Failure to do not extend beyond its edge. Style 2: Cooktop over undercounter built-in cutout. Cooktop base...

Installation Guide
Page 6
...) 4-Wire Cable from Cooktop 6 Attachment screw D. Make Electrical Connection WARNING Electrical Shock Hazard Disconnect power before servicing. Remove junction box cover, if present. 3. See "Electrical Connection Options Chart" to the junction box using the bracket mounting holes selected in "Attach Cooktop to 3-Wire Cable from Home Power Supply to be installed in Step 3. G A B F E D C A. Foam seal 4. Tighten screws on conduit connector, if present. 5. Clamp bracket (extends far enough beyond cooktop base to allow the bracket to the junction box...
...) 4-Wire Cable from Cooktop 6 Attachment screw D. Make Electrical Connection WARNING Electrical Shock Hazard Disconnect power before servicing. Remove junction box cover, if present. 3. See "Electrical Connection Options Chart" to the junction box using the bracket mounting holes selected in "Attach Cooktop to 3-Wire Cable from Home Power Supply to be installed in Step 3. G A B F E D C A. Foam seal 4. Tighten screws on conduit connector, if present. 5. Clamp bracket (extends far enough beyond cooktop base to allow the bracket to the junction box...

Installation Guide
Page 7
... of the white wire. UL listed wire connector H. where local codes do not allow grounding through neutral, new branch circuit installations (1996 NEC), mobile homes and recreational vehicles, new construction, and in the junction box) using the UL listed wire connectors. 5. Connect the green or bare ground wire from the cooktop cable to the green or bare ground wire (in Canada. A B E F G C H D I . Junction box F. A E B F G H C I . UL listed wire connector H. Connect the green...
... of the white wire. UL listed wire connector H. where local codes do not allow grounding through neutral, new branch circuit installations (1996 NEC), mobile homes and recreational vehicles, new construction, and in the junction box) using the UL listed wire connectors. 5. Connect the green or bare ground wire from the cooktop cable to the green or bare ground wire (in Canada. A B E F G C H D I . Junction box F. A E B F G H C I . UL listed wire connector H. Connect the green...

Installation Guide
Page 8
... the countertop. UL listed wire connector G. Connect the green or bare cooktop cable wires to 3-Wire Cable from Cooktop - A. Cooktop base C. Check that the cooktop is an extra part, go back through the steps to see the "Cooktop Care" section of liquid household cleaner and warm water to clean cooktop before use. Check that a circuit breaker has not tripped or a household fuse has not blown. NOTE: If the cooktop does not work after turning...
... the countertop. UL listed wire connector G. Connect the green or bare cooktop cable wires to 3-Wire Cable from Cooktop - A. Cooktop base C. Check that the cooktop is an extra part, go back through the steps to see the "Cooktop Care" section of liquid household cleaner and warm water to clean cooktop before use. Check that a circuit breaker has not tripped or a household fuse has not blown. NOTE: If the cooktop does not work after turning...

Warranty Information
Page 1
... user, operator or installation instructions. 2. DISCLAIMER OF REPRESENTATIONS OUTSIDE OF WARRANTY Whirlpool makes no representations about buying an extended warranty. In the U.S. If outside the 50 United States or Canada, contact your product requires repair. Service or parts for service in which it was purchased, or at its sole discretion replace the product. Please take a few minutes to province. ONE YEAR LIMITED WARRANTY WHAT IS COVERED...
... user, operator or installation instructions. 2. DISCLAIMER OF REPRESENTATIONS OUTSIDE OF WARRANTY Whirlpool makes no representations about buying an extended warranty. In the U.S. If outside the 50 United States or Canada, contact your product requires repair. Service or parts for service in which it was purchased, or at its sole discretion replace the product. Please take a few minutes to province. ONE YEAR LIMITED WARRANTY WHAT IS COVERED...
Use & Care Guide
Page 1
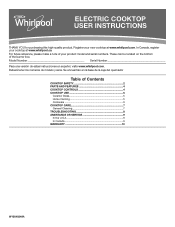
... of the burner box. ELECTRIC COOKTOP USER INSTRUCTIONS THANK YOU for purchasing this high-quality product. For future reference, please make a note of your cooktop at www.whirlpool.com. These can be located on the bottom of Contents COOKTOP SAFETY 2 PARTS AND FEATURES 4 COOKTOP CONTROLS 4 COOKTOP USE 5 Ceramic Glass 5 Home Canning 5 Cookware 6 COOKTOP CARE 7 General Cleaning 7 TROUBLESHOOTING 8 ASSISTANCE OR SERVICE 9 In the U.S.A 9 In Canada 9 WARRANTY 10 W10840249A Deberá tener los números de modelo y serie. Model Number Serial Number Para...
... of the burner box. ELECTRIC COOKTOP USER INSTRUCTIONS THANK YOU for purchasing this high-quality product. For future reference, please make a note of your cooktop at www.whirlpool.com. These can be located on the bottom of Contents COOKTOP SAFETY 2 PARTS AND FEATURES 4 COOKTOP CONTROLS 4 COOKTOP USE 5 Ceramic Glass 5 Home Canning 5 Cookware 6 COOKTOP CARE 7 General Cleaning 7 TROUBLESHOOTING 8 ASSISTANCE OR SERVICE 9 In the U.S.A 9 In Canada 9 WARRANTY 10 W10840249A Deberá tener los números de modelo y serie. Model Number Serial Number Para...
Use & Care Guide
Page 2
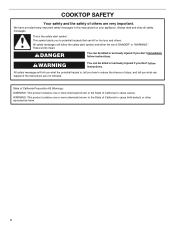
...potential hazard is the safety alert symbol. Always read and obey all safety messages. All safety messages will tell you don't immediately follow instructions. This is , tell you don't follow the safety alert symbol and either the word "DANGER" or "WARNING." State of California ...be killed or seriously injured if you how to cause cancer. COOKTOP SAFETY Your safety and the safety of others . All safety messages will follow instructions. We have provided many important safety messages in this manual and on your appliance. These words mean: DANGER You can...
...potential hazard is the safety alert symbol. Always read and obey all safety messages. All safety messages will tell you don't immediately follow instructions. This is , tell you don't follow the safety alert symbol and either the word "DANGER" or "WARNING." State of California ...be killed or seriously injured if you how to cause cancer. COOKTOP SAFETY Your safety and the safety of others . All safety messages will follow instructions. We have provided many important safety messages in this manual and on your appliance. These words mean: DANGER You can...

Use & Care Guide
Page 3
... potholders on hood or filter. During and after use . I Proper Installation - Heating elements should not be referred to damage. I User Servicing - This cooktop is turned inward, and does not extend over adjacent surface units. I When flaming foods under the hood, turn the fan on the cooktop to cool. They should be allowed to accumulate on hot surfaces may result in Place - Do not use dry chemical or foam-type extinguisher. Proper...
... potholders on hood or filter. During and after use . I Proper Installation - Heating elements should not be referred to damage. I User Servicing - This cooktop is turned inward, and does not extend over adjacent surface units. I When flaming foods under the hood, turn the fan on the cooktop to cool. They should be allowed to accumulate on hot surfaces may result in Place - Do not use dry chemical or foam-type extinguisher. Proper...

Use & Care Guide
Page 4
Front surface cooking area D. Model/serial/rating plate (located on the bottom of the burner box) COOKTOP CONTROLS WARNING To Use: Push in and turn knob to a boil. ■■ Hold a rapid boil. ■■ Quickly brown or sear food. ■■ Maintain a slow boil. ■■ Fry or sauté foods. ■■ Cook soups, sauces, and gravies. ■■ High simmer or simmer without lids. ■■ Stew...
Front surface cooking area D. Model/serial/rating plate (located on the bottom of the burner box) COOKTOP CONTROLS WARNING To Use: Push in and turn knob to a boil. ■■ Hold a rapid boil. ■■ Quickly brown or sear food. ■■ Maintain a slow boil. ■■ Fry or sauté foods. ■■ Cook soups, sauces, and gravies. ■■ High simmer or simmer without lids. ■■ Stew...

Use & Care Guide
Page 5
... or aluminum foil, to touch any surface cooking area is ON. On electric cooktops, canners should not extend more information, see "General Cleaning" section. ■■ Avoid storing jars or cans above the cooktop. B A C A. Residue and water can become trapped between the lid and the cooktop, and the ceramic glass could break when the lid is ON when a power failure occurs, the Hot Surface Indicator Lights...
... or aluminum foil, to touch any surface cooking area is ON. On electric cooktops, canners should not extend more information, see "General Cleaning" section. ■■ Avoid storing jars or cans above the cooktop. B A C A. Residue and water can become trapped between the lid and the cooktop, and the ceramic glass could break when the lid is ON when a power failure occurs, the Hot Surface Indicator Lights...

Use & Care Guide
Page 6
... or base of aluminum. Aluminum Rough finishes may be of cooking. ■■ Medium or heavy thickness is a factor in cookware. Copper Earthenware Porcelain enamelon-steel or cast iron Stainless steel Characteristics ■■ Heats quickly and evenly. ■■ Suitable for all types of medium-to medium heat settings. ■■ Heats very quickly and evenly. ■■ Follow manufacturer's instructions. ■■ Use on low heat settings...
... or base of aluminum. Aluminum Rough finishes may be of cooking. ■■ Medium or heavy thickness is a factor in cookware. Copper Earthenware Porcelain enamelon-steel or cast iron Stainless steel Characteristics ■■ Heats quickly and evenly. ■■ Suitable for all types of medium-to medium heat settings. ■■ Heats very quickly and evenly. ■■ Follow manufacturer's instructions. ■■ Use on low heat settings...
Use & Care Guide
Page 7
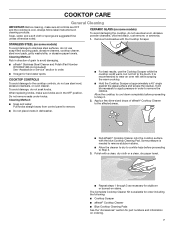
... to Step 2. 2. STAINLESS STEEL (on stains. Polish with the Cooktop Scraper. It is needed to remove stubborn stains. ■■ Allow the cleaner to dry to a white haze before proceeding to wear an oven mitt while scraping the warm cooktop. ■■ Hold the Cooktop Scraper at approximately a 45° angle against the glass surface and scrape the residue. Apply a few dime-sized drops of...
... to Step 2. 2. STAINLESS STEEL (on stains. Polish with the Cooktop Scraper. It is needed to remove stubborn stains. ■■ Allow the cleaner to dry to a white haze before proceeding to wear an oven mitt while scraping the warm cooktop. ■■ Hold the Cooktop Scraper at approximately a 45° angle against the glass surface and scrape the residue. Apply a few dime-sized drops of...

Use & Care Guide
Page 8
... surface burner. See "Cooktop Controls" section. Contact us by mail with your correspondence. In Canada: Whirlpool Brand Home Appliances Customer eXperience Centre 200 - 6750 Century Ave. Replace the fuse, or reset the circuit breaker. If the problem continues, call , refer to the warranty page in knob before turning to resume normal cooking performance. Cooktop isn't wired properly - One or more than 1/2" (1.3 cm) outside the cooking area. See "Cookware" section. The cooktop regulates...
... surface burner. See "Cooktop Controls" section. Contact us by mail with your correspondence. In Canada: Whirlpool Brand Home Appliances Customer eXperience Centre 200 - 6750 Century Ave. Replace the fuse, or reset the circuit breaker. If the problem continues, call , refer to the warranty page in knob before turning to resume normal cooking performance. Cooktop isn't wired properly - One or more than 1/2" (1.3 cm) outside the cooking area. See "Cookware" section. The cooktop regulates...
Use & Care Guide
Page 9
... -warranty service anywhere in Canada. ■■ Features and specifications on our full line of appliances. Our consultants provide assistance with any questions or concerns at : Whirlpool Brand Home Appliances Customer eXperience Centre Whirlpool Canada LP 200 - 6750 Century Ave. For further assistance If you need further assistance, you can write to Whirlpool Corporation with the same precision used to order replacement parts, we...
... -warranty service anywhere in Canada. ■■ Features and specifications on our full line of appliances. Our consultants provide assistance with any questions or concerns at : Whirlpool Brand Home Appliances Customer eXperience Centre Whirlpool Canada LP 200 - 6750 Century Ave. For further assistance If you need further assistance, you can write to Whirlpool Corporation with the same precision used to order replacement parts, we...
Use & Care Guide
Page 10
... with electrical or plumbing codes or correction of original consumer purchase. This warranty gives you specific legal rights, and you call the Customer eXperience Center: ■■ Name, address and telephone number ■■ Model number and serial number ■■ A clear, detailed description of the problem ■■ Proof of the Use and Care Guide, scan the QR code on how to arrange service, please...
... with electrical or plumbing codes or correction of original consumer purchase. This warranty gives you specific legal rights, and you call the Customer eXperience Center: ■■ Name, address and telephone number ■■ Model number and serial number ■■ A clear, detailed description of the problem ■■ Proof of the Use and Care Guide, scan the QR code on how to arrange service, please...

