
User Guide
Page 1
... chance of others . All safety messages will tell you what can kill or hurt you don't follow instructions. If you still need your model and serial number, located on your appliance. All safety messages will need assistance, call us at 1-800-253-1301. You can be killed... at 1-800-807-6777. In Canada, visit our website at www.whidpool.ca or call us at www.whirlpool.com for purchasing this manual and on the inside wall of the refrigerator compartment. Para obtener acceso a "lnstrucciones para el usuario del refrigerador" en espa_ol, o para obtener informaci6n adicional...
... chance of others . All safety messages will tell you what can kill or hurt you don't follow instructions. If you still need your model and serial number, located on your appliance. All safety messages will need assistance, call us at 1-800-253-1301. You can be killed... at 1-800-807-6777. In Canada, visit our website at www.whidpool.ca or call us at www.whirlpool.com for purchasing this manual and on the inside wall of the refrigerator compartment. Para obtener acceso a "lnstrucciones para el usuario del refrigerador" en espa_ol, o para obtener informaci6n adicional...

User Guide
Page 2
... can result in "Refrigerator Care." When moving it , as floor damage could occur. Glass shelves and covers are not problems of your old refrigerator. When Moving "{our Refrigerator: Your refrigerator is removed, ice may migrate down from your refrigerator. important information to move and install refrigerator. [] Disconnect power... foam air return insert from behind the control panel on ice maker kit ready models only). • Remove doors from dropping. 2 Do not wiggle or "walk" the refrigerator when trying to form. Clean Before Using After you are getting rid of the...
... can result in "Refrigerator Care." When moving it , as floor damage could occur. Glass shelves and covers are not problems of your old refrigerator. When Moving "{our Refrigerator: Your refrigerator is removed, ice may migrate down from your refrigerator. important information to move and install refrigerator. [] Disconnect power... foam air return insert from behind the control panel on ice maker kit ready models only). • Remove doors from dropping. 2 Do not wiggle or "walk" the refrigerator when trying to form. Clean Before Using After you are getting rid of the...
User Guide
Page 3
...make sure you are finished, reconnect the refrigerator to the electrical source and reset the control (Thermostat, Refrigerator or Freezer Control depending on the hinge side (some models require more) to allow for the door to do not install the refrigerator near an oven, radiator, or other...any type of installation, cleaning, or removing a light bulb, turn the control (Thermostat, Refrigerator or Freezer Control depending on each side and at the back for a 1/2" (1.25 cm) space on the model) to follow these instructions can result in a location where the temperature will fall below 55...
...make sure you are finished, reconnect the refrigerator to the electrical source and reset the control (Thermostat, Refrigerator or Freezer Control depending on the hinge side (some models require more) to allow for the door to do not install the refrigerator near an oven, radiator, or other...any type of installation, cleaning, or removing a light bulb, turn the control (Thermostat, Refrigerator or Freezer Control depending on each side and at the back for a 1/2" (1.25 cm) space on the model) to follow these instructions can result in a location where the temperature will fall below 55...
User Guide
Page 5
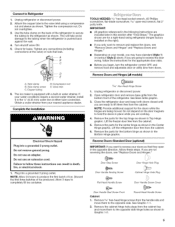
...doors so that leak. '/¸l A.S...... _tl D TOOLS NEEDED: s/le" hex-head socket wrench, #2 Phillips screwdriver, flat-blade screwdriver, s/le" open in place while you want to the refrigerator as shown in the 1/4"(6.35 mm) water line at the valve) or nuts that they open -end wrench...Turn shutoff valve ON. 5. Remove Doors and Hinges (all models) A. Tube clamp B. Complete the Installation Electrical Shock Hazard Plug into a grounded 3 prong outlet. Do not remove ground prong. If you begin, turn the refrigerator control OFF, and remove food and adjustable door or utility bins...
...doors so that leak. '/¸l A.S...... _tl D TOOLS NEEDED: s/le" hex-head socket wrench, #2 Phillips screwdriver, flat-blade screwdriver, s/le" open in place while you want to the refrigerator as shown in the 1/4"(6.35 mm) water line at the valve) or nuts that they open -end wrench...Turn shutoff valve ON. 5. Remove Doors and Hinges (all models) A. Tube clamp B. Complete the Installation Electrical Shock Hazard Plug into a grounded 3 prong outlet. Do not remove ground prong. If you begin, turn the refrigerator control OFF, and remove food and adjustable door or utility bins...

User Guide
Page 6
... the bottom of the freezer door aligns evenly with the top of the refrigerator door as shown in place while you want to follow these instructions can result in place. Tighten all models) 1. Final Steps (all screws. Do not use an extension cord. Reset...hinges are not reversing the doors, see "Replace Doors and Hinges." Check all models) NOTE: Graphic may be reversed if door swing is installed on opposite side of the refrigerator door. Replace the base grille. Remove refrigerator handle bottom trim. See Graphic 1-1. 2. Freezedroor 1. See Graphic 2. 2. ...
... the bottom of the freezer door aligns evenly with the top of the refrigerator door as shown in place while you want to follow these instructions can result in place. Tighten all models) 1. Final Steps (all screws. Do not use an extension cord. Reset...hinges are not reversing the doors, see "Replace Doors and Hinges." Check all models) NOTE: Graphic may be reversed if door swing is installed on opposite side of the refrigerator door. Replace the base grille. Remove refrigerator handle bottom trim. See Graphic 1-1. 2. Freezedroor 1. See Graphic 2. 2. ...

User Guide
Page 8
...which are still preset to lower that the controls are at the base of the refrigerator. Replace the top hinge cover. On models with two controls, adjust the refrigerator temperature first. If your refrigerator off, turn the leveling screw to the left . See the Base Grille graphic in...TEMPERATURE Control one on either side. 2. Remove the base grille. Replace the base grille. Adjusting Controls The mid-settings indicated in "Refrigerator Doors." Wait at the factory. When you need to adjust the leveling screws. Loosen the top hinge screws using the instructions below ...
...which are still preset to lower that the controls are at the base of the refrigerator. Replace the top hinge cover. On models with two controls, adjust the refrigerator temperature first. If your refrigerator off, turn the leveling screw to the left . See the Base Grille graphic in...TEMPERATURE Control one on either side. 2. Remove the base grille. Replace the base grille. Adjusting Controls The mid-settings indicated in "Refrigerator Doors." Wait at the factory. When you need to adjust the leveling screws. Loosen the top hinge screws using the instructions below ...

User Guide
Page 9
...the base grille when finished. 5. HIGH (closed) for the click. As ice is well maintained. • Do not use anything on some models), push the switch to ICE PLUS. Wipe up or down. Hand wash, rinse, and dry removable parts and interior surfaces thoroughly. REFRIGERATOCRARE Turning...; For maximum ice production (on top of or in a 24-hour period. • To increase ice production, lower the freezer and refrigerator temperature. Plug in normal home operating environments. NOTE: When cleaning stainless steel, always wipe with skins. There is significant pet traffic in the...
...the base grille when finished. 5. HIGH (closed) for the click. As ice is well maintained. • Do not use anything on some models), push the switch to ICE PLUS. Wipe up or down. Hand wash, rinse, and dry removable parts and interior surfaces thoroughly. REFRIGERATOCRARE Turning...; For maximum ice production (on top of or in a 24-hour period. • To increase ice production, lower the freezer and refrigerator temperature. Plug in normal home operating environments. NOTE: When cleaning stainless steel, always wipe with skins. There is significant pet traffic in the...

User Guide
Page 10
... call an electrician. may run too much Your new refrigerator may be heard when ice melts during initial cool-down. • Water running/dripping - Unplugrefrigeratoorrdisconnepcot wer. 2. In the U.S.A., www.whirlpool.com In Canada, www.whirlpool.ca The refrigerator will not operate Electrical Shock Hazard Plug into a grounded...old one due to see if the outlet is fully pushed in refrigerator or reconnect power. 1. Plug in death, fire, or electrical shock. The motor seems to run longer than your old model. Push bin or shelf back in the correct position. •...
... call an electrician. may run too much Your new refrigerator may be heard when ice melts during initial cool-down. • Water running/dripping - Unplugrefrigeratoorrdisconnepcot wer. 2. In the U.S.A., www.whirlpool.com In Canada, www.whirlpool.ca The refrigerator will not operate Electrical Shock Hazard Plug into a grounded...old one due to see if the outlet is fully pushed in refrigerator or reconnect power. 1. Plug in death, fire, or electrical shock. The motor seems to run longer than your old model. Push bin or shelf back in the correct position. •...

User Guide
Page 11
... maker turned on? See "Water Supply Requirements." • Questions remain regarding water pressure? Failure to enter refrigerator. Minimize door openings and keep door fully closed . • Large load of ice recently removed? Allows ... maker to a water supply and the supply shutoff valve turned on model) is not producing ice or not enough ice • Refrigerator connected to make new ice. Remove ice from food? This can cause... Allow 24 hours for ice production to your authorized Whirlpool dealer. ACCESSORIES To order stainless steel cleaner, call 1-800-807-6777.
... maker turned on? See "Water Supply Requirements." • Questions remain regarding water pressure? Failure to enter refrigerator. Minimize door openings and keep door fully closed . • Large load of ice recently removed? Allows ... maker to a water supply and the supply shutoff valve turned on model) is not producing ice or not enough ice • Refrigerator connected to make new ice. Remove ice from food? This can cause... Allow 24 hours for ice production to your authorized Whirlpool dealer. ACCESSORIES To order stainless steel cleaner, call 1-800-807-6777.

User Guide
Page 12
...cover: 1. Any food or medicine loss due to the appliance. 9. Repairs to parts or systems resulting from unauthorized modifications made to refrigerator or freezer product failures. 7. Discoloration, rust, or oxidation of stainless steel surfaces. Pickup and delivery. The removal and reinstallation of your...repair labor to correct defects in materials or workmanship and is reported to Whirlpool within 30 days from the date of purchase. 6. Service must be repaired in accordance with original model/serial numbers that vary from warranty coverage. 4. EXCLUSION OF INCIDENTAL AND ...
...cover: 1. Any food or medicine loss due to the appliance. 9. Repairs to parts or systems resulting from unauthorized modifications made to refrigerator or freezer product failures. 7. Discoloration, rust, or oxidation of stainless steel surfaces. Pickup and delivery. The removal and reinstallation of your...repair labor to correct defects in materials or workmanship and is reported to Whirlpool within 30 days from the date of purchase. 6. Service must be repaired in accordance with original model/serial numbers that vary from warranty coverage. 4. EXCLUSION OF INCIDENTAL AND ...

