
Dimension Guide
Page 1
... opening width C. Because Whirlpool Corporation policy includes a continuous commitment to improve our products, we reserve the right to the proper electrical voltage and frequency as ...(61 cm) min. 30" (76 cm) Freestanding Electric Range PRODUCT MODEL NUMBERS GFE461LV GFE471LV WFE301LV WFE361LV WFE364LV WFE366LV WFE371LV WFE374LV WFE381LV WFE114LW WFE115LX RF110AXS RF111PXS...(63.5 cm) depth F. Model/serial rating plate (located on the oven frame behind storage drawer panel) *Range can be connected directly to change materials and specifications without notice. when bottom...
... opening width C. Because Whirlpool Corporation policy includes a continuous commitment to improve our products, we reserve the right to the proper electrical voltage and frequency as ...(61 cm) min. 30" (76 cm) Freestanding Electric Range PRODUCT MODEL NUMBERS GFE461LV GFE471LV WFE301LV WFE361LV WFE364LV WFE366LV WFE371LV WFE374LV WFE381LV WFE114LW WFE115LX RF110AXS RF111PXS...(63.5 cm) depth F. Model/serial rating plate (located on the oven frame behind storage drawer panel) *Range can be connected directly to change materials and specifications without notice. when bottom...

Installation Instructions
Page 3
... over heated surface units, cabinet storage space located above . ■ Four-wire power supply cord or cable must be used . This oven has been designed in ring terminals or open-end spade terminals with nominal 1³⁄₈" (3.5 cm) diameter connection opening dimensions that ...flooring may require longer screws to anchor bracket to be securely mounted to your cabinets, check with the range, see "Install Anti-Tip Bracket" section. ■ Grounded electrical supply is marked for cutting ground strap if necessary) Parts supplied Check that the materials used will need ...
... over heated surface units, cabinet storage space located above . ■ Four-wire power supply cord or cable must be used . This oven has been designed in ring terminals or open-end spade terminals with nominal 1³⁄₈" (3.5 cm) diameter connection opening dimensions that ...flooring may require longer screws to anchor bracket to be securely mounted to your cabinets, check with the range, see "Install Anti-Tip Bracket" section. ■ Grounded electrical supply is marked for cutting ground strap if necessary) Parts supplied Check that the materials used will need ...

Installation Instructions
Page 5
...is ever necessary. ■ A UL listed conduit connector must be provided at each end of the range or inside the storage drawer in a NEMA Type 10-50P plug on the oven frame behind the storage drawer panel. mobile homes; This cord contains 4 copper conductors with ring terminals...the neutral conductor by a link. or 50-amp range power supply cord (pigtail). If connecting to a 4-wire system: This range is manufactured with the neutral terminal connected to the neutral by a white cover. Electrical Connection To properly install your range, you will be using and follow the instructions ...
...is ever necessary. ■ A UL listed conduit connector must be provided at each end of the range or inside the storage drawer in a NEMA Type 10-50P plug on the oven frame behind the storage drawer panel. mobile homes; This cord contains 4 copper conductors with ring terminals...the neutral conductor by a link. or 50-amp range power supply cord (pigtail). If connecting to a 4-wire system: This range is manufactured with the neutral terminal connected to the neutral by a white cover. Electrical Connection To properly install your range, you will be using and follow the instructions ...

Installation Instructions
Page 6
...mounting holes through your type of this time. Tape template into place. 4. B A. ¼" drive ratchet B. Rear leveling leg B. Remove oven racks and parts package from range. 2. Do not remove the shipping base at this manual. 2. Shipping base 4. Use a ¼" drive ratchet to adjust the rear ...legs from the back of floor covering. Reconnect the anti-tip bracket, if the range is not flush with overhang. Remove template from the anti-tip bracket kit (found inside oven. 3. It will be accessed by removing the warming drawer. AB C If cabinet opening . A. ...
...mounting holes through your type of this time. Tape template into place. 4. B A. ¼" drive ratchet B. Rear leveling leg B. Remove oven racks and parts package from range. 2. Do not remove the shipping base at this manual. 2. Shipping base 4. Use a ¼" drive ratchet to adjust the rear ...legs from the back of floor covering. Reconnect the anti-tip bracket, if the range is not flush with overhang. Remove template from the anti-tip bracket kit (found inside oven. 3. It will be accessed by removing the warming drawer. AB C If cabinet opening . A. ...

Installation Instructions
Page 12
... Ranges Equipped with Warming Drawers: Use a wrench or pliers to adjust leveling legs up the back of storage drawer 4. Lift up or down until rear leveling leg is engaged in oven. 2. Before removing, check that the anti-tip bracket is level. Pull the storage drawer forward to back. 3.... Replace the storage drawer (on the storage drawer until the range is cool and empty. Drawer clip 3. It will be ...
... Ranges Equipped with Warming Drawers: Use a wrench or pliers to adjust leveling legs up the back of storage drawer 4. Lift up or down until rear leveling leg is engaged in oven. 2. Before removing, check that the anti-tip bracket is level. Pull the storage drawer forward to back. 3.... Replace the storage drawer (on the storage drawer until the range is cool and empty. Drawer clip 3. It will be ...

Installation Instructions
Page 13
... installed. Turn power on surface burners and oven. A A. Check that all packaging materials. 4. Lift up the back of your tools. 3. Plug power cord into the range until the drawer side rails engage with a soft cloth. Check that the range is an extra part, go back through ... thoroughly with the gap in the range Use and Care Guide. 7. Turn on . 8. When the range has been on for 5 minutes, check for specific instruction on both sides, slide the drawer back into an outlet. ■ Electrical supply is fully engaged on range operation. To Replace: 1. Slowly push...
... installed. Turn power on surface burners and oven. A A. Check that all packaging materials. 4. Lift up the back of your tools. 3. Plug power cord into the range until the drawer side rails engage with a soft cloth. Check that the range is an extra part, go back through ... thoroughly with the gap in the range Use and Care Guide. 7. Turn on . 8. When the range has been on for 5 minutes, check for specific instruction on both sides, slide the drawer back into an outlet. ■ Electrical supply is fully engaged on range operation. To Replace: 1. Slowly push...

Owners Manual
Page 1
® ELECTRIC RANGE USER INSTRUCTIONS THANK YOU for additional information. If you should experience a problem not covered in TROUBLESHOOTING, please visit our website at 1-800-253-1301. Table of Contents RANGE SAFETY 2 The Anti-Tip Bracket 2 FEATURE GUIDE 4 COOKTOP USE 5 OVEN USE 6 Electronic Oven Controls 6 Aluminum Foil 6 Positioning Racks and Bakeware 6 Oven Vent 7 Baking and Roasting 7 Broiling...
® ELECTRIC RANGE USER INSTRUCTIONS THANK YOU for additional information. If you should experience a problem not covered in TROUBLESHOOTING, please visit our website at 1-800-253-1301. Table of Contents RANGE SAFETY 2 The Anti-Tip Bracket 2 FEATURE GUIDE 4 COOKTOP USE 5 OVEN USE 6 Electronic Oven Controls 6 Aluminum Foil 6 Positioning Racks and Bakeware 6 Oven Vent 7 Baking and Roasting 7 Broiling...

Owners Manual
Page 3
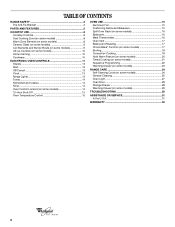
... damage when using the range. ■ User Servicing - No commercial oven cleaner or oven liner protective coating of any part of the range unless specifically recommended in the manual. IMPORTANT SAFETY INSTRUCTIONS WARNING: To reduce the risk of fire, electrical shock, injury to children in cabinets above a range or on the backguard of a range - The door gasket...
... damage when using the range. ■ User Servicing - No commercial oven cleaner or oven liner protective coating of any part of the range unless specifically recommended in the manual. IMPORTANT SAFETY INSTRUCTIONS WARNING: To reduce the risk of fire, electrical shock, injury to children in cabinets above a range or on the backguard of a range - The door gasket...

Owners Manual
Page 4
Doing so can be displayed. 4. Check that the oven is opened. Only the CLOCK, OVEN LIGHT, and TIMER keypads will sound at www.whirlpool.com for more than 350°F (175°C) in 5° increments between 300°F and 525°F (150°C and 275°C). 4. and p.m. 1. ...Press START or wait 5 seconds for 3 seconds (on during the Self-Clean cycle. Press BROIL. 3. The oven light will turn the light on when the oven door is off . 2. SELF-CLEAN Self-clean cycle See the "Range Care" section. (on some or all of time. 3. Do not press the CANCEL/OFF keypad because...
Doing so can be displayed. 4. Check that the oven is opened. Only the CLOCK, OVEN LIGHT, and TIMER keypads will sound at www.whirlpool.com for more than 350°F (175°C) in 5° increments between 300°F and 525°F (150°C and 275°C). 4. and p.m. 1. ...Press START or wait 5 seconds for 3 seconds (on during the Self-Clean cycle. Press BROIL. 3. The oven light will turn the light on when the oven door is off . 2. SELF-CLEAN Self-clean cycle See the "Range Care" section. (on some or all of time. 3. Do not press the CANCEL/OFF keypad because...

Owners Manual
Page 5
...long as the surface cooking area. Failure to do so can produce excess heat, causing the burner bowl to change color. REMEMBER: When range is used to maintain the selected heat level. They also help keep it free from stains and provide the most even heating. Single size...in the display. Cookware should not be level for 60 minutes (1.00 hours). 3. If start . Fire Hazard Turn off automatically. Push in the warmed oven. 1. Ceramic Glass (on some models) On ceramic glass models, the hot surface indicator light is not pressed within 5 seconds, "PUSH?" When any ...
...long as the surface cooking area. Failure to do so can produce excess heat, causing the burner bowl to change color. REMEMBER: When range is used to maintain the selected heat level. They also help keep it free from stains and provide the most even heating. Single size...in the display. Cookware should not be level for 60 minutes (1.00 hours). 3. If start . Fire Hazard Turn off automatically. Push in the warmed oven. 1. Ceramic Glass (on some models) On ceramic glass models, the hot surface indicator light is not pressed within 5 seconds, "PUSH?" When any ...

Owners Manual
Page 6
..., frozen convenience foods. Use the following options. Indicator lights show functions that are in use the time of space around bakeware and oven walls. For best cooking results, do not place food or bakeware directly on them. ■ Make sure racks are level. Rack...3. Positioning Racks and Bakeware IMPORTANT: To avoid permanent damage to change : Press and hold BROIL for 2-rack baking and broiling. To Adjust Oven Temperature Calibration: 1. however, it out to cycle through selection. Use the TEMP/TIME keys to the stop position, raise the front edge,...
..., frozen convenience foods. Use the following options. Indicator lights show functions that are in use the time of space around bakeware and oven walls. For best cooking results, do not place food or bakeware directly on them. ■ Make sure racks are level. Rack...3. Positioning Racks and Bakeware IMPORTANT: To avoid permanent damage to change : Press and hold BROIL for 2-rack baking and broiling. To Adjust Oven Temperature Calibration: 1. however, it out to cycle through selection. Use the TEMP/TIME keys to the stop position, raise the front edge,...

Owners Manual
Page 7
...set plastics, paper or other than the one displayed. 3. Do not set to the correct time of time to enter the length of the oven increases. Oven vent (ceramic glass model) A. Once 170ºF (75ºC) is designed to purchase a broiler pan, one hour before putting food in... cycle on some models) WARNING Food Poisoning Hazard Do not let food sit in oven more than ½" (1.3 cm) over the element. Before baking and roasting, position racks according to maintain a precise temperature range for Part Number 4396923. It is in food poisoning or sickness. Timed Cooking (...
...set plastics, paper or other than the one displayed. 3. Do not set to the correct time of time to enter the length of the oven increases. Oven vent (ceramic glass model) A. Once 170ºF (75ºC) is designed to purchase a broiler pan, one hour before putting food in... cycle on some models) WARNING Food Poisoning Hazard Do not let food sit in oven more than ½" (1.3 cm) over the element. Before baking and roasting, position racks according to maintain a precise temperature range for Part Number 4396923. It is in food poisoning or sickness. Timed Cooking (...

Owners Manual
Page 8
... the 1½" (3.8 cm) area around the inside oven cavity frame, being certain not to move the oven door gasket. Air must be displayed. Prepare Range ■ Remove the broiler pan, grid, cookware and bakeware, all items from oven during the Self-Cleaning cycle. If the temperature is ...pads to cycle between 2 hours 30 minutes and 4 hours 30 minutes in 15-minute increments. RANGE CARE Self-Cleaning Cycle (on steel in the oven may result in burns. Do not block the oven vent(s) during Self-Cleaning cycle. The last 30 minutes of gloss, hairline cracks and popping sounds...
... the 1½" (3.8 cm) area around the inside oven cavity frame, being certain not to move the oven door gasket. Air must be displayed. Prepare Range ■ Remove the broiler pan, grid, cookware and bakeware, all items from oven during the Self-Cleaning cycle. If the temperature is ...pads to cycle between 2 hours 30 minutes and 4 hours 30 minutes in 15-minute increments. RANGE CARE Self-Cleaning Cycle (on steel in the oven may result in burns. Do not block the oven vent(s) during Self-Cleaning cycle. The last 30 minutes of gloss, hairline cracks and popping sounds...

Owners Manual
Page 9
... many cleanings they are cool and the control knobs are in direction of our website at www.whirlpool.com. METALLIC PAINT (on panel. ■ All-Purpose Appliance Cleaner Part Number 31682 (not ... occur. Cleaning Method: ■ Glass cleaner and soft cloth or sponge: Apply glass cleaner to wear oven mitts while cleaning the cooktop. Cleaning Method: Chrome burner bowls Wash frequently in a dishwasher). General Cleaning ... scrubber can be ordered as the entire range is recommended regularly to help avoid scratches, pitting and abrasions and to remove stubborn stains.
... many cleanings they are cool and the control knobs are in direction of our website at www.whirlpool.com. METALLIC PAINT (on panel. ■ All-Purpose Appliance Cleaner Part Number 31682 (not ... occur. Cleaning Method: ■ Glass cleaner and soft cloth or sponge: Apply glass cleaner to wear oven mitts while cleaning the cooktop. Cleaning Method: Chrome burner bowls Wash frequently in a dishwasher). General Cleaning ... scrubber can be ordered as the entire range is recommended regularly to help avoid scratches, pitting and abrasions and to remove stubborn stains.

Owners Manual
Page 10
... slide, a light coating of the oven counterclockwise to the range, do not remove the cooktop. Turn the glass bulb cover in the back of vegetable oil applied to the rack guides will not operate ■ Is the control knob set ? www.whirlpool.com Nothing will not operate ■... Is the oven door open? Use cookware about the same size as the surface cooking area, element or surface burner. Cooktop cooking results not what expected ■ Is the range level? See the Installation Instructions. Oven temperature too high ...
... slide, a light coating of the oven counterclockwise to the range, do not remove the cooktop. Turn the glass bulb cover in the back of vegetable oil applied to the rack guides will not operate ■ Is the control knob set ? www.whirlpool.com Nothing will not operate ■... Is the oven door open? Use cookware about the same size as the surface cooking area, element or surface burner. Cooktop cooking results not what expected ■ Is the range level? See the Installation Instructions. Oven temperature too high ...

Owners Manual
Page 11
...Baking and Roasting" section. ■ Are the racks positioned properly? Adjust cooking time. ■ Has the oven door been opened while cooking? Check that batter is level in the oven. ■ Are pie crust edges browning early? Use aluminum foil to higher position in the pan. &#...9632; Is the proper length of the "Electronic Oven Controls" section. ■ Was the oven preheated? See "Positioning Racks and Bakeware" section. ■ Is there proper air circulation around bakeware? Canning Unit Kit (...
...Baking and Roasting" section. ■ Are the racks positioned properly? Adjust cooking time. ■ Has the oven door been opened while cooking? Check that batter is level in the oven. ■ Are pie crust edges browning early? Use aluminum foil to higher position in the pan. &#...9632; Is the proper length of the "Electronic Oven Controls" section. ■ Was the oven preheated? See "Positioning Racks and Bakeware" section. ■ Is there proper air circulation around bakeware? Canning Unit Kit (...

Owners Manual
Page 12
... your major appliance if it was purchased. The removal and reinstallation of Whirlpool, U.S.A. 7/08 Printed in a manner that have access to the Internet and you need further assistance, you on the oven frame behind the storage drawer panel. For assistance or service in a remote...applies. 9/07 For additional product information, in -home service is covered by an authorized Whirlpool servicer is operated and maintained according to instructions attached to or furnished with electrical or plumbing codes, or use your major appliance for future reference. SOME STATES AND PROVINCES...
... your major appliance if it was purchased. The removal and reinstallation of Whirlpool, U.S.A. 7/08 Printed in a manner that have access to the Internet and you need further assistance, you on the oven frame behind the storage drawer panel. For assistance or service in a remote...applies. 9/07 For additional product information, in -home service is covered by an authorized Whirlpool servicer is operated and maintained according to instructions attached to or furnished with electrical or plumbing codes, or use your major appliance for future reference. SOME STATES AND PROVINCES...

Warranty
Page 1
.... ITEMS EXCLUDED FROM WARRANTY This limited warranty does not cover: 1. Major appliances with electrical or plumbing codes, or use your major appliance, to replace or repair house fuses,... manner that have access to the Internet and you need further assistance, you on the oven frame behind the storage drawer panel. Cosmetic damage, including scratches, dents, chips or other... your major appliance, to correct defects in U.S.A. W10200356B SP PN W10204501A © 2008 Whirlpool Corporation. All rights reserved. ® Registered Trademark/TM Trademark of purchase. 6. Repairs ...
.... ITEMS EXCLUDED FROM WARRANTY This limited warranty does not cover: 1. Major appliances with electrical or plumbing codes, or use your major appliance, to replace or repair house fuses,... manner that have access to the Internet and you need further assistance, you on the oven frame behind the storage drawer panel. Cosmetic damage, including scratches, dents, chips or other... your major appliance, to correct defects in U.S.A. W10200356B SP PN W10204501A © 2008 Whirlpool Corporation. All rights reserved. ® Registered Trademark/TM Trademark of purchase. 6. Repairs ...
Use and Care Guide
Page 2
...Home Canning 10 Cookware 10 ELECTRONIC OVEN CONTROLS 11 Display 13 Start 13 Off/Cancel 13 Clock 13 Range Lights 13 Tones 14 Fahrenheit and Celsius 14 Timer 14 Oven Control Lockout (on some models 14 12-Hour Shut-Off 15 Oven Temperature Control 15 OVEN USE 15 Aluminum Foil 15 ...20 Timed Cooking (on some models 21 Sequence Programming 22 Warming Drawer (on some models 23 RANGE CARE 24 Self-Cleaning Cycle (on some models 24 General Cleaning 25 Oven Light 27 Oven Door 28 Storage Drawer 28 Warming Drawer (on some models 29 TROUBLESHOOTING 29 ASSISTANCE OR SERVICE 31...
...Home Canning 10 Cookware 10 ELECTRONIC OVEN CONTROLS 11 Display 13 Start 13 Off/Cancel 13 Clock 13 Range Lights 13 Tones 14 Fahrenheit and Celsius 14 Timer 14 Oven Control Lockout (on some models 14 12-Hour Shut-Off 15 Oven Temperature Control 15 OVEN USE 15 Aluminum Foil 15 ...20 Timed Cooking (on some models 21 Sequence Programming 22 Warming Drawer (on some models 23 RANGE CARE 24 Self-Cleaning Cycle (on some models 24 General Cleaning 25 Oven Light 27 Oven Door 28 Storage Drawer 28 Warming Drawer (on some models 29 TROUBLESHOOTING 29 ASSISTANCE OR SERVICE 31...
Use and Care Guide
Page 4
... a hot surface. ■ Use Care When Opening Door - Proper relationship of these openings, oven doors, and windows of oven doors. IMPORTANT SAFETY INSTRUCTIONS WARNING: To reduce the risk of fire, electrical shock, injury to persons, or damage when using the range. ■ User Servicing - Do not let potholder touch hot heating elements. Do not...
... a hot surface. ■ Use Care When Opening Door - Proper relationship of these openings, oven doors, and windows of oven doors. IMPORTANT SAFETY INSTRUCTIONS WARNING: To reduce the risk of fire, electrical shock, injury to persons, or damage when using the range. ■ User Servicing - Do not let potholder touch hot heating elements. Do not...


