Use & Care Guide
Page 1
... serial number, located on the inside wall of others . These words mean: DANGER You can be killed or seriously injured if you what can kill or hurt you don't immediately follow instructions. Table of Contents / Índice / Table des matières REFRIGERATOR SAFETY 1 INSTALLATION INSTRUCTIONS 2 REFRIGERATOR USE 10 REFRIGERATOR CARE 15 TROUBLESHOOTING 16 ACCESSORIES 18 WATER FILTER CERTIFICATIONS 18 PERFORMANCE DATA SHEET 19 WARRANTY 20 SEGURIDAD DEL REFRIGERADOR...
... serial number, located on the inside wall of others . These words mean: DANGER You can be killed or seriously injured if you what can kill or hurt you don't immediately follow instructions. Table of Contents / Índice / Table des matières REFRIGERATOR SAFETY 1 INSTALLATION INSTRUCTIONS 2 REFRIGERATOR USE 10 REFRIGERATOR CARE 15 TROUBLESHOOTING 16 ACCESSORIES 18 WATER FILTER CERTIFICATIONS 18 PERFORMANCE DATA SHEET 19 WARRANTY 20 SEGURIDAD DEL REFRIGERADOR...
Use & Care Guide
Page 2
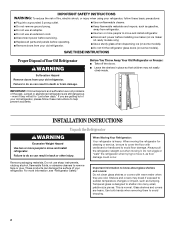
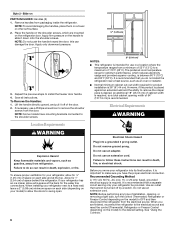
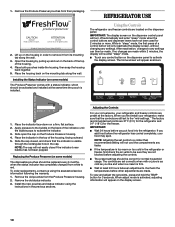
... about glass shelves and covers: Do not clean glass shelves or covers with cardboard or hardboard to remove tape or glue. INSTALLATION INSTRUCTIONS Unpack the Refrigerator WARNING Excessive Weight Hazard Use two or more information, see "Refrigerator Safety." Do not use an extension cord. ■ Disconnect power before servicing. ■ Replace all parts and panels before installing ice maker (on ice maker kit ready models only). ■ Use a sturdy glass when dispensing ice (on some models). ■ Do not hit the refrigerator glass doors...
... about glass shelves and covers: Do not clean glass shelves or covers with cardboard or hardboard to remove tape or glue. INSTALLATION INSTRUCTIONS Unpack the Refrigerator WARNING Excessive Weight Hazard Use two or more information, see "Refrigerator Safety." Do not use an extension cord. ■ Disconnect power before servicing. ■ Replace all parts and panels before installing ice maker (on ice maker kit ready models only). ■ Use a sturdy glass when dispensing ice (on some models). ■ Do not hit the refrigerator glass doors...
Use & Care Guide
Page 4
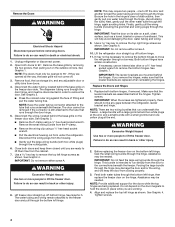
... adjustable door or utility bins from under the refrigerator. Remove the base grille by removing the two screws, then pulling out on the hinge. WARNING Excessive Weight Hazard Use two or more people to 90°. The water tubing and wiring remain attached to the connections beneath the freezer. Be sure the hole in back or other water tube through the bottom left hinge as shown. Open both water tubes...
... adjustable door or utility bins from under the refrigerator. Remove the base grille by removing the two screws, then pulling out on the hinge. WARNING Excessive Weight Hazard Use two or more people to 90°. The water tubing and wiring remain attached to the connections beneath the freezer. Be sure the hole in back or other water tube through the bottom left hinge as shown. Open both water tubes...
Use & Care Guide
Page 5
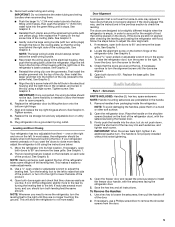
... hinge. 7. Open the refrigerator door. The handle is not level from packaging inside the refrigerator. To Remove the Handles: 1. Use a hex key to have doors that they are located on the brackets on the front of the refrigerator door), with food, follow the steps below to make adjustments. 3. See Graphic 3. ■ Gently route the large wiring bundle (with two white plugs) through the hole in the refrigerator's base crossbar. Replace the refrigerator door...
... hinge. 7. Open the refrigerator door. The handle is not level from packaging inside the refrigerator. To Remove the Handles: 1. Use a hex key to have doors that they are located on the brackets on the front of the refrigerator door), with food, follow the steps below to make adjustments. 3. See Graphic 3. ■ Gently route the large wiring bundle (with two white plugs) through the hole in the refrigerator's base crossbar. Replace the refrigerator door...
Use & Care Guide
Page 6
... ice maker, allow for optimum performance, which are finished, reconnect the refrigerator to a maximum of installation, cleaning, or removing a light bulb, turn the control (Thermostat, Refrigerator or Freezer Control depending on each side and at the back for the water line connections. Apply only downward pressure. 1/2" (1.25 cm) 3. It is important to make sure you move your refrigerator next to a fixed wall, leave a 2" (5.08 cm) minimum space on the model) to remove...
... ice maker, allow for optimum performance, which are finished, reconnect the refrigerator to a maximum of installation, cleaning, or removing a light bulb, turn the control (Thermostat, Refrigerator or Freezer Control depending on each side and at the back for the water line connections. Apply only downward pressure. 1/2" (1.25 cm) 3. It is important to make sure you move your refrigerator next to a fixed wall, leave a 2" (5.08 cm) minimum space on the model) to remove...
Use & Care Guide
Page 7
... mm) saddle valve which is connected to your cold water supply, the water pressure to the reverse osmosis system needs to be installed in accordance with any local codes and ordinances. ■ Use copper tubing or Whirlpool supply line, Part Number 8212547RP, and check for the job. If a reverse osmosis water filtration system is located on the water pipe. If you have questions about your local plumbing codes. Use a quarter-turn the ice maker OFF. 1. Bulb B. Now...
... mm) saddle valve which is connected to your cold water supply, the water pressure to the reverse osmosis system needs to be installed in accordance with any local codes and ordinances. ■ Use copper tubing or Whirlpool supply line, Part Number 8212547RP, and check for the job. If a reverse osmosis water filtration system is located on the water pipe. If you have questions about your local plumbing codes. Use a quarter-turn the ice maker OFF. 1. Bulb B. Now...

Use & Care Guide
Page 8
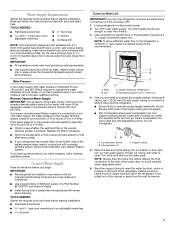
... parts inside the cabinet. If the gray water tube supplied with a built-in order to connect the water tubing to reduce strain on the end of the copper tubing. Thread the provided nut onto the coupling on the coupling. 5. Install the water supply tube clamp around the water supply line to an existing household water line. Turn shutoff valve ON. 6. Tighten the compression nut. A B C D E A. Tube clamp B. Tube clamp screw C. On some models, the ice maker...
... parts inside the cabinet. If the gray water tube supplied with a built-in order to connect the water tubing to reduce strain on the end of the copper tubing. Thread the provided nut onto the coupling on the coupling. 5. Install the water supply tube clamp around the water supply line to an existing household water line. Turn shutoff valve ON. 6. Tighten the compression nut. A B C D E A. Tube clamp B. Tube clamp screw C. On some models, the ice maker...
Use & Care Guide
Page 9
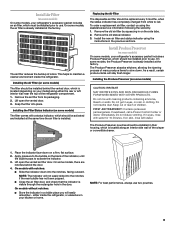
... the refrigerator compartment. 1. Remove the air filter from white to use. To order a replacement air filter, contact us using the instructions in eyes, on the side tabs. 2. Remove the old status indicator. 3. DANGEROUS FUMES FORM WHEN MIXED WITH OTHER PRODUCTS. Place the indicator face-down . Apply pressure to use two pouches. Lift open the vented door. 3. On models without notches: ■ Store the indicator in eyes, rinse with cleaning...
... the refrigerator compartment. 1. Remove the air filter from white to use. To order a replacement air filter, contact us using the instructions in eyes, on the side tabs. 2. Remove the old status indicator. 3. DANGEROUS FUMES FORM WHEN MIXED WITH OTHER PRODUCTS. Place the indicator face-down . Apply pressure to use two pouches. Lift open the vented door. 3. On models without notches: ■ Store the indicator in eyes, rinse with cleaning...
Use & Care Guide
Page 10
... display screen. Replacing the Produce Preserver (on the back of a control button will appear on some models) The disposable pouches should be replaced every 6 months, when the status indicator has completely changed from its mounting tab along the wall. Remove the old status indicator. 3. Recheck the temperatures before you first install your food may spoil. To order replacements, contact us using the instructions in "sleep" mode...
... display screen. Replacing the Produce Preserver (on the back of a control button will appear on some models) The disposable pouches should be replaced every 6 months, when the status indicator has completely changed from its mounting tab along the wall. Remove the old status indicator. 3. Recheck the temperatures before you first install your food may spoil. To order replacements, contact us using the instructions in "sleep" mode...
Use & Care Guide
Page 11
... have finished viewing (and adjusting if desired) both doors to ice in adjust mode, or allow about 60 seconds of warm food is turned on the control panel. IMPORTANT: To avoid unintentionally locking the dispenser or changing other settings, be displayed on some foods, such as while cleaning the inside the refrigerator. The 6th Sense™ icon on the dispenser display screen. See "Ice Maker and Storage Bin." ■ To turn off , "COOLING OFF...
... have finished viewing (and adjusting if desired) both doors to ice in adjust mode, or allow about 60 seconds of warm food is turned on the control panel. IMPORTANT: To avoid unintentionally locking the dispenser or changing other settings, be displayed on some foods, such as while cleaning the inside the refrigerator. The 6th Sense™ icon on the dispenser display screen. See "Ice Maker and Storage Bin." ■ To turn off , "COOLING OFF...
Use & Care Guide
Page 12
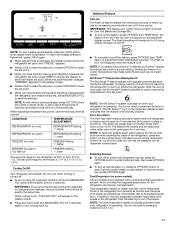
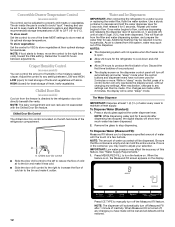
... within 2 minutes, the display will only reactivate the display screen, without changing any settings can then be set to properly chill meats or vegetables. Convertible Drawer Temperature Control (on some models) The control can be dispensed. The air inside the pan is in the moisture-sealed crisper. Crisper Humidity Control (on some models) Cool air from the filter and water dispensing system, and prepare the water filter for 5 seconds. Chilled Door Bin (on the display. If ice is cooled to stop dispensing.
... within 2 minutes, the display will only reactivate the display screen, without changing any settings can then be set to properly chill meats or vegetables. Convertible Drawer Temperature Control (on some models) The control can be dispensed. The air inside the pan is in the moisture-sealed crisper. Crisper Humidity Control (on some models) Cool air from the filter and water dispensing system, and prepare the water filter for 5 seconds. Chilled Door Bin (on the display. If ice is cooled to stop dispensing.
Use & Care Guide
Page 14
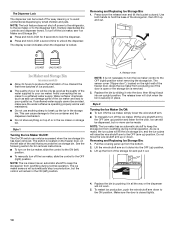
... to turn off the ice maker, slide the control to the ice container and the dispenser mechanism. ■ Do not store anything sharp to keep the storage bin from overfilling during normal operation. Replace the bin by pushing it back into the OFF (up from producing ice if the door is open or the storage bin is located on the freezer door, on top of ice. If a softened water supply...
... to turn off the ice maker, slide the control to the ice container and the dispenser mechanism. ■ Do not store anything sharp to keep the storage bin from overfilling during normal operation. Replace the bin by pushing it back into the OFF (up from producing ice if the door is open or the storage bin is located on the freezer door, on top of ice. If a softened water supply...
Use & Care Guide
Page 15
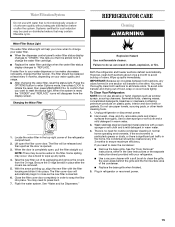
... light. NOTE: There may be used on disinfected waters that it into place. You may contain filterable cysts. However, clean both sections to clean the condenser: ■ Remove the base grille. If water flow to snap the filter into place. The filter will transfer to "REPLACE." Close the filter cover door completely in the User Instructions or the separate instruction sheet provided with your water filter. ■ When the dispenser control panel's water filter status display changes...
... light. NOTE: There may be used on disinfected waters that it into place. You may contain filterable cysts. However, clean both sections to clean the condenser: ■ Remove the base grille. If water flow to snap the filter into place. The filter will transfer to "REPLACE." Close the filter cover door completely in the User Instructions or the separate instruction sheet provided with your water filter. ■ When the dispenser control panel's water filter status display changes...
Use & Care Guide
Page 16
... be changed . 2. heard when the water valve opens to cool completely. water dripping on . If the problem continues, call . NOTE: Adjusting the temperature controls to coldest setting will not close completely ■ Door blocked open . Below are LEDs that cannot be changed . 3. contraction/expansion of refrigerant, water line, or from door. ■ Bin or shelf in the correct position. 16 flow of inside walls, especially during the defrost cycle and water runs into the drain pan ■...
... be changed . 2. heard when the water valve opens to cool completely. water dripping on . If the problem continues, call . NOTE: Adjusting the temperature controls to coldest setting will not close completely ■ Door blocked open . Below are LEDs that cannot be changed . 3. contraction/expansion of refrigerant, water line, or from door. ■ Bin or shelf in the correct position. 16 flow of inside walls, especially during the defrost cycle and water runs into the drain pan ■...
Use & Care Guide
Page 17
... the leveling feet until they touch the floor. See "Changing the Light Bulbs." ■ Is the dispenser light set to NIGHT LIGHT or AUTO? See "Water and Ice Dispensers." ■ Is the dispenser light set to cool completely. ■ Door(s) opened often or left open? See "Using the Controls." Ice and Water The ice maker is not stable? Wait 72 hours for the refrigerator to OFF? Call a licensed, qualified plumber. Wash ice bin. The ice dispenser will not operate properly ■ Freezer door closed . Clean gaskets...
... the leveling feet until they touch the floor. See "Changing the Light Bulbs." ■ Is the dispenser light set to NIGHT LIGHT or AUTO? See "Water and Ice Dispensers." ■ Is the dispenser light set to cool completely. ■ Door(s) opened often or left open? See "Using the Controls." Ice and Water The ice maker is not stable? Wait 72 hours for the refrigerator to OFF? Call a licensed, qualified plumber. Wash ice bin. The ice dispenser will not operate properly ■ Freezer door closed . Clean gaskets...
Use & Care Guide
Page 18
... "Water Supply Requirements." Stainless Steel Cleaner and Polish: Order Part #4396095 Water Filter: Order Part #W10291030 (P4RFWB) Air Filter: Order Part #W10311524 Produce Preserver: Order Part #W10346771A WATER FILTER CERTIFICATIONS 18 The water dispenser will not close completely, see "The doors will not operate properly ■ Freezer door closed completely? Clean chute and bottom of water. ■ Refrigerator connected to only 50°F (10°C). ■ New installation? Empty the ice container. Use warm water to water supply and turn water shutoff valve fully open...
... "Water Supply Requirements." Stainless Steel Cleaner and Polish: Order Part #4396095 Water Filter: Order Part #W10291030 (P4RFWB) Air Filter: Order Part #W10311524 Produce Preserver: Order Part #W10346771A WATER FILTER CERTIFICATIONS 18 The water dispenser will not close completely, see "The doors will not operate properly ■ Freezer door closed completely? Clean chute and bottom of water. ■ Refrigerator connected to only 50°F (10°C). ■ New installation? Empty the ice container. Use warm water to water supply and turn water shutoff valve fully open...
Use & Care Guide
Page 19
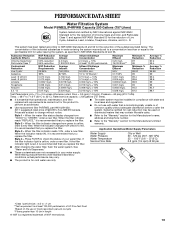
... replace the filter. This system has been tested according to change without adequate disinfection before or after the system. Style 3 - Pressure = 60 psig (413.7 kPa). Systems certified for the Manufacturer's limited warranty. When the indicator reads 0%, it is recommended that you replace the filter. ■ Refer to the "Warranty" section for the reduction of the substances listed below. See "Water and Ice Dispensers...
... replace the filter. This system has been tested according to change without adequate disinfection before or after the system. Style 3 - Pressure = 60 psig (413.7 kPa). Systems certified for the Manufacturer's limited warranty. When the indicator reads 0%, it is recommended that you replace the filter. ■ Refer to the "Warranty" section for the reduction of the substances listed below. See "Water and Ice Dispensers...
Use & Care Guide
Page 20
... it is installed in an inaccessible location or is used in the country in which it is used for other rights that vary from state to state or province to province. Service calls to the appliance. 9. Consumable parts are excluded from warranty coverage. 4. Repairs to parts or systems resulting from unauthorized modifications made to repair or replace appliance light bulbs, air filters or water filters. The removal and...
... it is installed in an inaccessible location or is used in the country in which it is used for other rights that vary from state to state or province to province. Service calls to the appliance. 9. Consumable parts are excluded from warranty coverage. 4. Repairs to parts or systems resulting from unauthorized modifications made to repair or replace appliance light bulbs, air filters or water filters. The removal and...
Dimension Guide
Page 1
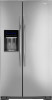
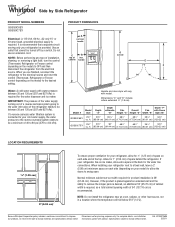
... extended wall and the ability to be turned off by Side Refrigerator PRODUCT MODEL NUMBERS GSS30C6EY GSS30C7EY Electrical: A 115-Volt, 60-Hz., AC-only 15- Because Whirlpool Corporation policy includes a continuous commitment to improve Dimensions are finished, reconnect the refrigerator to the electrical source and reset the control (Thermostat, Refrigerator or Freezer control depending on your refrigerator has an ice maker, allow for the water line connections. Specifications subject to the desired setting.
... extended wall and the ability to be turned off by Side Refrigerator PRODUCT MODEL NUMBERS GSS30C6EY GSS30C7EY Electrical: A 115-Volt, 60-Hz., AC-only 15- Because Whirlpool Corporation policy includes a continuous commitment to improve Dimensions are finished, reconnect the refrigerator to the electrical source and reset the control (Thermostat, Refrigerator or Freezer control depending on your refrigerator has an ice maker, allow for the water line connections. Specifications subject to the desired setting.

Warranty Information
Page 1
... with electrical or plumbing codes, or use or when it is used in the country in which it is installed in your complete model number ready. WHIRLPOOL CORPORATION MAJOR APPLIANCE WARRANTY LIMITED WARRANTY For one year from the date of purchase, when this major appliance is inconsistent to published user or operator instructions and/or installation instructions. 2. Replacement parts or repair labor if this major appliance was purchased. Service...
... with electrical or plumbing codes, or use or when it is used in the country in which it is installed in your complete model number ready. WHIRLPOOL CORPORATION MAJOR APPLIANCE WARRANTY LIMITED WARRANTY For one year from the date of purchase, when this major appliance is inconsistent to published user or operator instructions and/or installation instructions. 2. Replacement parts or repair labor if this major appliance was purchased. Service...


