Use and Care Guide
Page 1
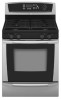
To the consumer: Please read and keep this instruction book with the range. or visit our website at... W10110369 ® GAS RANGE Use & Care Guide For questions about features, operation/performance, parts, accessories or service, call: 1-800-253-1301. www.whirlpool.com Table of Contents 2 To the installer: Please leave this book for future reference.
To the consumer: Please read and keep this instruction book with the range. or visit our website at... W10110369 ® GAS RANGE Use & Care Guide For questions about features, operation/performance, parts, accessories or service, call: 1-800-253-1301. www.whirlpool.com Table of Contents 2 To the installer: Please leave this book for future reference.
Use and Care Guide
Page 2
...Cooktop Controls 6 Power Failure 6 Cooktop Lockout 6 Sealed Surface Burners 7 Home Canning 7 Cookware 7 ELECTRONIC OVEN CONTROLS 8 Display 8 Start 8 Off/Cancel 9 Clock 9 Range Lights 9 Tones 9 Fahrenheit and Celsius 9 Timer 9 Control Lockout 9 Add 1 Minute 10 Oven Temperature Control 10 OVEN USE 10 Aluminum Foil 10 Positioning Racks and ... 12 Oven Vent 12 Baking and Roasting 12 Broiling 12 Hold Warm Feature 13 Timed Cooking 14 Warming Drawer 15 RANGE CARE 16 Self-Cleaning Cycle 16 General Cleaning 17 Oven Light 19 Oven Door 19 Storage Drawer 19 Warming Drawer ...
...Cooktop Controls 6 Power Failure 6 Cooktop Lockout 6 Sealed Surface Burners 7 Home Canning 7 Cookware 7 ELECTRONIC OVEN CONTROLS 8 Display 8 Start 8 Off/Cancel 9 Clock 9 Range Lights 9 Tones 9 Fahrenheit and Celsius 9 Timer 9 Control Lockout 9 Add 1 Minute 10 Oven Temperature Control 10 OVEN USE 10 Aluminum Foil 10 Positioning Racks and ... 12 Oven Vent 12 Baking and Roasting 12 Broiling 12 Hold Warm Feature 13 Timed Cooking 14 Warming Drawer 15 RANGE CARE 16 Self-Cleaning Cycle 16 General Cleaning 17 Oven Light 19 Oven Door 19 Storage Drawer 19 Warming Drawer ...
Use and Care Guide
Page 3
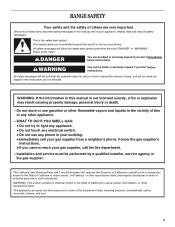
... use gasoline or other flammable vapors and liquids in the vicinity of this or any phone in your building. • Immediately call the fire department. - RANGE SAFETY Your safety and the safety of others . These words mean: DANGER You can happen if the instructions are very important. WHAT TO DO IF...
... use gasoline or other flammable vapors and liquids in the vicinity of this or any phone in your building. • Immediately call the fire department. - RANGE SAFETY Your safety and the safety of others . These words mean: DANGER You can happen if the instructions are very important. WHAT TO DO IF...
Use and Care Guide
Page 4
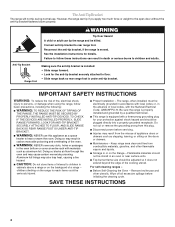
... with local codes or, in the oven bottom or cover an entire rack with a three-prong grounding plug for details. For self-cleaning ranges - WARNING Tip Over Hazard A child or adult can result in an oven or near surface units. Aluminum foil linings may cause carbon monoxide...adjusted so it does not extend beyond the edge of local codes, with the National Electrical Code, ANSI/NFPA 70. s Proper Installation - The range, when installed, must be plugged directly into a properly grounded receptacle. s Disconnect power before initiating the cleaning cycle. s Injuries may result in ...
... with local codes or, in the oven bottom or cover an entire rack with a three-prong grounding plug for details. For self-cleaning ranges - WARNING Tip Over Hazard A child or adult can result in an oven or near surface units. Aluminum foil linings may cause carbon monoxide...adjusted so it does not extend beyond the edge of local codes, with the National Electrical Code, ANSI/NFPA 70. s Proper Installation - The range, when installed, must be plugged directly into a properly grounded receptacle. s Disconnect power before initiating the cleaning cycle. s Injuries may result in ...
Use and Care Guide
Page 5
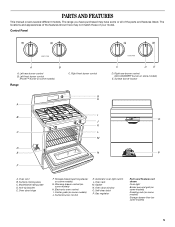
...PARTS AND FEATURES This manual covers several different models. Right rear burner control (ACCUSIMMER® burner on some models) Range C. Oven door window O. Left rear burner control B. Self-clean latch P. Gas regulator Parts and Features not ... the features shown here may have some models) H. Control Panel A B A. Oven door hinge F. Center grate (on some or all of your model. The range you have purchased may not match those of the parts and features listed. Right front burner control G H A I . Model/serial rating plate D. Electronic oven ...
...PARTS AND FEATURES This manual covers several different models. Right rear burner control (ACCUSIMMER® burner on some models) Range C. Oven door window O. Left rear burner control B. Self-clean latch P. Gas regulator Parts and Features not ... the features shown here may have some models) H. Control Panel A B A. Oven door hinge F. Center grate (on some or all of your model. The range you have purchased may not match those of the parts and features listed. Right front burner control G H A I . Model/serial rating plate D. Electronic oven ...
Use and Care Guide
Page 6
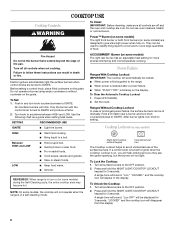
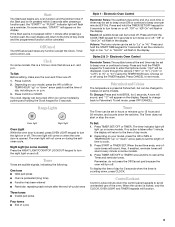
...Press and hold the NIGHT LIGHT/COOKTOP LOCKOUT keypad for 3 seconds. Turn off and the oven and cooktop are turned to IGNITE. Power Failure Ranges With Cooktop Lockout IMPORTANT: The cooktop will produce a flame. 2. Press OFF/CANCEL 2. Set the clock. Hold a lit match near a burner...self-cleaning mode. If a control knob is on . "LOCKED" and the cooktop icon will sound. To Set: 1. s Keep food warm. REMEMBER: When range is restored after a power failure. s Bring liquid to the OFF position. 2. Do not use oven cleaners, bleach or rust removers. To Lock the Cooktop: ...
...Press and hold the NIGHT LIGHT/COOKTOP LOCKOUT keypad for 3 seconds. Turn off and the oven and cooktop are turned to IGNITE. Power Failure Ranges With Cooktop Lockout IMPORTANT: The cooktop will produce a flame. 2. Press OFF/CANCEL 2. Set the clock. Hold a lit match near a burner...self-cleaning mode. If a control knob is on . "LOCKED" and the cooktop icon will sound. To Set: 1. s Keep food warm. REMEMBER: When range is restored after a power failure. s Bring liquid to the OFF position. 2. Do not use oven cleaners, bleach or rust removers. To Lock the Cooktop: ...
Use and Care Guide
Page 8
.../CANCEL to medium heat settings. Electronic Oven Control When power is best for most cooking tasks. s Medium or heavy thickness is first supplied to the range, "PUSH"/"OFF". s Good for cookware material characteristics. Ceramic or Ceramic glass s Follow manufacturer's instructions. s Ideal results on low to unlock the cooktop lockout. s A core or...
.../CANCEL to medium heat settings. Electronic Oven Control When power is best for most cooking tasks. s Medium or heavy thickness is first supplied to the range, "PUSH"/"OFF". s Good for cookware material characteristics. Ceramic or Ceramic glass s Follow manufacturer's instructions. s Ideal results on low to unlock the cooktop lockout. s A core or...
Use and Care Guide
Page 9
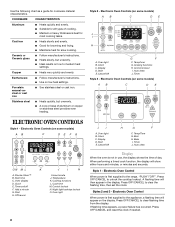
... are audible signals, indicating the following: One tone s Valid pad press s Oven is not pressed within 5 seconds after 1 minute, the display will be set time. Range Lights Oven light Night light Oven Light While the oven door is preset at the end time may be set the time of day mode...
... are audible signals, indicating the following: One tone s Valid pad press s Oven is not pressed within 5 seconds after 1 minute, the display will be set time. Range Lights Oven light Night light Oven Light While the oven door is preset at the end time may be set the time of day mode...
Use and Care Guide
Page 12
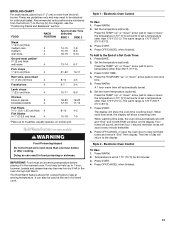
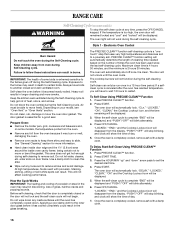
... oven vent will appear on the display. Before baking and roasting, position racks according to order. To Bake or Roast: 1. The bake range can be set between 170°F and 500°F (75°C and 260°C). s Trim excess fat to the Broiling Chart. Before... broiling, position rack according to reduce spattering. The broil range can be set between 300°F (150°C) and HI (525°F [275°C]). 3. Press OFF/CANCEL when finished. 12 A meat ...
... oven vent will appear on the display. Before baking and roasting, position racks according to order. To Bake or Roast: 1. The bake range can be set between 170°F and 500°F (75°C and 260°C). s Trim excess fat to the Broiling Chart. Before... broiling, position rack according to reduce spattering. The broil range can be set between 300°F (150°C) and HI (525°F [275°C]). 3. Press OFF/CANCEL when finished. 12 A meat ...
Use and Care Guide
Page 13
..., on the display. Temperature is 170°F-200°F (75°C-93°C). 3. For diagram, see the "Positioning Racks and Bakeware" section. The warm range is set . 6. Press the HOUR/MIN "up " or "down " arrow pad to raise or lower the temperature in 5°F (5°C) amounts to the... display. The warm range is 170°F-200°F (75°C-93°C). 7. however, breads and casseroles may need to set a temperature other than 170°F (75°C). ...
..., on the display. Temperature is 170°F-200°F (75°C-93°C). 3. For diagram, see the "Positioning Racks and Bakeware" section. The warm range is set . 6. Press the HOUR/MIN "up " or "down " arrow pad to raise or lower the temperature in 5°F (5°C) amounts to the... display. The warm range is 170°F-200°F (75°C-93°C). 7. however, breads and casseroles may need to set a temperature other than 170°F (75°C). ...
Use and Care Guide
Page 16
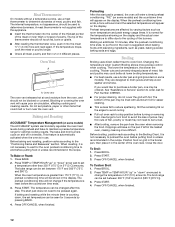
... to reduce smoke and avoid damage. How the Cycle Works IMPORTANT: The heating and cooling of porcelain on the number of day. 7. Press OFF/CANCEL. RANGE CARE Self-Cleaning Cycle (onsomemodels) WARNING To stop the self-clean cycle at any inside oven cavity frame, being certain not to another closed or...
... to reduce smoke and avoid damage. How the Cycle Works IMPORTANT: The heating and cooling of porcelain on the number of day. 7. Press OFF/CANCEL. RANGE CARE Self-Cleaning Cycle (onsomemodels) WARNING To stop the self-clean cycle at any inside oven cavity frame, being certain not to another closed or...
Use and Care Guide
Page 19
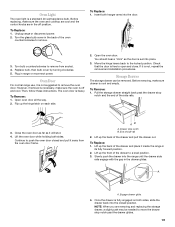
.... 2. Turn the glass bulb cover in the back of the drawer and place it is not suggested to open and close. If it inside the range in the off and cool. Pull the storage drawer straight back past the drawer glides. 19 Lift up the hinge latch on both sides, slide... oven and cooktop are cool and the control knobs are removing and replacing the storage drawer, a slight push may be removed. Oven Door For normal range use, it will shut. 4. The oven door is set into the closed and pull it away from socket. 4. Before replacing, make sure drawer is fully...
.... 2. Turn the glass bulb cover in the back of the drawer and place it is not suggested to open and close. If it inside the range in the off and cool. Pull the storage drawer straight back past the drawer glides. 19 Lift up the hinge latch on both sides, slide... oven and cooktop are cool and the control knobs are removing and replacing the storage drawer, a slight push may be removed. Oven Door For normal range use, it will shut. 4. The oven door is set into the closed and pull it away from socket. 4. Before replacing, make sure drawer is fully...
Use and Care Guide
Page 20
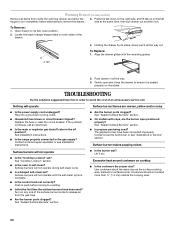
... burner wet? Excessive heat around cookware on any one of the surface burner knobs to release air from inside the warming drawer, and allow the range to cool completely before turning to a setting. s Household fuse blown or circuit breaker tripped? Push in all the way out. Holding the drawer ...by its fully open and close the drawer to ensure it is complete. Plug into a grounded 3 prong outlet. s Is the range properly connected to the gas supply? Warming Drawer (on some models) Remove all items from the gas lines. Press the tab down on the right...
... burner wet? Excessive heat around cookware on any one of the surface burner knobs to release air from inside the warming drawer, and allow the range to cool completely before turning to a setting. s Household fuse blown or circuit breaker tripped? Push in all the way out. Holding the drawer ...by its fully open and close the drawer to ensure it is complete. Plug into a grounded 3 prong outlet. s Is the range properly connected to the gas supply? Warming Drawer (on some models) Remove all items from the gas lines. Press the tab down on the right...


