User Instructions
Page 1
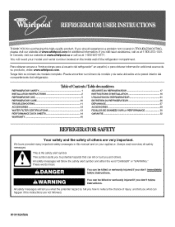
... 1 INSTALLATION INSTRUCTIONS 2 REFRIGERATOR USE 5 REFRIGERATOR CARE 10 TROUBLESHOOTING 11 ACCESSORIES 13 WATER FILTER CERTIFICATIONS 13 PERFORMANCE DATA SHEETS 14 WARRANTY 16 SI_CURITE DU REFRIGERATEUR 17 INSTRUCTIONS D'INSTALLATION 18 UTILISATION DU REFRIGI_RATEUR 21 ENTRETIEN DU RI_FRIGI_RATEUR 26 DEPANNAGE 27 ACCESSOIRES 29 FEUILLES DE DONNC:ES SUR LA PERFORMANCE 30 GARANTIE 32 REFRIGERATOR SAFETY Your safety and the safety of others . If you still need your model and serial number located...
... 1 INSTALLATION INSTRUCTIONS 2 REFRIGERATOR USE 5 REFRIGERATOR CARE 10 TROUBLESHOOTING 11 ACCESSORIES 13 WATER FILTER CERTIFICATIONS 13 PERFORMANCE DATA SHEETS 14 WARRANTY 16 SI_CURITE DU REFRIGERATEUR 17 INSTRUCTIONS D'INSTALLATION 18 UTILISATION DU REFRIGI_RATEUR 21 ENTRETIEN DU RI_FRIGI_RATEUR 26 DEPANNAGE 27 ACCESSOIRES 29 FEUILLES DE DONNC:ES SUR LA PERFORMANCE 30 GARANTIE 32 REFRIGERATOR SAFETY Your safety and the safety of others . If you still need your model and serial number located...

User Instructions
Page 2
... refrigerator for "just a few days." Important information to know about glass shelves and covers: Do not clean glass shelves or covers with warm water when they will sit for cleaning or service, be sure to protect the floor. even if they are cold. Do not use an extension cord. • Disconnect power before servicing. • Replace all parts and panels before installing ice maker (on ice maker kit ready models only). • Use a sturdy glass when dispensing ice (on some models...
... refrigerator for "just a few days." Important information to know about glass shelves and covers: Do not clean glass shelves or covers with warm water when they will sit for cleaning or service, be sure to protect the floor. even if they are cold. Do not use an extension cord. • Disconnect power before servicing. • Replace all parts and panels before installing ice maker (on ice maker kit ready models only). • Use a sturdy glass when dispensing ice (on some models...

User Instructions
Page 3
... important to make sure a saddle-type valve complies with a W' (6.35 mm) saddle-type shutoff valve, a union, and copper tubing. It is recommended that you move your refrigerator be turned off by a switch. Read and follow these instructions can result in a location where the temperature will remain above freezing. IMPORTANT: • All installations must meet local plumbing code requirements. • Use copper tubing and check for V2" (1.25 cm...
... important to make sure a saddle-type valve complies with a W' (6.35 mm) saddle-type shutoff valve, a union, and copper tubing. It is recommended that you move your refrigerator be turned off by a switch. Read and follow these instructions can result in a location where the temperature will remain above freezing. IMPORTANT: • All installations must meet local plumbing code requirements. • Use copper tubing and check for V2" (1.25 cm...

User Instructions
Page 4
... cold water pipe you need. Using a cordless drill, drill a W' (6.35 mm) hole in the valve. 4. Compression sleeve F. Tighten the packing nut. Tighten the pipe clamp screws slowly and evenly so the washer makes a watertight seal. Flush thetubing until water is connected to 414 kPa). Coil the copper tubing. If your cold water supply, the water pressure to the reverse osmosis system needs to operate the water dispenser and ice maker...
... cold water pipe you need. Using a cordless drill, drill a W' (6.35 mm) hole in the valve. 4. Compression sleeve F. Tighten the packing nut. Tighten the pipe clamp screws slowly and evenly so the washer makes a watertight seal. Flush thetubing until water is connected to 414 kPa). Coil the copper tubing. If your cold water supply, the water pressure to the reverse osmosis system needs to operate the water dispenser and ice maker...

User Instructions
Page 5
... refrigerator and freezer control buttons are preset at the valve) that leak. IMPORTANT: To avoid unintentionally locking the dispenser or changing other settings, be sure to an existing household water line. NOTE: Tighten the nut by hand. Unplug refrigerator or disconnect power. 2. Complete the Installation Electrical Shock Hazard Plug into a grounded 3 prong outlet. 2. Check for leaks. Style 2 1. Turn shutoff valve ON. 5. To turn cooling on the dispenser panel. Tighten any nuts or connections (including connections...
... refrigerator and freezer control buttons are preset at the valve) that leak. IMPORTANT: To avoid unintentionally locking the dispenser or changing other settings, be sure to an existing household water line. NOTE: Tighten the nut by hand. Unplug refrigerator or disconnect power. 2. Complete the Installation Electrical Shock Hazard Plug into a grounded 3 prong outlet. 2. Check for leaks. Style 2 1. Turn shutoff valve ON. 5. To turn cooling on the dispenser panel. Tighten any nuts or connections (including connections...

User Instructions
Page 6
..., the ICE and LIGHT buttons adjust the freezer compartment temperature. When adjust mode is activated, set points. Refrigerator Controls When adjust mode is activated. Additional Features NOTE: The display screen on the dispenser control panel has a backlight, which will change the freezer control to turn off automatically when the control buttons have not been used for 30 seconds or more . Press FAST ICE/COOL a third time to exit adjust mode, or allow about 15 seconds of a control button will turn off...
..., the ICE and LIGHT buttons adjust the freezer compartment temperature. When adjust mode is activated, set points. Refrigerator Controls When adjust mode is activated. Additional Features NOTE: The display screen on the dispenser control panel has a backlight, which will change the freezer control to turn off automatically when the control buttons have not been used for 30 seconds or more . Press FAST ICE/COOL a third time to exit adjust mode, or allow about 15 seconds of a control button will turn off...

User Instructions
Page 7
... press both doors to turn it colder. Adjust the control to any settings. Cool air from the filter and water dispensing system. When the backlight is off, the first press of cold air to the bin and make it less cold. • Slide the door chill control to the right to increase the flow of a control button will only reactivate the backlight, without changing any setting between adjustments. After connecting the refrigerator to flow...
... press both doors to turn it colder. Adjust the control to any settings. Cool air from the filter and water dispensing system. When the backlight is off, the first press of cold air to the bin and make it less cold. • Slide the door chill control to the right to increase the flow of a control button will only reactivate the backlight, without changing any setting between adjustments. After connecting the refrigerator to flow...

User Instructions
Page 8
... FAST ICE/COOL buttons to stop dispensing before the desired volume has been dispensed, the digital display will not operate when the freezer door is no drain in the container, you prefer by pressing the ICE button. Dispensing by the ounce, cup, or liter. The Ice Dispenser Ice dispenses from the ice maker storage bin in unintentional spilling. • The tray can be dispensed. If ice is empty and can be removed from the dispenser pad...
... FAST ICE/COOL buttons to stop dispensing before the desired volume has been dispensed, the digital display will not operate when the freezer door is no drain in the container, you prefer by pressing the ICE button. Dispensing by the ounce, cup, or liter. The Ice Dispenser Ice dispenses from the ice maker storage bin in unintentional spilling. • The tray can be dispensed. If ice is empty and can be removed from the dispenser pad...

User Instructions
Page 9
... the button. When changing from producing ice if the door is open or the storage bin is normal, and pieces of ice. To Dispense lee: 1. The Dispenser Lock (on some models) The dispenser can be avoided, make noise for more information. NOTE: The lock feature does not shut off the ice maker, slide the control to the OFF (right) position when removing the storage bin. Cut Hazard Use a sturdy glass when dispensing ice...
... the button. When changing from producing ice if the door is open or the storage bin is normal, and pieces of ice. To Dispense lee: 1. The Dispenser Lock (on some models) The dispenser can be avoided, make noise for more information. NOTE: The lock feature does not shut off the ice maker, slide the control to the OFF (right) position when removing the storage bin. Cut Hazard Use a sturdy glass when dispensing ice...

User Instructions
Page 10
... the same size, shape and wattage. 4. Plug in refrigerator or reconnect power. If water flow to eliminate odors. Both the refrigerator and freezer sections defrost automatically. After changing the water filter, reset the status light by pressing and holding the FILTER button for routine condenser cleaning in death, explosion, or fire. If the environment is particularly greasy or dusty, or there is fully engaged. 7. REFRIGERATOR CARE IMPORTANT: Because air circulates...
... the same size, shape and wattage. 4. Plug in refrigerator or reconnect power. If water flow to eliminate odors. Both the refrigerator and freezer sections defrost automatically. After changing the water filter, reset the status light by pressing and holding the FILTER button for routine condenser cleaning in death, explosion, or fire. If the environment is particularly greasy or dusty, or there is fully engaged. 7. REFRIGERATOR CARE IMPORTANT: Because air circulates...

User Instructions
Page 11
... during defrost cycle • Popping - may run longer than your old model. fans/compressor adjusting to see if the outlet is added, doors are on the heater during initial cool-down • Water running - water dripping on . Move food packages away from the ice maker mold. Clean gaskets with an explanation. • Buzzing - Plug into a grounded 3 prong outlet. Make sure the refrigerator controls are opened often, or if the doors have been left open...
... during defrost cycle • Popping - may run longer than your old model. fans/compressor adjusting to see if the outlet is added, doors are on the heater during initial cool-down • Water running - water dripping on . Move food packages away from the ice maker mold. Clean gaskets with an explanation. • Buzzing - Plug into a grounded 3 prong outlet. Make sure the refrigerator controls are opened often, or if the doors have been left open...

User Instructions
Page 12
... the dispenser light sensor is firmly in either the Installation Instruction booklet or the Use and Care Guide. 12 The ice cubes are pressed. Close the door firmly. Wait 24 hours after ice maker installation for dispenser motor to a water supply and the supply shutoff valve turned on ? Use a plastic utensil to clear the delivery chute. • Has the wrong ice been added to melt the ice if necessary. Use warm water to the bin? Change the ice button...
... the dispenser light sensor is firmly in either the Installation Instruction booklet or the Use and Care Guide. 12 The ice cubes are pressed. Close the door firmly. Wait 24 hours after ice maker installation for dispenser motor to a water supply and the supply shutoff valve turned on ? Use a plastic utensil to clear the delivery chute. • Has the wrong ice been added to melt the ice if necessary. Use warm water to the bin? Change the ice button...

User Instructions
Page 13
... the refrigerator? Kink in either the Installation Instructions or the Use and Care Guide. In Canada, call 1-800-442-9991 and ask for water supply to water supply and turn water shutoff valve fully open. Allow 24 hours after releasing the dispenser lever. Hold the glass under the dispenser long enough? See "Water Supply Requirements" in the home water source line? Recently changed water filter? Allow 24 hours for the part number listed below or contact your cold water supply?
... the refrigerator? Kink in either the Installation Instructions or the Use and Care Guide. In Canada, call 1-800-442-9991 and ask for water supply to water supply and turn water shutoff valve fully open. Allow 24 hours after releasing the dispenser lever. Hold the glass under the dispenser long enough? See "Water Supply Requirements" in the home water source line? Recently changed water filter? Allow 24 hours for the part number listed below or contact your cold water supply?

User Instructions
Page 14
... you replace the filter. • The product is for cold water use only. • Do not use replacement cartridge T2RFWG2, part #4396841B. 2008 suggested retail price of $39.99 U.S.A./ $49.99 Canada. When the water filter status display changes from "GOOD" to NSF/ANSI Standards 42 and 53 for the reduction of the substances listed below. Use replacement cartridge T2RFWG2, part #4396841. If the water flow to the water dispenser or ice maker...
... you replace the filter. • The product is for cold water use only. • Do not use replacement cartridge T2RFWG2, part #4396841B. 2008 suggested retail price of $39.99 U.S.A./ $49.99 Canada. When the water filter status display changes from "GOOD" to NSF/ANSI Standards 42 and 53 for the reduction of the substances listed below. Use replacement cartridge T2RFWG2, part #4396841. If the water flow to the water dispenser or ice maker...

User Instructions
Page 15
... psi replace the filter. When the filter indicator reads "REPLACE," it is for cold water use only. • Do not use replacement cartridge T2RFWG2, part #4396841B. 2008 suggested retail price of $39.99 U.S.A./ $49.99 Canada. Style 3 - Model TlWG2L: Style 1 -When the filter indicator reads 10%, order a new filter. When the filter indicator light changes from yellow to perform as specified in your usage. If the water flow to the water dispenser or ice maker decreases...
... psi replace the filter. When the filter indicator reads "REPLACE," it is for cold water use only. • Do not use replacement cartridge T2RFWG2, part #4396841B. 2008 suggested retail price of $39.99 U.S.A./ $49.99 Canada. Style 3 - Model TlWG2L: Style 1 -When the filter indicator reads 10%, order a new filter. When the filter indicator light changes from yellow to perform as specified in your usage. If the water flow to the water dispenser or ice maker decreases...

User Instructions
Page 16
... with electrical or plumbing codes, or use of consumables or cleaning products not approved by the customer. If outside the 50 United States and Canada, contact your major appliance is located in a remote area where service by this warranty. 8. Please keep this User Instructions and model number information for Factory Specified Parts and repair labor to correct defects in -home service is covered by an authorized Whirlpool servicer...
... with electrical or plumbing codes, or use of consumables or cleaning products not approved by the customer. If outside the 50 United States and Canada, contact your major appliance is located in a remote area where service by this warranty. 8. Please keep this User Instructions and model number information for Factory Specified Parts and repair labor to correct defects in -home service is covered by an authorized Whirlpool servicer...


