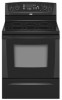
Use and Care Guide
Page 2
... 12-Hour Shut-Off ...14 Oven Temperature Control ...14 OVEN USE...15 Aluminum Foil...15 Positioning Racks and Bakeware ...15 Split Oven Rack...16 Bakeware...16 Meat Thermometer...16 Oven Vent...17 Baking and Roasting...17 Choice Bake® Function ...17 Broiling...18 Convection Cooking...19 Hold Warm Feature ...20 Timed Cooking ...21 Sequence Programming ...22 Warming Drawer ...23 RANGE CARE ...24 Self-Cleaning Cycle...24 General Cleaning...26 Oven Light ...28 Oven Door ...28 Storage Drawer ...28 Warming Drawer ...29 TROUBLESHOOTING ...30 ASSISTANCE OR SERVICE...31 WARRANTY ...32...
... 12-Hour Shut-Off ...14 Oven Temperature Control ...14 OVEN USE...15 Aluminum Foil...15 Positioning Racks and Bakeware ...15 Split Oven Rack...16 Bakeware...16 Meat Thermometer...16 Oven Vent...17 Baking and Roasting...17 Choice Bake® Function ...17 Broiling...18 Convection Cooking...19 Hold Warm Feature ...20 Timed Cooking ...21 Sequence Programming ...22 Warming Drawer ...23 RANGE CARE ...24 Self-Cleaning Cycle...24 General Cleaning...26 Oven Light ...28 Oven Door ...28 Storage Drawer ...28 Warming Drawer ...29 TROUBLESHOOTING ...30 ASSISTANCE OR SERVICE...31 WARRANTY ...32...
Use and Care Guide
Page 4
... the range unless specifically recommended in the manual. TO CHECK IF THE DEVICES ARE INSTALLED PROPERLY, SLIDE RANGE FORWARD, LOOK FOR ANTI-TIP BRACKET SECURELY ATTACHED TO FLOOR, AND SLIDE RANGE BACK SO REAR RANGE FOOT IS UNDER ANTI-TIP BRACKET. Be sure the range is essential for Warming or Heating the Room. Do not repair or replace any kind should be used to wipe spills on a hot cooking area, be worn while using the range...
... the range unless specifically recommended in the manual. TO CHECK IF THE DEVICES ARE INSTALLED PROPERLY, SLIDE RANGE FORWARD, LOOK FOR ANTI-TIP BRACKET SECURELY ATTACHED TO FLOOR, AND SLIDE RANGE BACK SO REAR RANGE FOOT IS UNDER ANTI-TIP BRACKET. Be sure the range is essential for Warming or Heating the Room. Do not repair or replace any kind should be used to wipe spills on a hot cooking area, be worn while using the range...
Use and Care Guide
Page 5
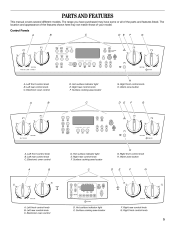
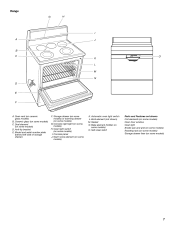
PARTS AND FEATURES This manual covers several different models. Surface cooking area locator G. Warm zone button A B C D E F G H A. Left front control knob B. Hot surface indicator light E. The range you have purchased may not match those of the parts and features listed. Electronic oven control D. Right front control knob H. Hot surface indicator light E. Warm zone button A B C D E F G A. Left rear control knob C. Control Panels A B C D E F G H A. Left front control knob B. The location and appearance of the features shown here may have some or ...
PARTS AND FEATURES This manual covers several different models. Surface cooking area locator G. Warm zone button A B C D E F G H A. Left front control knob B. Hot surface indicator light E. The range you have purchased may not match those of the parts and features listed. Electronic oven control D. Right front control knob H. Hot surface indicator light E. Warm zone button A B C D E F G A. Left rear control knob C. Control Panels A B C D E F G H A. Left front control knob B. The location and appearance of the features shown here may have some or ...
Use and Care Guide
Page 7
Oven light switch (on some models) O. Bake element (hidden on some models) H. Oven vent (on some models) G. Model and serial number plate (behind left side of storage drawer) F. Broil element (not shown) M. Ceramic glass (on some models) I A J B C K L M N D O E F A. Console night light (on some models) D. Self-clean latch Parts and Features not shown Coil elements (on some models) Oven door window Oven light Broiler pan and grid (on some models) Roasting rack (on some models) Storage drawer liner (on some models) C. Dual element (on some models) K. ...
Oven light switch (on some models) O. Bake element (hidden on some models) H. Oven vent (on some models) G. Model and serial number plate (behind left side of storage drawer) F. Broil element (not shown) M. Ceramic glass (on some models) I A J B C K L M N D O E F A. Console night light (on some models) D. Self-clean latch Parts and Features not shown Coil elements (on some models) Oven door window Oven light Broiler pan and grid (on some models) Roasting rack (on some models) Storage drawer liner (on some models) C. Dual element (on some models) K. ...
Use and Care Guide
Page 8
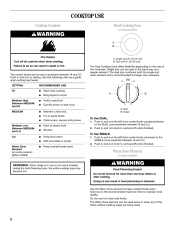
... food warm. Melt chocolate or butter. Dual B. Push in death or fire. WARNING Food Poisoning Hazard Do not let food sit for larger size cookware. Doing so can result in and turn knob to vertical (off all controls when done cooking. One hour is the recommended maximum time to heat cold foods. COOKTOP USE Cooktop Controls Dual Cooking Zone (on some models) WARNING A B Fire Hazard Turn off...
... food warm. Melt chocolate or butter. Dual B. Push in death or fire. WARNING Food Poisoning Hazard Do not let food sit for larger size cookware. Doing so can result in and turn knob to vertical (off all controls when done cooking. One hour is the recommended maximum time to heat cold foods. COOKTOP USE Cooktop Controls Dual Cooking Zone (on some models) WARNING A B Fire Hazard Turn off...
Use and Care Guide
Page 9
... on the console panel. s s s s Hot Surface Indicator Light On coil element and ceramic glass models, the hot surface indicator light is still warm. Do not leave a hot lid on . As the cooktop cools, air can cause pitting and permanent marks. Then, while wearing oven mitts, remove the spills while the surface is located on and off the cooktop before using them. If sugary spills are allowed to change color when surface cooking areas are clean and dry...
... on the console panel. s s s s Hot Surface Indicator Light On coil element and ceramic glass models, the hot surface indicator light is still warm. Do not leave a hot lid on . As the cooktop cools, air can cause pitting and permanent marks. Then, while wearing oven mitts, remove the spills while the surface is located on and off the cooktop before using them. If sugary spills are allowed to change color when surface cooking areas are clean and dry...
Use and Care Guide
Page 10
... element. Good for cleaning beneath. Cast iron s s s Ceramic or Ceramic glass s s s To Replace: 1. Copper Earthenware s s s Home Canning When canning for all types of medium-to unlock them. 2. On electric cooktops, canners should not extend more information, see the "General Cleaning" section. Do not place canner on a hot surface cooking area, element or surface burner. Cookware IMPORTANT: Do not leave empty cookware on 2 surface cooking areas, elements or surface burners at the same time...
... element. Good for cleaning beneath. Cast iron s s s Ceramic or Ceramic glass s s s To Replace: 1. Copper Earthenware s s s Home Canning When canning for all types of medium-to unlock them. 2. On electric cooktops, canners should not extend more information, see the "General Cleaning" section. Do not place canner on a hot surface cooking area, element or surface burner. Cookware IMPORTANT: Do not leave empty cookware on 2 surface cooking areas, elements or surface burners at the same time...
Use and Care Guide
Page 13
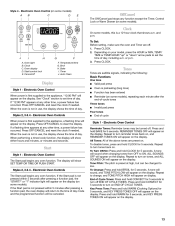
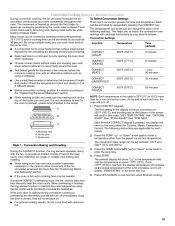
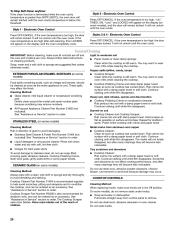
... hold BROIL for 5 seconds to set time of day mode and the programmed function will appear on some models). Key Press Tone: Press and hold CONVECT for 5 seconds. Electronic Oven Controls The Start pad begins any oven function. or "?" Depending on your model, press the HOUR or MIN, TEMP/ TIME or TEMP/HOUR "up" or "down" arrow pads to turn on the display. Clock C. Repeat to the appliance, a flashing time will...
... hold BROIL for 5 seconds to set time of day mode and the programmed function will appear on some models). Key Press Tone: Press and hold CONVECT for 5 seconds. Electronic Oven Controls The Start pad begins any oven function. or "?" Depending on your model, press the HOUR or MIN, TEMP/ TIME or TEMP/HOUR "up" or "down" arrow pads to turn on the display. Clock C. Repeat to the appliance, a flashing time will...
Use and Care Guide
Page 14
... hold TIMER SET for 5 seconds. Style 1 - Electronic Oven Controls To change , and "Snd HI" will appear on , and "rEP ON" or "ON" will sound; Timer The Timer can be turned off . The Timer does not start or stop the oven. The timer indicator light will sound every minute on some models, press and hold BROIL for 5 seconds. If no action is locked, only the CLOCK SET, OVEN LIGHT (on some models, to Basic Functions...
... hold TIMER SET for 5 seconds. Style 1 - Electronic Oven Controls To change , and "Snd HI" will appear on , and "rEP ON" or "ON" will sound; Timer The Timer can be turned off . The Timer does not start or stop the oven. The timer indicator light will sound every minute on some models, press and hold BROIL for 5 seconds. If no action is locked, only the CLOCK SET, OVEN LIGHT (on some models, to Basic Functions...
Use and Care Guide
Page 17
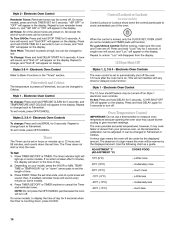
... the display (on some models) The ACCUBAKE® system electronically regulates the oven heat levels during a regular Bake cycle to the "Positioning Racks and Bakeware" section. A. Oven vent (ceramic glass model) A. Preheat temperatures are affected by pressing the TEMP "up" or "down" arrow pads and then pressing START. 3. Waiting an additional 10 minutes after the preheat conditioning time ends to set a temperature other items that could melt or burn near the oven vent. This feature...
... the display (on some models) The ACCUBAKE® system electronically regulates the oven heat levels during a regular Bake cycle to the "Positioning Racks and Bakeware" section. A. Oven vent (ceramic glass model) A. Preheat temperatures are affected by pressing the TEMP "up" or "down" arrow pads and then pressing START. 3. Waiting an additional 10 minutes after the preheat conditioning time ends to set a temperature other items that could melt or burn near the oven vent. This feature...
Use and Care Guide
Page 18
...-11 Before broiling, position rack according to cook food. Open door to purchase a broiler pan, one may need to be lined with foil. For diagram, see the "Positioning Racks and Bakeware" section. Times are numbered from the bottom (1) to order. Changing the temperature when Custom Broiling allows more difficult. Very thin cuts of meat, fish and poultry may not need to be ordered. After broiling, remove the pan from the broil element.
...-11 Before broiling, position rack according to cook food. Open door to purchase a broiler pan, one may need to be lined with foil. For diagram, see the "Positioning Racks and Bakeware" section. Times are numbered from the bottom (1) to order. Changing the temperature when Custom Broiling allows more difficult. Very thin cuts of meat, fish and poultry may not need to be ordered. After broiling, remove the pan from the broil element.
Use and Care Guide
Page 19
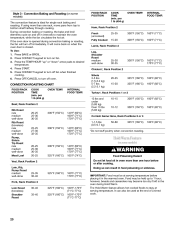
... of heated air around the food. During the CONVECT preheating cycle, the fan, and the bake and broil elements heat the oven cavity. Many foods can be set time, the oven will display "PREHEATING" in this order: "SET TEMP OR TIME" then "OR PUSH START" then "PUSH AGAIN" then "FOR NEXT." Roasting rack B. Press OFF/CANCEL to the "Positioning Racks and Bakeware" section. s For optimal cooking results, do not cover food with package instructions...
... of heated air around the food. During the CONVECT preheating cycle, the fan, and the bake and broil elements heat the oven cavity. Many foods can be set time, the oven will display "PREHEATING" in this order: "SET TEMP OR TIME" then "OR PUSH START" then "PUSH AGAIN" then "FOR NEXT." Roasting rack B. Press OFF/CANCEL to the "Positioning Racks and Bakeware" section. s For optimal cooking results, do not cover food with package instructions...
Use and Care Guide
Page 20
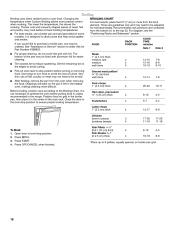
... food sit in the oven during convection baking or roasting, the fan will come back on some models) The convection feature is closed. If the oven door is opened during Hold Warm. Press BAKE or BROIL. 2. Press CONVECT keypad to stay at the end of a timed cook. 20 FOOD/RACK POSITION COOK TIME (min. however, breads and casseroles may be used at serving temperature. Ham, Rack Position 2 Fresh (uncooked) Fully Cooked 25-35 15...
... food sit in the oven during convection baking or roasting, the fan will come back on some models) The convection feature is closed. If the oven door is opened during Hold Warm. Press BAKE or BROIL. 2. Press CONVECT keypad to stay at the end of a timed cook. 20 FOOD/RACK POSITION COOK TIME (min. however, breads and casseroles may be used at serving temperature. Ham, Rack Position 2 Fresh (uncooked) Fully Cooked 25-35 15...
Use and Care Guide
Page 21
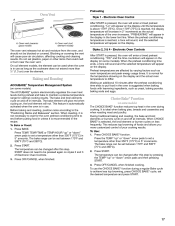
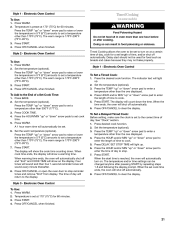
...°C). 3. See "Clock" section. 1. Press DELAY. Press the HOUR and/or MIN "up . 2. Electronic Oven Control To Use: 1. Electronic Oven Control To Set a Timed Cook: 1. The indicator text will shut off automatically. 6. Set the warm temperature (optional). The warm range is set cook time ends, the oven will light up " or "down " arrow pad to set a temperature other than the one hour before or after pressing START by repeating steps 1-6 and following the display prompt. The warm range is 170...
...°C). 3. See "Clock" section. 1. Press DELAY. Press the HOUR and/or MIN "up . 2. Electronic Oven Control To Use: 1. Electronic Oven Control To Set a Timed Cook: 1. The indicator text will shut off automatically. 6. Set the warm temperature (optional). The warm range is set cook time ends, the oven will light up " or "down " arrow pad to set a temperature other than the one hour before or after pressing START by repeating steps 1-6 and following the display prompt. The warm range is 170...
Use and Care Guide
Page 23
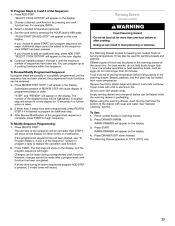
.... "PUSH START OR ADD STEP" will appear on the oven display. 5. "SELECT COOK OPTION" will appear on the display. 2. For smaller quantities or heat-sensitive foods, such as eggs, do not hold longer than 1 hour. STEP 1 will sound. 23 "STEP" and "REVIEW" will begin. Press DRAWER OFF when finished. For example, BROIL. 3. Set the cook time by pressing any time during a programmed cook function; Continue...
.... "PUSH START OR ADD STEP" will appear on the oven display. 5. "SELECT COOK OPTION" will appear on the display. 2. For smaller quantities or heat-sensitive foods, such as eggs, do not hold longer than 1 hour. STEP 1 will sound. 23 "STEP" and "REVIEW" will begin. Press DRAWER OFF when finished. For example, BROIL. 3. Set the cook time by pressing any time during a programmed cook function; Continue...
Use and Care Guide
Page 24
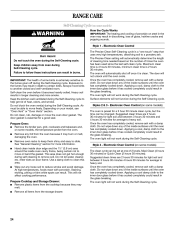
.... Electronic Oven Control (on some models) The clean cycle can be changed. Applying a cool, damp cloth to the inner door glass before it may result in death to the inner door glass before it is essential for more smoke. Prepare Oven: s Remove the broiler pan, grid, cookware and bakeware and, on some models, the temperature probe from oven during the Self-Cleaning cycle. Suggested clean times are 2 hours 30 minutes for light soil...
.... Electronic Oven Control (on some models) The clean cycle can be changed. Applying a cool, damp cloth to the inner door glass before it may result in death to the inner door glass before it is essential for more smoke. Prepare Oven: s Remove the broiler pan, grid, cookware and bakeware and, on some models, the temperature probe from oven during the Self-Cleaning cycle. Suggested clean times are 2 hours 30 minutes for light soil...
Use and Care Guide
Page 26
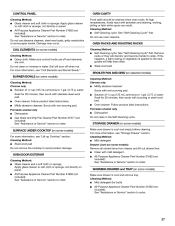
... oven door will become less noticeable. If the oven temperature is too high, "cln," TIMED, ON, "cool," and LOCKED will remain locked. Cooktop Polishing Creme and clean damp paper towel: Clean as soon as cooktop has cooled down . s s All-Purpose Appliance Cleaner Part Number 31662 (not included): See "Assistance or Service" section to order. Metal marks from control panel to wear oven mitts while cleaning the cooktop. Do not use...
... oven door will become less noticeable. If the oven temperature is too high, "cln," TIMED, ON, "cool," and LOCKED will remain locked. Cooktop Polishing Creme and clean damp paper towel: Clean as soon as cooktop has cooled down . s s All-Purpose Appliance Cleaner Part Number 31662 (not included): See "Assistance or Service" section to order. Metal marks from control panel to wear oven mitts while cleaning the cooktop. Do not use...
Use and Care Guide
Page 27
.... CONTROL PANEL Cleaning Method: s Glass cleaner and soft cloth or sponge: Apply glass cleaner to soft cloth or sponge, not directly on panel. At high temperatures, foods react with mild detergent. All-Purpose Appliance Cleaner Part Number 31662 (not included): See "Assistance or Service" section to order. 27 Remove racks or they will burn off and elements are off when hot. Steel-wool pad BROILER PAN AND...
.... CONTROL PANEL Cleaning Method: s Glass cleaner and soft cloth or sponge: Apply glass cleaner to soft cloth or sponge, not directly on panel. At high temperatures, foods react with mild detergent. All-Purpose Appliance Cleaner Part Number 31662 (not included): See "Assistance or Service" section to order. 27 Remove racks or they will burn off and elements are off when hot. Steel-wool pad BROILER PAN AND...
Use and Care Guide
Page 30
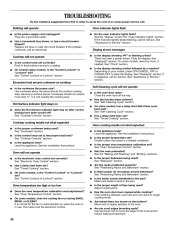
... cool the electronic control. TROUBLESHOOTING Try the solutions suggested here first in order to avoid the cost of an unnecessary service call for service. Plug into a grounded outlet. Replace the fuse or reset the circuit breaker. Push in knob before turning to cover the edge of time being used? On ceramic glass models, is level in use. See "Clock" section. Use cookware about the same size as the surface cooking area, element or surface burner. Has a delay start been set ? Hot Surface indicator light stays...
... cool the electronic control. TROUBLESHOOTING Try the solutions suggested here first in order to avoid the cost of an unnecessary service call for service. Plug into a grounded outlet. Replace the fuse or reset the circuit breaker. Push in knob before turning to cover the edge of time being used? On ceramic glass models, is level in use. See "Clock" section. Use cookware about the same size as the surface cooking area, element or surface burner. Has a delay start been set ? Hot Surface indicator light stays...
Use and Care Guide
Page 32
... published installation instructions. Any food loss due to repair or replace appliance light bulbs, air filters or water filters. DISCLAIMER OF IMPLIED WARRANTIES; If you ever need it is installed in an inaccessible location or is operated and maintained according to instructions attached to or furnished with the product, Whirlpool Corporation or Whirlpool Canada LP (hereafter "Whirlpool") will need service, first see the "Troubleshooting" section of the Use & Care Guide...
... published installation instructions. Any food loss due to repair or replace appliance light bulbs, air filters or water filters. DISCLAIMER OF IMPLIED WARRANTIES; If you ever need it is installed in an inaccessible location or is operated and maintained according to instructions attached to or furnished with the product, Whirlpool Corporation or Whirlpool Canada LP (hereafter "Whirlpool") will need service, first see the "Troubleshooting" section of the Use & Care Guide...


