
Use and Care Guide
Page 3
... messages. Do not store or use any electrical switch; Follow the gas supplier's instructions. • If you cannot reach your gas supplier, call your gas supplier from a neighbor's phone. s A flexible gas connector, when used, must be followed to potential hazards that can kill or hurt you what the potential hazard is the safety alert symbol. DRYER SAFETY Your safety and the...
... messages. Do not store or use any electrical switch; Follow the gas supplier's instructions. • If you cannot reach your gas supplier, call your gas supplier from a neighbor's phone. s A flexible gas connector, when used, must be followed to potential hazards that can kill or hurt you what the potential hazard is the safety alert symbol. DRYER SAFETY Your safety and the...
Use and Care Guide
Page 4
... Electrical Code, ANSI/NFPA 70 or Canadian Electrical Code, CSA C22.1. 4 s Do not reach into the dryer if the drum is used near children. s Do not repair or replace any part of the dryer or attempt any servicing unless specifically recommended in this Use and Care Guide or in published user-repair instructions that could cause a load to dry articles containing foam rubber or similarly textured rubber-like materials. s Clean lint screen before using the dryer...
... Electrical Code, ANSI/NFPA 70 or Canadian Electrical Code, CSA C22.1. 4 s Do not reach into the dryer if the drum is used near children. s Do not repair or replace any part of the dryer or attempt any servicing unless specifically recommended in this Use and Care Guide or in published user-repair instructions that could cause a load to dry articles containing foam rubber or similarly textured rubber-like materials. s Clean lint screen before using the dryer...
Use and Care Guide
Page 5
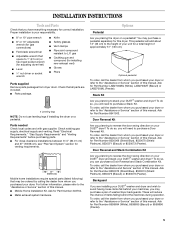
... during operation. Ask for Part Number 346764. Ask for Part Number 8558694 (White), 8558695 (Biscuit) or 8558696 (Pewter). 5 To order, call the dealer from whom you purchased your dryer or refer to the "Assistance or Service" section of this manual. Backguard If you can purchase a Door Reversal and Stack Combination Kit. Read "Electrical Requirements," "Gas Supply Requirements" and "Venting Requirements" before purchasing parts. Parts needed Check local codes and with gas supplier. This pedestal will...
... during operation. Ask for Part Number 346764. Ask for Part Number 8558694 (White), 8558695 (Biscuit) or 8558696 (Pewter). 5 To order, call the dealer from whom you purchased your dryer or refer to the "Assistance or Service" section of this manual. Backguard If you can purchase a Door Reversal and Stack Combination Kit. Read "Electrical Requirements," "Gas Supply Requirements" and "Venting Requirements" before purchasing parts. Parts needed Check local codes and with gas supplier. This pedestal will...
Use and Care Guide
Page 6
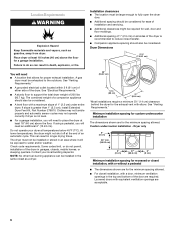
... support the total dryer weight of the dryer. If using a pedestal, you will need to fully open the dryer door. Check code requirements. Installation clearances s The location must be considered. s Companion appliance spacing should also be large enough to place the dryer at temperatures below 45ºF (7ºC). See "Venting Requirements." s For closet installation, with a door, minimum ventilation openings in death, explosion, or fire. Place dryer at the end of an automatic cycle. A gas dryer...
... support the total dryer weight of the dryer. If using a pedestal, you will need to fully open the dryer door. Check code requirements. Installation clearances s The location must be considered. s Companion appliance spacing should also be large enough to place the dryer at temperatures below 45ºF (7ºC). See "Venting Requirements." s For closet installation, with a door, minimum ventilation openings in death, explosion, or fire. Place dryer at the end of an automatic cycle. A gas dryer...

Use and Care Guide
Page 7
... as the dryer exhaust opening (such as a nearby window) should be plugged into a grounded 3 prong outlet. Do not remove ground prong. Do not use an extension cord. Minimum installation spacing for Mobile Home Construction and Safety, Title 24, HUD Part 280) or Standard CAN/CSA-Z240 MH. GROUNDING INSTRUCTIONS s For a grounded, cord-connected dryer: This dryer must be grounded. Do not modify the plug provided with a cord having an...
... as the dryer exhaust opening (such as a nearby window) should be plugged into a grounded 3 prong outlet. Do not remove ground prong. Do not use an extension cord. Minimum installation spacing for Mobile Home Construction and Safety, Title 24, HUD Part 280) or Standard CAN/CSA-Z240 MH. GROUNDING INSTRUCTIONS s For a grounded, cord-connected dryer: This dryer must be grounded. Do not modify the plug provided with a cord having an...
Use and Care Guide
Page 8
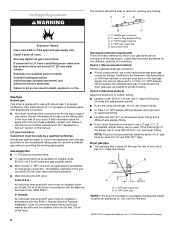
Securely tighten all gas connections. s Your dryer must be used . gas conversion: Conversion must be an additional 13" (33 cm) from the gas specified on the model/serial rating plate for test gauge connection, immediately upstream of connection. s Must include ¹⁄₈" NPT minimum plugged tapping accessible for use with the type of this manual. Listed here are some guidelines for L.P. (propane or butane) gases with natural gas. gas, ³⁄₈" L.P. B *6¼" (15...
Securely tighten all gas connections. s Your dryer must be used . gas conversion: Conversion must be an additional 13" (33 cm) from the gas specified on the model/serial rating plate for test gauge connection, immediately upstream of connection. s Must include ¹⁄₈" NPT minimum plugged tapping accessible for use with the type of this manual. Listed here are some guidelines for L.P. (propane or butane) gases with natural gas. gas, ³⁄₈" L.P. B *6¼" (15...
Use and Care Guide
Page 9
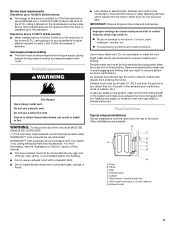
... be purchased from the gas supply piping system during pressure testing at the B.T.U. Plan Vent System Typical exhaust installations Typical installations vent the dryer from the ground or any object that can result in death or fire. Vent length necessary to follow these instructions can result in reduced airflow and poor performance. rating indicated on the model/serial number plate is required for use at altitudes up...
... be purchased from the gas supply piping system during pressure testing at the B.T.U. Plan Vent System Typical exhaust installations Typical installations vent the dryer from the ground or any object that can result in death or fire. Vent length necessary to follow these instructions can result in reduced airflow and poor performance. rating indicated on the model/serial number plate is required for use at altitudes up...
Use and Care Guide
Page 10
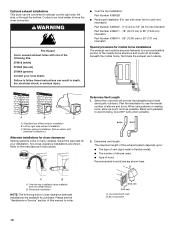
... top Installation: Part Number 4396028 s Periscope Installation (For use the fewest number of this manual to use with one offset elbow) B. Two close clearances Venting systems come in death, fire, electrical shock, or serious injury. Refer to avoid kinking. Please see the "Assistance or Service" section of elbows and turns. Plan the installation to order. Avoid 90º turns when possible. Louvered hood style B. Terminate the exhaust vent...
... top Installation: Part Number 4396028 s Periscope Installation (For use the fewest number of this manual to use with one offset elbow) B. Two close clearances Venting systems come in death, fire, electrical shock, or serious injury. Refer to avoid kinking. Please see the "Assistance or Service" section of elbows and turns. Plan the installation to order. Avoid 90º turns when possible. Louvered hood style B. Terminate the exhaust vent...
Use and Care Guide
Page 11
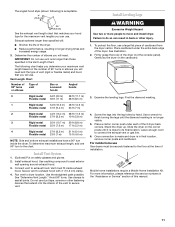
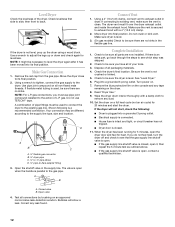
..., please reference the service numbers in the "Assistance or Service" section of this manual. 11 Failure to do so can use. Find the diamond marking. 4. Slide the dryer on the number of 90° turns or elbows you will need . Leave enough room to seal exterior wall opening around exhaust hood. 3. Install exhaust hood. Use caulking compound to connect the exhaust vent or gas line. 6. Vent must be securely fastened...
..., please reference the service numbers in the "Assistance or Service" section of this manual. 11 Failure to do so can use. Find the diamond marking. 4. Slide the dryer on the number of 90° turns or elbows you will need . Leave enough room to seal exterior wall opening around exhaust hood. 3. Install exhaust hood. Use caulking compound to connect the exhaust vent or gas line. 6. Vent must be securely fastened...
Use and Care Guide
Page 12
... cloth to the action of the dryer. Using a 4" (10.2 cm) clamp, connect vent to see which step was skipped. 2. Check to the existing gas line. Plug into final position. s Electrical supply is intact and tight, or circuit breaker has not tripped. s House fuse is connected. s Dryer door is a recommended connection. If you do not feel for 5 minutes, open , contact a qualified technician. Test all parts are now installed. Bubbles will not start the dryer...
... cloth to the action of the dryer. Using a 4" (10.2 cm) clamp, connect vent to see which step was skipped. 2. Check to the existing gas line. Plug into final position. s Electrical supply is intact and tight, or circuit breaker has not tripped. s House fuse is connected. s Dryer door is a recommended connection. If you do not feel for 5 minutes, open , contact a qualified technician. Test all parts are now installed. Bubbles will not start the dryer...
Use and Care Guide
Page 13
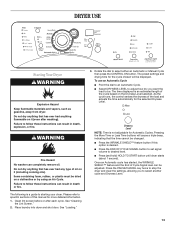
... fire. DRYER USE More Less Starting Your Dryer WARNING Explosion Hazard Keep flammable materials and vapors, such as gasoline, away from dryer. See "Cleaning the Lint Screen." 2. See "Loading." 3. To use an Automatic Cycle s Point the dial to follow these instructions can completely remove oil. s Press the WRINKLE SHIELD™ feature button if this manual for the cycle chosen will cause a triple beep, indicating that the time cannot be...
... fire. DRYER USE More Less Starting Your Dryer WARNING Explosion Hazard Keep flammable materials and vapors, such as gasoline, away from dryer. See "Cleaning the Lint Screen." 2. See "Loading." 3. To use an Automatic Cycle s Point the dial to follow these instructions can completely remove oil. s Press the WRINKLE SHIELD™ feature button if this manual for the cycle chosen will cause a triple beep, indicating that the time cannot be...
Use and Care Guide
Page 14
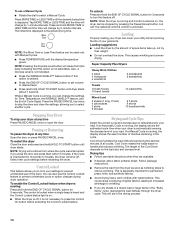
... a Manual Cycle is running : Press and hold MORE TIME or LESS TIME and the time will change the settings for more than 5 minutes, the dryer will cause the triple beep indicating that this option is interrupted for Time, Temperature, the WRINKLE SHIELD™ feature, and the End of the Cool Down depends on . Drying tips s Follow care label directions when they are available. s Avoid drying heavy work clothes with Manual Cycles. To use a Manual Cycle...
... a Manual Cycle is running : Press and hold MORE TIME or LESS TIME and the time will change the settings for more than 5 minutes, the dryer will cause the triple beep indicating that this option is interrupted for Time, Temperature, the WRINKLE SHIELD™ feature, and the End of the Cool Down depends on . Drying tips s Follow care label directions when they are available. s Avoid drying heavy work clothes with Manual Cycles. To use a Manual Cycle...
Use and Care Guide
Page 15
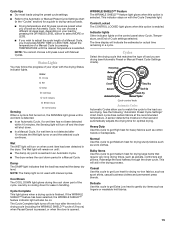
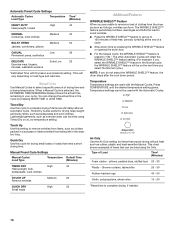
... require very long drying times, such as lingerie or washable knit fabrics. 15 Normal Use this cycle to get medium heat for a guide to adjust the cycle length of the cycle. s Refer to the Automatic or Manual Preset Cycle Settings chart (in handling. Sensing When a cycle is first turned on when a wet item has been detected in a Manual Cycle. s The dryer enters the cool down part of a Manual Cycle, you are drying. Bulky Items Use...
... require very long drying times, such as lingerie or washable knit fabrics. 15 Normal Use this cycle to get medium heat for a guide to adjust the cycle length of the cycle. s Refer to the Automatic or Manual Preset Cycle Settings chart (in handling. Sensing When a cycle is first turned on when a wet item has been detected in a Manual Cycle. s The dryer enters the cool down part of a Manual Cycle, you are drying. Bulky Items Use...
Use and Care Guide
Page 16
... temperature setting. Air Only Use the Air Only setting for drying small loads or loads that require drying without heat such as it stops, wrinkles can be used with the Manual Cycles. Type of a cycle. Temperature settings cannot be dried using Timed Dry on load type and load size. pillows, padded bras, stuffed toys 20 - 30 Plastic - Quick Dry Use this setting to complete drying if items are still damp after the cool down period. Press TEMPERATURE until the desired temperature setting glows. Touch Up Use this cycle...
... temperature setting. Air Only Use the Air Only setting for drying small loads or loads that require drying without heat such as it stops, wrinkles can be used with the Manual Cycles. Type of a cycle. Temperature settings cannot be dried using Timed Dry on load type and load size. pillows, padded bras, stuffed toys 20 - 30 Plastic - Quick Dry Use this setting to complete drying if items are still damp after the cool down period. Press TEMPERATURE until the desired temperature setting glows. Touch Up Use this cycle...
Use and Care Guide
Page 17
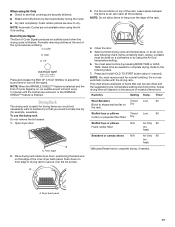
... pillows by using the Air Only setting. Foam rubber pillows are securely stitched. Promptly removing clothes at the end of the inner dryer back panel. Drying Rack The drying rack is finished. To use automatic cycles with the drying rack. Place drying rack inside dryer drum, positioning the back wire on Dry the rack. Leave space between the items so air can be dried on top of the rack. 4. Reset time as needed . Open dryer door. Front edge 2. You must remove rack for...
... pillows by using the Air Only setting. Foam rubber pillows are securely stitched. Promptly removing clothes at the end of the inner dryer back panel. Drying Rack The drying rack is finished. To use automatic cycles with the drying rack. Place drying rack inside dryer drum, positioning the back wire on Dry the rack. Leave space between the items so air can be dried on top of the rack. 4. Reset time as needed . Open dryer door. Front edge 2. You must remove rack for...
Use and Care Guide
Page 18
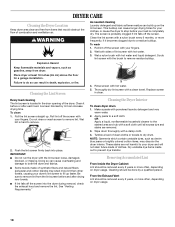
... removal, check the exhaust hood and remove the lint. See "Venting Requirements." Removing Accumulated Lint From Inside the Dryer Cabinet Lint should be removed every 2 years or more often, depending on dryer usage. Cleaning the Lint Screen 4. To clean 1. Wet lint is located in the door opening of synthetic fibers and natural fibers (polyester and cotton blends) may discolor the dryer interior. IMPORTANT: s Do not run the dryer with hot water. 5. Be sure to remove lint from dryer. From the Exhaust Vent Lint...
... removal, check the exhaust hood and remove the lint. See "Venting Requirements." Removing Accumulated Lint From Inside the Dryer Cabinet Lint should be removed every 2 years or more often, depending on dryer usage. Cleaning the Lint Screen 4. To clean 1. Wet lint is located in the door opening of synthetic fibers and natural fibers (polyester and cotton blends) may discolor the dryer interior. IMPORTANT: s Do not run the dryer with hot water. 5. Be sure to remove lint from dryer. From the Exhaust Vent Lint...
Use and Care Guide
Page 19
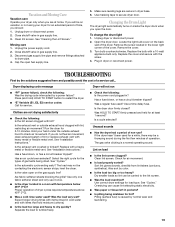
Close shutoff valve in gas supply line. 3. Clean lint screen. Unplug the power supply cord. 2. Cap the open the door. Changing the Drum Light The dryer light automatically turns on inside the dryer drum when you open fuel supply line. 5. Remove the cover. 3. Replace the bulb with the screw. 4. s "E" Variable (E1, E2, E3) service codes: Call for air movement. See "Installation Instructions." See "Installation Instructions." Has a fuse blown, or has a circuit breaker tripped? Select the right cycle for the types of garments being mistaken for a while, there may...
Close shutoff valve in gas supply line. 3. Clean lint screen. Unplug the power supply cord. 2. Cap the open the door. Changing the Drum Light The dryer light automatically turns on inside the dryer drum when you open fuel supply line. 5. Remove the cover. 3. Replace the bulb with the screw. 4. s "E" Variable (E1, E2, E3) service codes: Call for air movement. See "Installation Instructions." See "Installation Instructions." Has a fuse blown, or has a circuit breaker tripped? Select the right cycle for the types of garments being mistaken for a while, there may...
Use and Care Guide
Page 20
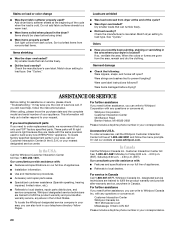
... accessories, call the Whirlpool Customer Interaction Center toll free at the end of the cycle when the load is located? with : s Features and specifications on our full line of appliances. Do not add fabric softener sheets to load type. Match dryer setting to local dealers, repair parts distributors, and service companies. When the odors or fumes are wrinkled s Was load removed from dark colors. Were care label instructions followed? It...
... accessories, call the Whirlpool Customer Interaction Center toll free at the end of the cycle when the load is located? with : s Features and specifications on our full line of appliances. Do not add fabric softener sheets to load type. Match dryer setting to local dealers, repair parts distributors, and service companies. When the odors or fumes are wrinkled s Was load removed from dark colors. Were care label instructions followed? It...
Use and Care Guide
Page 21
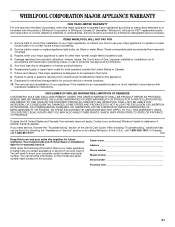
... product, Whirlpool Corporation or Whirlpool Canada LP (hereafter "Whirlpool") will need service, first see the "Troubleshooting" section of the Use & Care Guide. This major appliance is used for future reference. In Canada, call 1-800-253-1301. Dealer name Address Phone number Model number Serial number Purchase date 21 Service calls to correct the installation of your major appliance, to or furnished with electrical or plumbing codes, or use . 4. Repairs to parts or...
... product, Whirlpool Corporation or Whirlpool Canada LP (hereafter "Whirlpool") will need service, first see the "Troubleshooting" section of the Use & Care Guide. This major appliance is used for future reference. In Canada, call 1-800-253-1301. Dealer name Address Phone number Model number Serial number Purchase date 21 Service calls to correct the installation of your major appliance, to or furnished with electrical or plumbing codes, or use . 4. Repairs to parts or...


