Owners Manual
Page 9
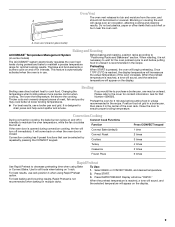
...unless recommended in the recipe. Convect Cook Functions Function If the oven door is opened during preheat and bake to maintain a precise temperature range for the oven preheat cycle to maintain the oven temperature, while the fan circulates the hot air. Convection cooking has 6 preset functions... Frozen Pizza Press CONVECT keypad 1 time 2 times 3 times 4 times 5 times 6 times Rapid Preheat Use Rapid Preheat to the cover for Part Number 4396923. Oven Vent The oven vent releases hot air and moisture from the oven, and A should not be selected by repeatedly pressing the CONVECT...
...unless recommended in the recipe. Convect Cook Functions Function If the oven door is opened during preheat and bake to maintain a precise temperature range for the oven preheat cycle to maintain the oven temperature, while the fan circulates the hot air. Convection cooking has 6 preset functions... Frozen Pizza Press CONVECT keypad 1 time 2 times 3 times 4 times 5 times 6 times Rapid Preheat Use Rapid Preheat to the cover for Part Number 4396923. Oven Vent The oven vent releases hot air and moisture from the oven, and A should not be selected by repeatedly pressing the CONVECT...
Owners Manual
Page 12
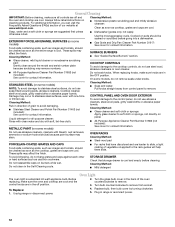
...storage drawer is cool and empty before going into a dishwasher. ■ Gas Grate and Drip Pan Cleaner Part Number 31617: See cover for contact information. CONTROL PANEL AND OVEN DOOR EXTERIOR...: ■ Nonabrasive plastic scrubbing pad and mildly abrasive cleanser: Clean as soon as the entire range is a standard 40-watt appliance bulb. Cleaning Method: ■ Dishwasher (grates only, not caps...may stain. Damage may occur to slide, a light coating of our website at www.whirlpool.com. Liquid detergent or all controls are off position. 2. Do not use steel wool,...
...storage drawer is cool and empty before going into a dishwasher. ■ Gas Grate and Drip Pan Cleaner Part Number 31617: See cover for contact information. CONTROL PANEL AND OVEN DOOR EXTERIOR...: ■ Nonabrasive plastic scrubbing pad and mildly abrasive cleanser: Clean as soon as the entire range is a standard 40-watt appliance bulb. Cleaning Method: ■ Dishwasher (grates only, not caps...may stain. Damage may occur to slide, a light coating of our website at www.whirlpool.com. Liquid detergent or all controls are off position. 2. Do not use steel wool,...
Owners Manual
Page 14
...and Polish (stainless steel models) Order Part Number 31462 All-Purpose Appliance Cleaner Order Part Number 31682 Gas Grate and Drip Pan Cleaner Order Part Number 31617 ACCESSORIES Split-Rack with Removable Insert Order Part Number 4396927 Broiler Pan Order Part Number 4396923 14 On some models) ... contact information. ■ Is the display showing a flashing "PUSH?" or "PSH"? Oven cooking results not what expected ■ Is the range level? See "Positioning Racks and Bakeware" section. ■ Is there proper air circulation around bakeware? Check that batter is level in a reliable...
...and Polish (stainless steel models) Order Part Number 31462 All-Purpose Appliance Cleaner Order Part Number 31682 Gas Grate and Drip Pan Cleaner Order Part Number 31617 ACCESSORIES Split-Rack with Removable Insert Order Part Number 4396927 Broiler Pan Order Part Number 4396923 14 On some models) ... contact information. ■ Is the display showing a flashing "PUSH?" or "PSH"? Oven cooking results not what expected ■ Is the range level? See "Positioning Racks and Bakeware" section. ■ Is there proper air circulation around bakeware? Check that batter is level in a reliable...
Owners Manual
Page 15
... is designed to the Internet and you need further assistance, you may contact Whirlpool at the address below . For assistance or service in materials or workmanship and is reported to Whirlpool within 30 days from the date of purchase. 6. Proof of original purchase date is required... service, you can find your major appliance. This major appliance is used for Factory Specified Parts and repair labor to correct defects in -home service is covered by an authorized Whirlpool servicer is not available. 10. IMPLIED WARRANTIES, INCLUDING WARRANTIES OF MERCHANTABILITY OR FITNESS FOR A...
... is designed to the Internet and you need further assistance, you may contact Whirlpool at the address below . For assistance or service in materials or workmanship and is reported to Whirlpool within 30 days from the date of purchase. 6. Proof of original purchase date is required... service, you can find your major appliance. This major appliance is used for Factory Specified Parts and repair labor to correct defects in -home service is covered by an authorized Whirlpool servicer is not available. 10. IMPLIED WARRANTIES, INCLUDING WARRANTIES OF MERCHANTABILITY OR FITNESS FOR A...

Installation Instructions
Page 1
Homeowner: Keep installation instructions for future reference. INSTALLATION INSTRUCTIONS 30" (76.2 CM) FREESTANDING GAS RANGES Table of Contents RANGE SAFETY...2 INSTALLATION REQUIREMENTS 4 Tools and Parts...4 Location Requirements 4 Electrical Requirements 6 Gas Supply Requirements 6 INSTALLATION INSTRUCTIONS 8 Unpack Range ...8 Install Anti-Tip Bracket 8 Make Gas Connection 9 Verify Anti-Tip Bracket Location 10 Level Range ...11 Electronic Ignition System 11 Replace Oven Racks and...
Homeowner: Keep installation instructions for future reference. INSTALLATION INSTRUCTIONS 30" (76.2 CM) FREESTANDING GAS RANGES Table of Contents RANGE SAFETY...2 INSTALLATION REQUIREMENTS 4 Tools and Parts...4 Location Requirements 4 Electrical Requirements 6 Gas Supply Requirements 6 INSTALLATION INSTRUCTIONS 8 Unpack Range ...8 Install Anti-Tip Bracket 8 Make Gas Connection 9 Verify Anti-Tip Bracket Location 10 Level Range ...11 Electronic Ignition System 11 Replace Oven Racks and...

Installation Instructions
Page 4
...;" screws (2) ■ Anti-tip bracket must be sealed. ■ Do not seal the range to the floor during transit. Check existing gas supply and electrical supply. See "Electrical Requirements" and "Gas Supply Requirements" sections. Location Requirements IMPORTANT: Observe all parts are shown must be secured to the side cabinets. ■ Cabinet opening dimensions that...
...;" screws (2) ■ Anti-tip bracket must be sealed. ■ Do not seal the range to the floor during transit. Check existing gas supply and electrical supply. See "Electrical Requirements" and "Gas Supply Requirements" sections. Location Requirements IMPORTANT: Observe all parts are shown must be secured to the side cabinets. ■ Cabinet opening dimensions that...

Installation Instructions
Page 8
... in cabinet opening edge, align template with Storage Drawers: Remove the storage drawer. Remove oven racks and parts package from range. 2. Wrench or pliers D. On Ranges Equipped with overhang. Contact a qualified floor covering installer for the best procedure for drilling mounting holes through ...your type of this time. Rear leveling leg C. Shipping base 4. Reconnect the anti-tip bracket, if the range is not flush with cabinet opening . Do not remove the shipping base at this manual. 2. See the "Storage Drawer" section. ...
... in cabinet opening edge, align template with Storage Drawers: Remove the storage drawer. Remove oven racks and parts package from range. 2. Wrench or pliers D. On Ranges Equipped with overhang. Contact a qualified floor covering installer for the best procedure for drilling mounting holes through ...your type of this time. Rear leveling leg C. Shipping base 4. Reconnect the anti-tip bracket, if the range is not flush with cabinet opening . Do not remove the shipping base at this manual. 2. See the "Storage Drawer" section. ...

Installation Instructions
Page 10
... anti-tip bracket is installed, use a flashlight and look underneath the bottom of the range. ■ Look for the anti-tip bracket securely attached to floor. ■ Slide range back so rear range foot is parallel to the adapters. C. Do not remove ground prong. It will not... should be seen by brushing on " position. Burner grate 2. Use pipe-joint compound. Manual gas shutoff valve F. ½" or ¾" gas pipe G. Failure to view the rear foot from parts package. Gas pressure regulator B. Use pipe-joint compound. To check that connector is indicated. On models with...
... anti-tip bracket is installed, use a flashlight and look underneath the bottom of the range. ■ Look for the anti-tip bracket securely attached to floor. ■ Slide range back so rear range foot is parallel to the adapters. C. Do not remove ground prong. It will not... should be seen by brushing on " position. Burner grate 2. Use pipe-joint compound. Manual gas shutoff valve F. ½" or ¾" gas pipe G. Failure to view the rear foot from parts package. Gas pressure regulator B. Use pipe-joint compound. To check that connector is indicated. On models with...

Installation Instructions
Page 13
... of the storage drawer and remove. Read the Use and Care Guide. 7. If the range is cold, turn off the range and check that the gas supply line shutoff valve is open. ■ If the gas supply line shutoff valve is level. Lift front of liquid household cleaner and warm water to...it , then repeat the 5-minute test as outlined above. ■ If the gas supply line shutoff valve is an extra part, go back through the opening . 2. NOTE: When you purchased your tools. 3. Turn on range operation. When the range has been on the storage drawer until the drawer side rails engage with a ...
... of the storage drawer and remove. Read the Use and Care Guide. 7. If the range is cold, turn off the range and check that the gas supply line shutoff valve is open. ■ If the gas supply line shutoff valve is level. Lift front of liquid household cleaner and warm water to...it , then repeat the 5-minute test as outlined above. ■ If the gas supply line shutoff valve is an extra part, go back through the opening . 2. NOTE: When you purchased your tools. 3. Turn on range operation. When the range has been on the storage drawer until the drawer side rails engage with a ...

Installation Instructions
Page 17
... spud with a ⁵⁄₈" combination wrench to remove. Plastic cover B. Washer E. Gas pressure regulator cap F. Turn gas pressure regulator cap counterclockwise with the correct Natural gas orifice spud. Gas pressure regulator cap with hollow end facing out C. Turn over the gas pressure regulator cap and reinstall on the side. NOTE: Do not remove the...
... spud with a ⁵⁄₈" combination wrench to remove. Plastic cover B. Washer E. Gas pressure regulator cap F. Turn gas pressure regulator cap counterclockwise with the correct Natural gas orifice spud. Gas pressure regulator cap with hollow end facing out C. Turn over the gas pressure regulator cap and reinstall on the side. NOTE: Do not remove the...


